
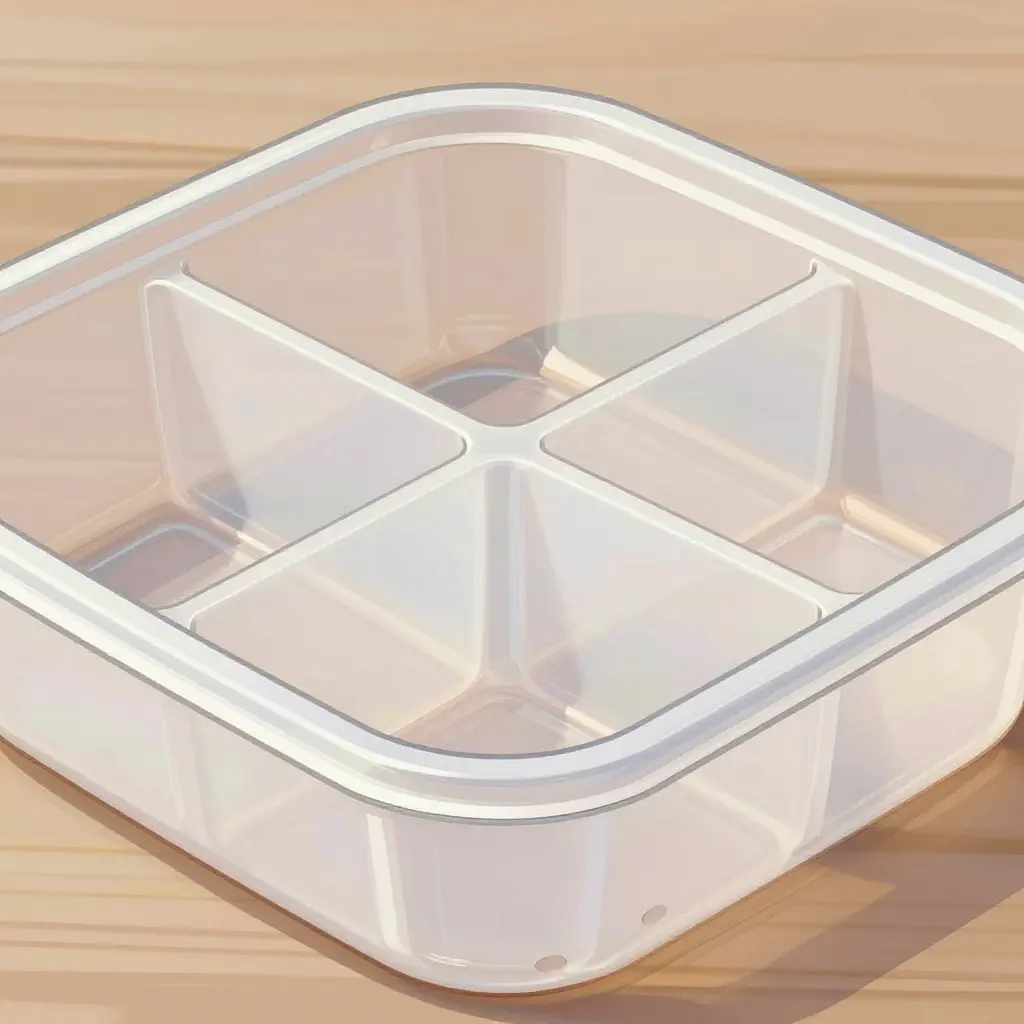
Compartmentalized Plastic Food Storage Containers Leaking Between Sections: Divider Wall Thickness vs Weld Seam Quality
Multi-compartment trays are harder to get right than single-well containers. Bento boxes, meal-prep kits and delivery combos all aim to do the same job: hold sauces, grains and proteins apart inside one unit that does not leak. Among bulk buyers, the complaint that comes back most often is not warping, discoloration or a loose lid. It is liquid crossing between sections. Once a divider separates two wells, a leak can mean cross-contamination, a dissatisfied customer, or a return.
The trouble is that a leak seldom traces back to one defect. It usually comes out of how two variables behave together: how thick the divider wall is, and how well the weld seam holds.
- Divider wall thickness – sets stiffness and how much the wall flexes. A thin divider bows under the weight of the fill and under heat, opening micro-gaps at the base. A very thick one builds up cooling stress and can distort along the bond line.
- Weld seam quality – determines how completely the divider fuses to the base or body. A weak, contaminated or under-energized seam fails even when the wall behind it is rigid.
Because the two pull against each other, judging a container by wall thickness alone, or by how the seam looks, makes for unreliable sourcing, especially when you compare across resin grades, mold designs and production runs. For background on how container formats and construction affect performance, our plastic food containers guide is a useful starting point.
The sections below cover how the two variables interact, where inter-compartment leaks actually start, and how procurement, quality control and product development teams can specify and test a container without relying on a thickness number or a visual seam check.
Divider Wall Thickness: Mechanical Role and Limits
The divider carries the tray’s structural load, and its thickness decides how the part behaves well before a leak shows up at the seam. It has to resist flexural deflection under load and survive repeated thermal cycling without fatigue-cracking at the joint where the compartments meet.
How thickness drives rigidity
Flexural stiffness scales roughly with the cube of wall thickness, so going from 0.6 mm to 0.8 mm raises rigidity by more than 100 percent – a change that looks small on a drawing. Thin dividers bow when the compartments are full, and every deflection cycle bends the root of the divider. Since the weld seam concentrates stress, a thin wall passes that bending straight into the junction instead of absorbing it, which is the usual start of a leak between compartments.
Why material choice changes the calculus
- PP (polypropylene): higher elongation and toughness, so it tolerates moderate deflection. It also shrinks more, which widens the cooling differential between a thick divider and thin outer walls.
- PET (polyethylene terephthalate): stiffer and more dimensionally stable, but more brittle – a thin divider cracks instead of yielding.
- Thermoforming wall thinning: material draws down from the sheet, so a divider can end up 30-50 percent thinner than nominal and quietly eat the safety margin.
- Cooling shrinkage differentials: uneven thickness cools at different rates, leaving the seam under residual stress as soon as the part leaves the mold.
Thicker is not automatically better
A heavier divider adds weight and freight cost, uses more resin per part, lengthens cooling time and cuts cycle count, and often leaves sink marks on the visible face. If cooling is not matched to the extra thickness, it can raise internal stress rather than lower it.
Thickness-driven failure modes
- Thin divider flexing until the seam fatigues and separates
- Stress concentration at the compartment junction causing micro-cracks
- Thermoforming over-thinning that voids the original design margin
- Shrinkage differentials warping the divider and opening the joint
- Sink marks signaling hidden internal stress
For more on wall geometry and material selection, see this guide to plastic food containers. The practical point: treat divider wall thickness as a measured, controlled dimension rather than a nominal one, and validate it together with the seam, because the wall and the weld hold or fail as a system.

The schematic isolates the feature that matters most: where the divider wall meets the base and side walls. The layered parallel lines show wall thickness; the hatched area marks the weld or heat-seal zone. When you evaluate a supplier’s sample, look at that junction first. A thin divider can seal cleanly and still fail under thermal cycling, and a thick one with an uneven seal bead leaks just as readily. How the two variables behave together is what decides whether bulk orders come back as leakage complaints.
Weld Seam Quality: The Critical Leak Path
The divider wall is only half of the story. The actual barrier is the weld seam, the heat-sealed interface that joins the divider to the base and rim. Whether adjacent compartments stay separated under pressure, temperature swings and repeated handling, or whether sauce migrates from one to the next, comes down to that seam. When buyers investigate leakage complaints, this is where most failures start.
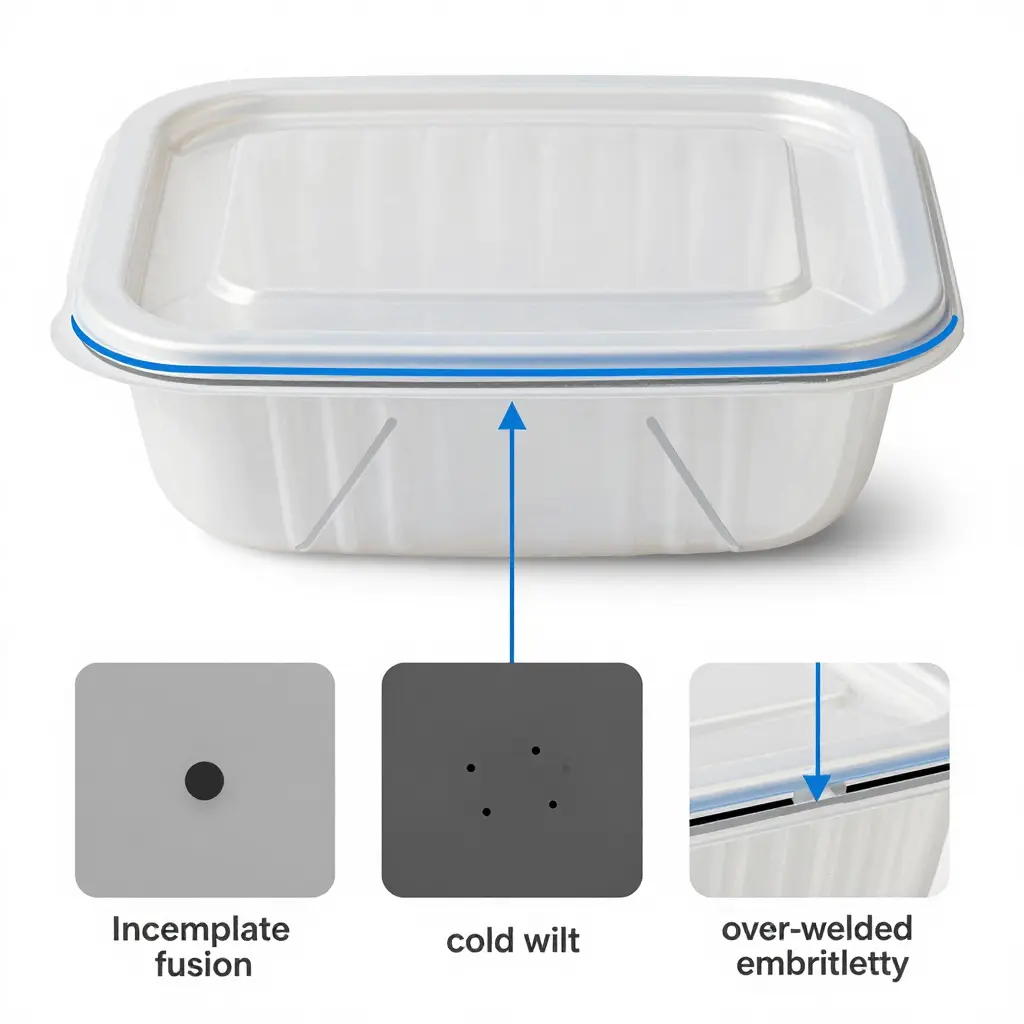
The Variables That Govern Seam Integrity
A reliable seal comes from a narrow process window set by four parameters that interact:
- Heat-seal temperature – too low gives a cold weld; too high degrades the polymer.
- Dwell time – too little contact time prevents molecular interdiffusion across the interface.
- Pressure – uneven or low clamping pressure leaves unmelted zones and micro-gaps.
- Contamination and polymer compatibility – mold release agents, oils or incompatible resin blends block bonding at the molecular level.
When these drift, they open paths for leaking between sections. Seal strength scales with real contact area and melt depth, so a seam that looks continuous can still be porous.
Common Seam Defects
Most field failures come from a handful of defects, each with its own cause:
- Incomplete fusion – localized regions never reached melt temperature, often because of uneven pressure or fast cycle times.
- Cold welds – polymer chains bonded weakly without full interdiffusion, so the seam peels under low load.
- Voids – trapped gas or moisture that vaporized during sealing and left internal cavities that open under flex.
- Over-welding and embrittlement – excess heat degrades the polymer and creates a stiff, crack-prone seam.
- Contamination – mold release residue or dried food film that stops direct polymer-to-polymer contact.
How Seam Quality Interacts With Divider Wall Thickness
You cannot tune the seam without looking at the wall. Heat and pressure have to cross the seal line, and they cross it evenly only if the wall geometry is even. Uneven thickness – common after aggressive weight reduction or inconsistent mold filling – leaves zones of different thermal mass that cool at different rates; the thick zone under-seals while the thin zone overheats, and the result is a seam that is both weak and brittle. A very thick divider does the opposite, blocking heat penetration and stretching dwell time and cycle cost. Thickness and seam settings need to be specified together. For more on container construction trade-offs, see these notes on evaluating plastic food storage containers. Treat the sealing window as a controlled specification and confirm it with pressure-hold and dye-penetration testing before you approve bulk production.
Table 1. Divider wall thickness versus weld seam quality benchmarked across key evaluation parameters for compartmentalized plastic food storage containers.
| Parameter | Divider Wall Thickness | Weld Seam Quality | Impact on Inter-Compartment Leakage |
|---|---|---|---|
| Primary function | Provides structural rigidity and resists flexing/bowing of the internal partition under load | Bonds the divider to the base and side walls, forming the actual fluid-tight barrier | Thickness limits flex-induced gap formation; seam quality sets the seal. Leakage typically needs a flexed wall plus a weak seam to occur |
| Key process variables | Mold steel wall thickness, resin flow length, cooling rate, masterbatch/PP vs HDPE grade | Melt temperature, weld/clamp pressure, cycle time, mold alignment, dwell time | Low melt temp and low pressure create cold welds; thin walls worsen it by flexing the joint apart |
| Failure mode | Warping or flexing away from the seam; sink marks and dimensional drift | Cold weld, incomplete fusion, internal void, contamination line, pin-hole | Flexure opens an already-marginal seam; a strong seam tolerates minor flex without weeping |
| Inspection method | Caliper or ultrasonic gauge, section weight, dimensional/drop check | Dye penetration, water/submersion leak test, pull or burst test, machine-vision inspection | Leak test validates the assembled pair; thickness measurement alone cannot certify sealing |
| Typical tolerance range | Roughly 0.6-1.2 mm for single-serve dividers; +/-0.1 mm control common | Zero pin-holes; bond strength and burst targets set to an internal spec | Tightening thickness without matching process control simply shifts failures to the seam |
| Cost driver | Resin volume per part, part weight, cycle time | Cycle time, mold maintenance, scrap rate, added QC labor | Over-thick walls raise material cost; weak seams raise return and warranty-claim cost |
| Effect of thermal cycling | Expands and contracts; may bow where thermal mismatch exists with the base | Repeated heat/cool cycles fatigue the weld and can micro-crack it | Combined cycling produces differential stress at the seam, making it the dominant long-term leak path |
For a wider specification reference, see our plastic food container guide.
The Engineering Trade-Off: Balancing Thickness and Seam Integrity
Two design variables dominate leakage between sections: divider wall thickness and weld seam quality. They are rarely independent. Change one and the other’s behavior shifts, which is why “thicker is better” and “stronger welds fix everything” are both incomplete.
Why thicker dividers resist deflection but complicate welding
A thicker divider raises the section’s second moment of inertia, so it resists flexural deflection under load, thermal stress and handling torque. Less deflection keeps the seal line seated and reduces leaking between sections. The penalty is thermal: the heavier wall acts as a heat sink and pulls energy out of the weld zone, which can leave incomplete fusion, cold welds or inconsistent melt. Clamping force also spreads differently across a stiffer, less compliant interface.
Why weld optimization alone is insufficient
Raising weld seam quality through temperature, dwell time and tooling geometry can close marginal gaps and hide early defects, but that is cosmetic if the wall still deflects. A flawless seam on an under-thick divider still fatigues and opens under repeated bending, so tuning the weld masks the deflection instead of fixing it.
Comparing the two levers directly
Thickness addresses stiffness, which is a design property; weld quality addresses joint integrity, which is a process property. Every extra fraction of a millimeter of wall demands tighter weld control to keep fusion depth, so the two trade off rather than add up.
| Design lever | Property addressed | Primary benefit | Main risk |
|---|---|---|---|
| Divider wall thickness | Structural stiffness (design) | Less flexural deflection, better seal seating | Heat-sink effect, weaker fusion |
| Weld seam quality | Joint integrity (process) | Stronger, void-free seals | Can mask underlying deflection |
Where the optimal design window sits
The optimum is not one number; it is a range set by end use. Containers that go through thermal cycling want moderate thickness and conservative weld parameters to avoid stress-driven cracking. Transport-heavy supply chains care more about deflection resistance, which favors stiffer dividers. High-moisture foods put seal reliability first, because capillary action will follow any micro-gap. Material compounds all of it – PP and copolymers weld differently from PS – so the window moves with the resin. See our companion plastic food containers guide for how these variables map to real specifications.
Material and Manufacturing Reasoning Behind Section Leakage
Section leakage is rarely one variable’s fault. It shows up where polymer chemistry, processing and tooling precision meet at the thinnest, most stressed point of the container, the compartment interface. For buyers comparing supplier specs, understanding that interplay is the difference between a dependable line item and a recurring returns problem.
Polymer Choice Sets the Boundary Conditions
The base resin sets how thin the divider wall can get before sealing integrity and structural strength diverge.
| Polymer | Typical Shrinkage | Weld Seam Quality | Heat Resistance | Relative Cost |
|---|---|---|---|---|
| PP (Polypropylene) | 1.5-2.0% | Excellent | High | Low-Medium |
| PET | 0.2-2.0% (process dependent) | Moderate | Medium | Medium |
| PS (Polystyrene) | 0.4-0.7% | Poor | Low | Low |
| PLA | 0.3-0.5% | Poor-Moderate | Low | High |
Semi-crystalline PP stays the default for multi-compartment formats because its broad melting range forgives small temperature drift during sealing. Amorphous PS and PET bond cleanly only inside narrow process windows, and PLA’s moisture sensitivity and low thermal stability make consistent weld seam quality hard to hold at production speed.
Processing Route Reshapes the Geometry
Thermoforming draws a heated sheet over a mold, and the material thins sharply at corners and divider junctions, often down to 40-60% of the original gauge. Those zones fail first under flex and thermal cycling. Injection molding gives more uniform walls and tighter dimensions, but it creates weld lines where opposing melt fronts meet. Knit lines are weaker than the surrounding material and turn into leak paths when fill parameters are off.
Shrinkage, Cooling, and Mold Design
Every polymer shrinks as it cools, and different shrinkage rates between a thick base and thin dividers can warp the sealing plane. Uneven cooling makes it worse, pulling the interface out of flat and opening micro-gaps. Mold design has to balance gate location, cooling-channel layout and draft angles against the target divider wall thickness. Tooling tolerance matters just as much: a mismatch of a few hundredths of a millimeter between cavity halves can stop the divider from seating fully, and the seam passes a visual check but fails a water test.
From Engineering to Procurement
These variables turn into commercial trade-offs. A heavier divider wall improves durability and lowers returns and complaints, but it costs more resin per unit and more cycle time. Specifying PP with generous wall sections may cost more up front and reduce warranty exposure; a thin-walled PS build wins on price and loses on leakage claims. Buyers should ask for wall-thickness ranges, weld-line locations and shrinkage data, then compare them against their own failure thresholds. For background on evaluating these specifications, see our plastic food container buying guide. In the end, durability, cost per unit and returns are decided by treating the divider and its seam as one engineered system rather than two line items.
Frequently Asked Questions
Is a thicker divider wall always better for preventing leaks?
No. A thicker wall increases stiffness and resists flexing under load, but leaks usually start at the joint where the wall meets the base or rim, not through the wall. Past a certain point, extra thickness only adds cooling time, warping risk and material cost without improving seal integrity. The best thickness is the minimum that resists deflection while still allowing a clean, fully bonded weld.
What causes leakage between sections even when the walls look thick?
Most inter-compartment leaks trace back to weld seam quality, not wall dimensions. Incomplete bonding, trapped gas, contaminated resin or too little melt temperature at the weld line creates micro-channels that let liquid migrate between sections. A thick wall can hide a weak or porous seam, which is why dimensional inspection alone cannot tell you whether a part will leak.
How can weld seam quality be verified before bulk ordering?
Ask for pre-production samples and run dye-penetration or pressure-decay testing, which expose voids along the seam. Cross-section microscopy with peel or shear tests measures bond strength and shows incomplete fusion. Have suppliers document their weld process parameters and tolerances as part of a thorough plastic food container guide.
Does material choice affect divider and seam performance?
Yes. Polypropylene welds well and stays tough, while materials with high filler content can resist bonding and crack along the seam. Additives, regrind ratio and moisture content also affect how reliably the divider fuses to the base, so material choice shapes both the divider thickness you need and the weld seam quality you get.
Will thermal cycling worsen inter-compartment leakage over time?
It can. Repeated heating and cooling expands and contracts the plastic, stressing the seam and widening any micro-voids that are already there. Over many cycles, different shrinkage rates between the container and its lid can speed up seepage. A material with a matched thermal expansion profile and a robust weld slows that down.
Conclusion: Specifying for Leak-Proof Compartments
The engineering conclusion is straightforward: leakage is not set by divider wall thickness or weld seam quality on its own, but by how they interact. A thicker divider stiffens the partition and resists flexing, but if the seam at its base is under-consolidated, that rigidity just moves stress into a weak joint. A perfect seam cannot make up for a wall so thin that it deforms and opens a gap during thermal cycling. Leaking between sections is a property of the system, not of one component.
Practical Guidance for B2B Procurement and QC
Three things turn this into an enforceable contract:
- Define both variables in the specification. State a minimum divider wall thickness with tolerance and a quantifiable weld seam criterion (for example, seam width and continuity), rather than naming either alone.
- Require documented process parameters. Ask suppliers for molding and welding settings – melt temperature, pressure, dwell time – so that acceptable parts come from controlled, repeatable production rather than post-hoc inspection.
- Validate through leak and thermal cycling tests. Pair pressure or dye-penetration leak testing with repeated hot-to-cold cycling to confirm the wall-seam interface holds under realistic use conditions.
Suppliers who can show that documentation tend to be more reliable for bulk sourcing. A general plastic food containers guide can help teams set baseline expectations before writing specifications, and it helps to benchmark against well-regarded best-rated plastic food storage containers to see what proven market performance looks like.
When a specification treats divider thickness and weld seam quality as one integrated requirement, backed by process data and physical testing, returns go down, brand reputation holds up, and sourcing teams have a defensible basis for qualifying a supplier.