
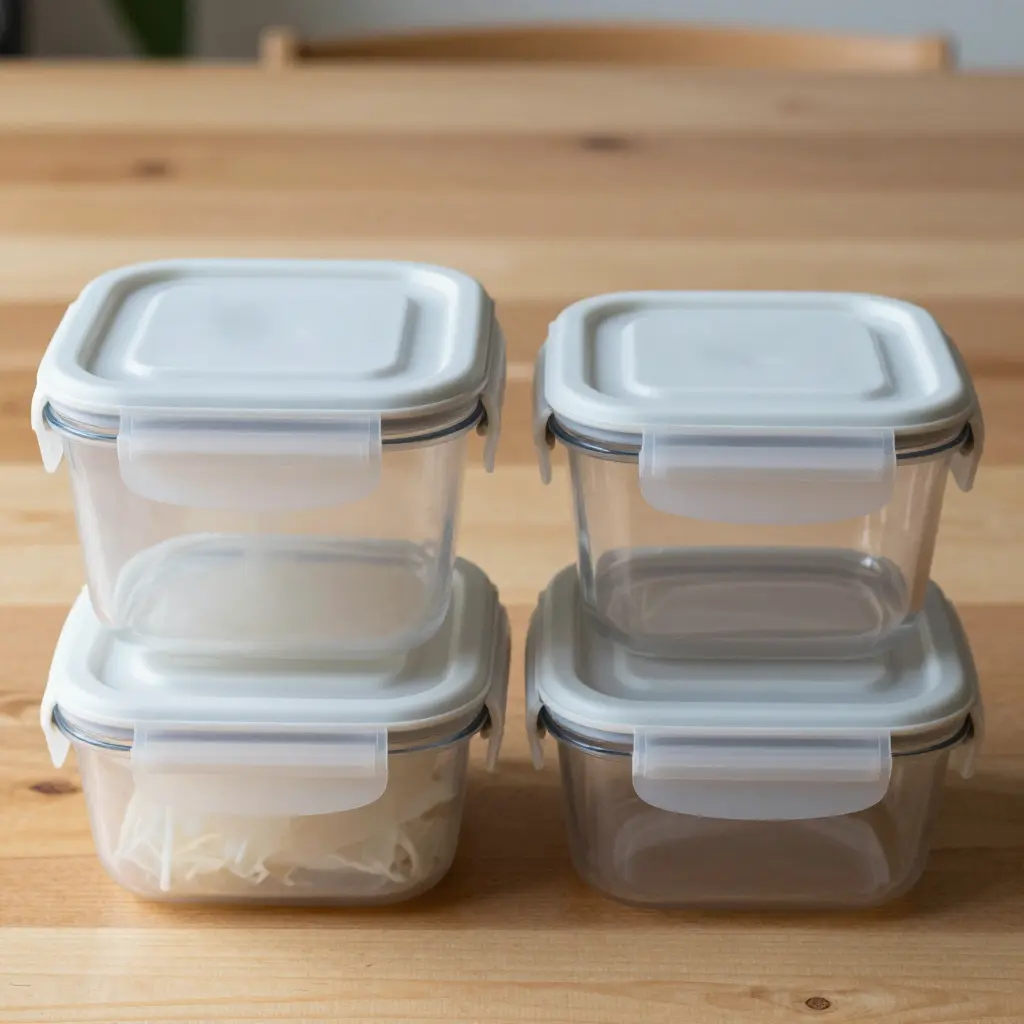
Buy meal prep food storage containers with lids in volume and the smallest item on the order decides how the kitchen runs: the lid. Catalogs list sealed and vented versions side by side, both marked microwave-ready. Bubble tea shops, restaurants, food trucks, caterers and corporate procurement teams buy on that basis, then find out during a lunch rush that the two behave nothing alike once steam is involved.
Those differences show up as cost. A lid that traps pressure lifts, pops or sprays, and someone has to wipe the bag, remake the portion and hold up the queue. A lid that vents too freely leaves rice, noodles and sauces dry at the edges or unevenly hot, so the portion comes back for rework and the same tray gets handled twice. Repeated across a lunch rush, the lid is worth testing before you commit to a pallet. Teams standardizing on sugarcane food containers meet the same trade-off, because fibre and compostable formats vent by the same logic.
The rest of this piece covers how each design handles steam, leakage and texture, and how to pick a lid per dish instead of per kitchen.
What a lid is actually doing during microwave reheating
During reheating a lid stops being a dust cover and joins a small pressure system. How it handles steam decides whether the food comes out moist, dry, or over the rim.
Where the pressure comes from
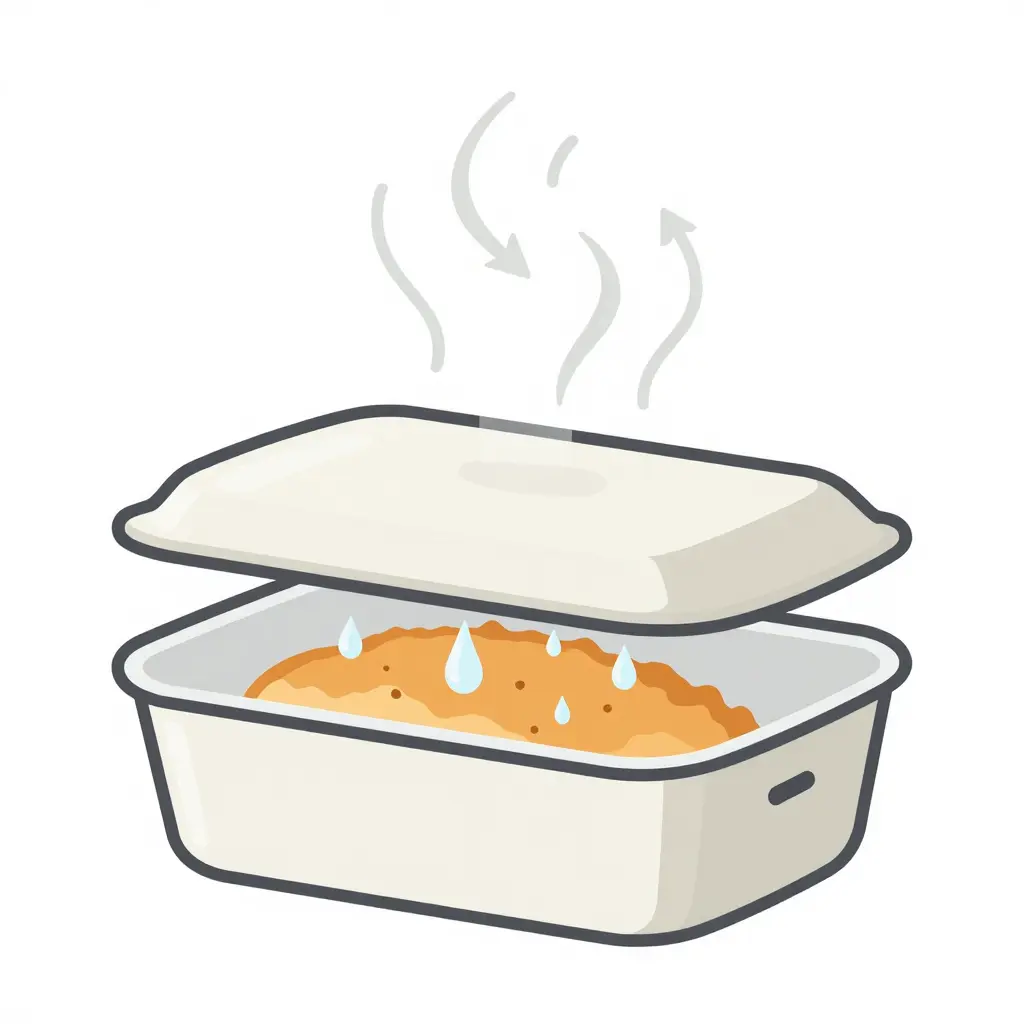
Microwaves heat the water inside the food, not the air around it. Water turned to vapour takes up roughly 1,600 times its liquid volume, so a modest amount of moisture fills the headspace above the food fast. In a sealed lid that vapour has nowhere to go. Molecules accumulate, collisions with the lid and walls increase, and internal pressure climbs above room pressure. A hotter vapour pushes harder on the same walls.
Condensation and the drip-back loop
The lid surface runs cooler than the saturated air beneath it. Vapour reaching that surface gives up latent heat and condenses, so droplets nucleate, merge into larger beads and run to the lowest point, where gravity returns them to the food. That condensation drip-back does useful work: it re-wets the surface, slows moisture loss, and keeps rice, noodles and sauces loose instead of drying at the edges.
What a vented lid changes
A vented lid carries a small opening or a one-way valve that opens once internal pressure passes a set threshold. Excess vapour leaves in a controlled stream instead of straining the closure, while most of the ambient moisture in the headspace stays where it is. The container ends up humid rather than pressurised, and there is far less chance of a sudden release when someone peels the lid back.
Mechanical consequences for the container
- Lid lift. Rising pressure pushes upward on the panel; thin or flexible lids dome and can disengage from the rim.
- Seal stress. The sealing lip, gasket or latch tabs stay loaded while hot, and repeated heating cycles accelerate creep and permanent set.
- Rim distortion. Heat softens the rim at the moment pressure is highest, so rims can ovalise or ripple and then fail to seat on the next closure.
- Lateral leakage when tilted. Liquid behaves differently from vapour. Tilt the container and liquid pools against the seal, where hydrostatic head pushes it through gaps that gas passes easily. This is why carried meals leak even when the lid looked secure.
Whatever you choose, check the closure against the heat the dish will reach. Ask for microwave-safe food containers with matching lidding options for takeaway packaging so lid and body are rated for the same temperature.
Neither design wins everywhere. The dish and the workflow decide, and the table below puts the trade-offs side by side.
Sealed vs Vented Lid Design: Side-by-Side Comparison
| Attribute | Sealed Lid | Vented Lid | Best For |
|---|---|---|---|
| Steam release control | Closed system, minimal release | Fixed or adjustable vents | Vented – high-moisture dishes that reheat in the pack |
| Leak resistance in transit | High, snap-tight rim lock | Moderate, vent path is a weak point | Sealed – delivery and catering runs |
| Condensation build-up | Heavy droplets on the underside | Noticeably less pooling | Vented – microwave reheating |
| Pressure and lid-lift risk | Higher if overheated | Low, steam escapes steadily | Vented – microwave-safe prep |
| Texture retention for wet dishes | Moisture stays in; surface can turn waterlogged | Less pooling; sauce skins over on long reheats | Sealed when drying out is the complaint, vented when sogginess is |
| Texture retention for fried or dry dishes | Crust softens quickly | Crispness holds longer | Vented – fried chicken, pastries, rice |
| Reheat speed | Faster heat build-up | Slightly slower but more even | Sealed – quick turnarounds |
| Odour containment | Strong, aroma stays locked in | Aroma escapes through vents | Sealed – spicy or pungent menus |
| Compatibility with paper, kraft and sugarcane bodies | Fits matching sealed rims | Fits vent-ready rims | Both – confirm rim fit per body |
| Suitability for delivery versus dine-in prep | Delivery and transport | Dine-in service and reheat | Sealed for delivery, vented for reheating |
Legend: Sealed = tight-fit lid for transport; Vented = steam-relief lid for reheating. Match either option to your container body by browsing our full paper lid range.
Five Signs Your Current Lid Choice Is Working Against You
Lid problems rarely arrive labelled as lid problems. They surface as remakes, refunds and a pass that keeps falling behind. These five come up most from operators and procurement teams.
- Sauce pooling in delivery bags. A lid that does not seat flush against the rim leaves gravity to finish the job, and one 500 ml sauce portion leaking into a bag will soak the orders stacked around it. Log leak incidents per 100 orders: if the number is climbing, lid-to-rim fit is the first variable to check.
- Lid lift or popping under steam. A lid that domes or clicks loose within ten minutes of packing is telling you venting and wall rigidity do not match a hot, high-moisture menu. Those containers reach the customer looking tampered with, which adds a tamper complaint to the temperature complaint.
- Condensation sogginess on coated or fried items. An unvented lid holds steam against breaded and coated surfaces, and a 20 to 25 minute delivery window is usually enough to soften a crust that was crisp at packing. Reviewing vented and sealed paper lid options against the menu mix is a shorter path to a fix than swapping base containers.
- Staff wiping rims and re-lidding. Ten to fifteen seconds per order comes to 30 to 50 minutes of labour across 200 covers, and it lands at the moment the pass is busiest. Nobody budgets for that line.
- Complaints about reheating rather than about the food. Dry edges, soggy bases, a lid that warps in the microwave: the feedback is about the closure, not the recipe. It tends to arrive on review platforms rather than in your ticket system, where it erodes repeat orders for food packaging containers that were never the problem.
Three or more of these in the same month is reason enough to review the lid specification before the next volume order rather than after it.
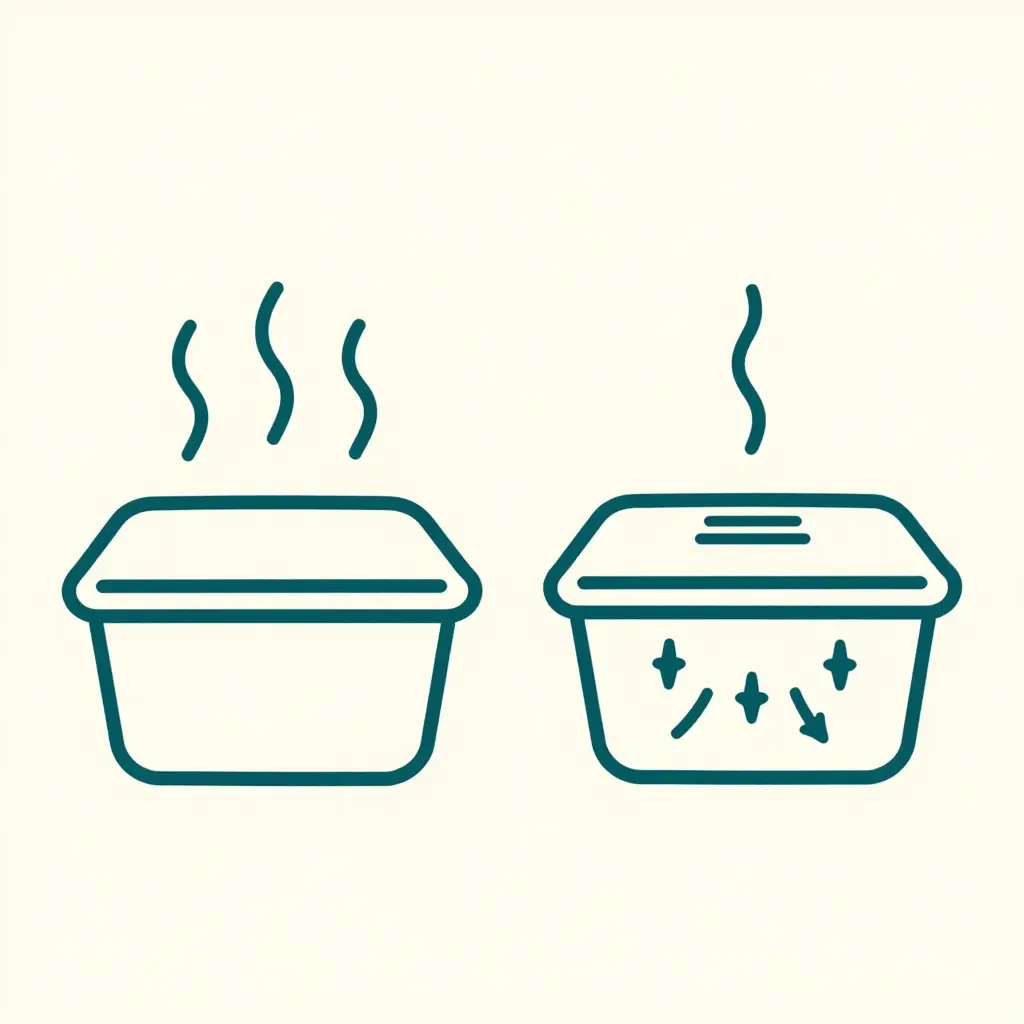
Left: a sealed lid traps steam that condenses and drips back onto the food. Right: a vented lid releases pressure through a small channel and keeps a working level of humidity behind.
When a Sealed Lid Is the Right Answer
Sealed lids do work a vented lid cannot, but only for certain jobs. A container that has to travel, sit closed in a shared fridge, or hold heat for a short unsupervised window needs a closure that stays shut. A container that goes from prep bench to microwave is usually better off vented. The question worth asking is which of those two jobs a given pack is doing.
Transport: leak resistance and tamper evidence
Sealed designs lock onto the rim with a snap or a thread, so the closure stays put when a full container tips or stacks in a delivery bag. Leak resistance here is a property of the system, not of the lid alone: the body has to be filled below the rim line and the lid seated the whole way round, because a partly engaged edge leaks at the first tilt. That is why leak-proof food containers are specified by fill height as much as by lid geometry. The same rim engagement gives visible tamper evidence, which matters for catering drops, pantry deliveries and any shared setup where containers change hands.
Heat retention and odour control in shared refrigeration
Over short holds, roughly 20 to 45 minutes between packing and service, a sealed closure keeps steam in the headspace and slows heat loss more than an open or vented top. In a shared refrigerator it also limits odour transfer in both directions: strong aromas stay with their own container and neighbouring shelves pick up less. Both benefits depend on the lid going on before the food cools and on not overfilling, since a fill above the line breaks the seal.
Dish profiles that benefit most
High-liquid stews, soups, sauce-heavy noodle dishes and marinated items are the clearest fit, because a tipped container becomes a spill rather than an inconvenience, and free surface liquid speeds up both heat loss and aroma spread. Body rigidity matters as much as the lid: sugarcane food containers keep their wall shape under a full liquid load and mate cleanly with sealing closures, though a long hot hold will still soften fibre, so test the dish you actually sell. A dense paper bowl suits noodles and grain bases with less free liquid. Marinated items are the quieter case: sealing keeps marinade against the product instead of pooling in the bag.
The trade-offs you have to plan for
A sealed lid traps pressure as the contents heat, so in the microwave you either plan a partial peel-back, one corner lifted with the rest engaged, or you buy a lid with a built-in pressure-relief vent. Neither step is optional. A fully sealed container under heat will release somewhere, and rarely where you want it. Dense sauces heat unevenly and need a longer venting window than thin liquids: short bursts, stir, re-cover for the remainder. For meal prep food storage containers with lids that move from fridge to transport to reheat, the workable arrangement is a sealing lid for the cold and travel legs and a deliberate peel-back for the hot one.
When a Vented Lid Wins
Vented lids are not the compromise option. They solve a different problem: letting a measured amount of vapour leave so the food finishes reheating in its own humid micro-climate.
The balancing act: steam out, moisture in
Every reheated meal releases water vapour. Sealed in, that vapour condenses on the lid underside and drips back onto the food. A steam release path changes the balance: pressure escapes gradually, the vapour load in the headspace drops, and much less condensation forms on the lid. What is left is humid enough to stop lean proteins and grains drying out, without water pooling at the base of the tray.
Protecting the crunch: fried, breaded, bakery and grain-based items
Crispness is where the difference is easiest to see.
- Fried and breaded items – a crisp coating is a moisture barrier running in reverse. Trapped steam softens starch and gelatinises the crumb within minutes; a vent lets that vapour leave first.
- Bakery items – pastries, buns and flatbreads keep a dry surface instead of developing that damp, chewy skin.
- Grain-based dishes – rice, noodles, couscous and quinoa take up any free water they find and turn clumpy. Venting removes the excess before it is reabsorbed.
Rule of thumb: if the item is sold on texture contrast, venting protects it better than a tight seal.
Less lid lift, less rim distortion
Heat a sealed container and the trapped vapour expands. The lid domes, the rim distorts, and at worst the lid pops off mid-cycle or never sits flat again. Venting relieves that pressure differential, so the lid stays seated, the rim keeps its shape and the stack survives the trip home. Our vented paper lid options are made for that behaviour.
Vent configurations buyers actually encounter
| Configuration | Typical use | Behaviour |
|---|---|---|
| Small pin vents | Single portions, small sides | Minimal vapour loss, gentle release |
| Slit vents | Rice, noodles, grain bowls | Narrow slits vent steam while resisting sauce splash |
| Steam-release tabs | Larger portions, fried chicken, family meals | Peel-back tab for a fast, high-volume release |
Vent area should scale with the load. A small pin vent suits a modest side dish; a generous high-moisture portion needs more open area or a tab, or pressure still builds. Oversized venting on a small portion just dries the food out, so matching vent area to portion size and moisture load matters more than picking the largest option on the shelf.
The honest trade-offs
Vented lids give up leak resistance. The vent is a deliberate hole, and liquid finds it as soon as the container tilts, which rules them out for saucy curries, gravies and oil-heavy dishes in transit. Take-away food containers with vented lids also need a flat base and upright handling all the way through delivery; a well-fitted kraft takeaway box underneath supplies the structure the lid cannot. Aroma containment is weaker too, so fish, garlic-heavy dishes and spiced stews share their scent with the bag. For those, seal for the trip and vent at the point of reheating, or add secondary containment.
Choosing wisely
Reach for a vented lid when texture is the selling point and the container will be reheated rather than shaken, tipped or carried on a scooter. Reach for sealed when leak resistance and odour control outrank texture. Many operators keep both and match the lid to the menu item rather than to container size alone.
Moisture and Texture Retention Across Reheat Cycles
Few dishes get eaten in one sitting. Leftovers go back into the microwave a second, third and fourth time, and each pass takes moisture and texture out of them. The chart below sets out the pattern for a fully sealed and a vented lid over four consecutive reheats, with cycle one as the freshly packed baseline and both measurements scored on a 0-100 scale. It is a model of how the two designs typically behave, not a bench test of your menu, so confirm it with your own trial before writing it into a specification.
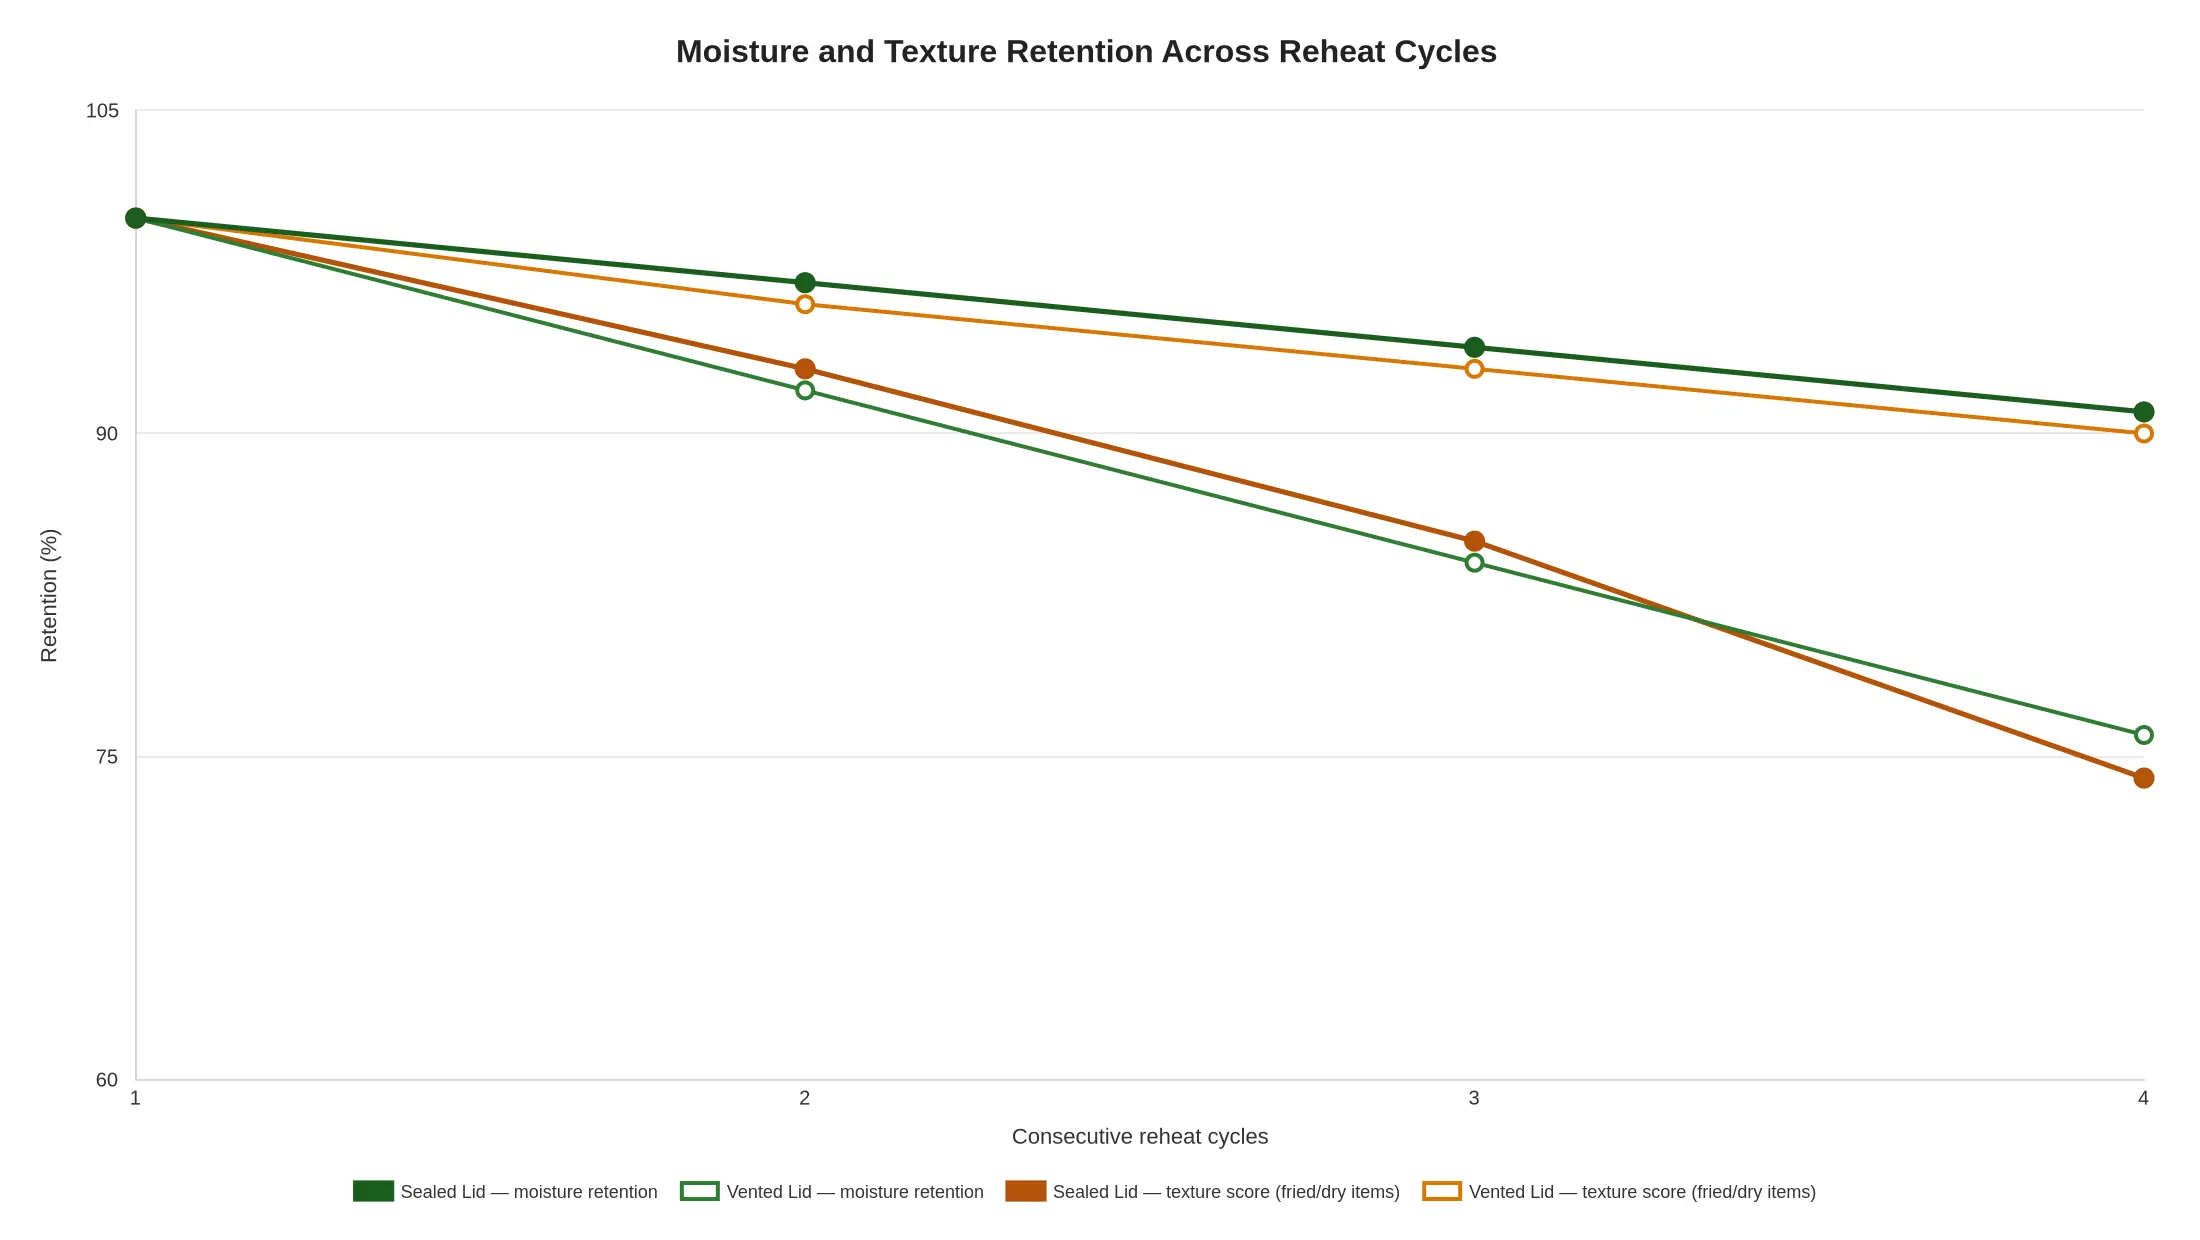
Caption: Sealed lids hold moisture on a gentle downward slope (100 to 91 percent) while vented lids lose moisture much faster, falling to 76 percent by cycle four. Texture tells the opposite story: vented lids keep fried and dry items crisp at 90 percent, whereas sealed lids trap steam and drop to 74 percent. The takeaway for buyers is simple – match the lid to the menu, sealing saucy, soup-based, and rice dishes, and venting anything breaded, fried, or meant to stay crunchy.
Reading the four lines
- Sealed lid, moisture retention: the flattest line on the chart. Steam recirculates instead of escaping, so rice, curries and noodle bowls stay glossy and loose rather than drying into clumps.
- Vented lid, moisture retention: the steepest decline. That trade-off is intentional: controlled venting lets excess steam out, which costs water weight and protects the surface of the food.
- Sealed lid, texture score (fried and dry items): 100 down to 74, because trapped steam softens coatings, wilts fries and turns crisp chicken skin chewy.
- Vented lid, texture score (fried and dry items): holds at 90 across all four cycles, which is the strongest argument for stocking vented designs alongside sealed ones.
What this means when you order
The split is more useful than a winner. Sealed lids suit high-moisture menus – congee, stews, gravies, catered pasta trays – where reheat quality is judged by how wet and tender the food stays. Vented lids suit anything that should crunch or flake, including food truck and catering items that sit under a heat lamp before service.
For a mixed menu the practical answer is a dual-spec order: sealed lids as the default, vented lids reserved for fried and baked items. If you are locking specifications for a chain rollout, browse our microwave-friendly paper lid range to compare vent styles, rim diameters and pairing options before the purchase order goes out. A customer usually makes up their mind about whether your food travels well within four reheats, not a dozen.
Material, Cost and Sustainability Considerations for Bulk Buyers
In most sourcing meetings the lid gets about five seconds and the container gets the budget, yet the lid decides whether a pack survives a microwave pass, a courier run and a customer’s photo. For anyone buying disposable food containers at volume, the rule that holds is to specify lid and body as one system, because the rim does the work for both.
Why the lid and the body have to be chosen together
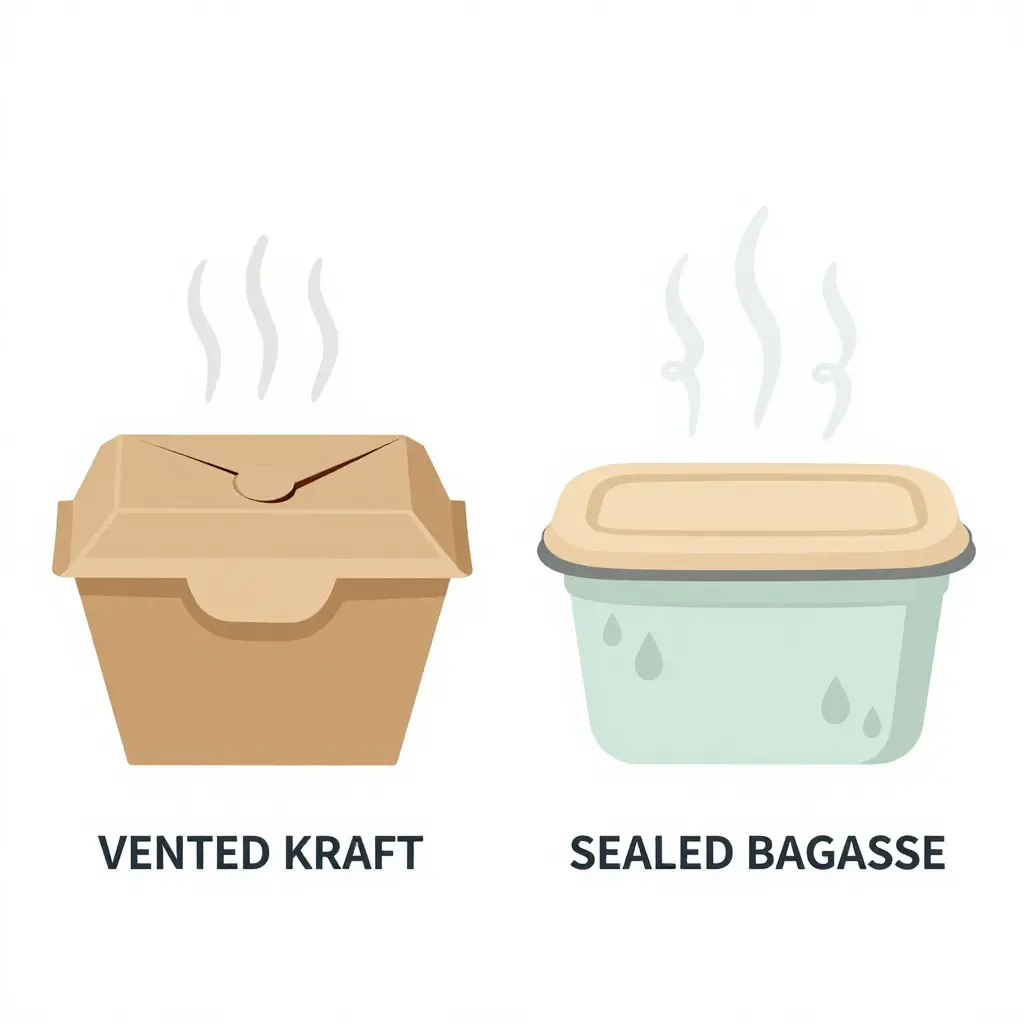
Paper and kraft. A vented kraft lid on a kraft box works like a chimney. Small die-cut vents let steam walk out, which keeps rice, fried items and breaded food from turning soggy and stops internal pressure from lifting the lid mid-delivery. Paper softens under sustained steam and grease, though, so kraft-on-kraft suits shorter hold times and drier or greasier menus. Sauce-heavy dishes want a coating or a tighter rim.
Moulded sugarcane bagasse. Rigid and heat-tolerant enough for microwave temperatures. A sealed lid on a bagasse container holds liquid reliably and stacks predictably, but it also traps steam, so condensation rains back onto the food and pressure builds until the seal creaks or pops. Most kitchens settle on a sealed lid with a small vent tab that staff lift before reheating. Rectangle formats stack tightly in fridges, on prep counters and in delivery bags, which is why so many teams build their programme around rectangular sugarcane food containers.
Compostable film windows. A clear window sells the meal and is usually the most fragile part of the specification. The film has to be bonded consistently to the board, and it has to match the disposal route you actually promise customers. If window and body do not share that route, the compostability story falls apart at the bin.
Unit price is the easy number, total cost of use is the real one
A lid that costs a fraction of a cent less per unit can cost several times that in wasted food, repacks and refunds. Ask your food packaging suppliers for landed cost per case, then map the hidden line items your finance team will eventually ask about.
| Cost driver | What it looks like in practice | Why it matters |
|---|---|---|
| Unit and landed price | Case price, freight, pallet fit | The number buyers compare first |
| Leakage losses | Discarded meals, soaked bags, ruined deliveries | Often dwarfs the unit saving |
| Rework and repacks | Kitchen time spent re-lidding and wiping | Labour cost with no revenue attached |
| Complaint handling | Refunds, replacement vouchers, support time | Erodes repeat orders and reviews |
| Storage across SKUs | Racking for every body and lid combination | Every extra SKU costs floor space and working capital |
The storage row is the one bulk buyers underestimate. Four body sizes and three lid types make twelve combinations to hold in stock, each tied to a minimum order quantity. Consolidating on shared lid diameters, or on multi-compartment containers that replace two items with one, frees racking space and cuts the odds of a mismatch at 6pm on a Friday.
Sustainability claims that hold up under a procurement review
Green claims are easy to print and hard to defend, so keep the language to attributes a buyer can check.
- Compostability: state the standard and the conditions. Industrial composting certification does not mean a customer’s home compost heap will break the product down.
- Recycled content: give a percentage and say what it refers to, rather than the word “recycled” on its own.
- Plastic reduction: quantify it in grams per unit or per case, and say what the plastic was replaced with.
That is where credible eco-friendly food packaging differs from marketing copy. A fibre bucket with a fibre lid is largely plastic-free; a container with a film window is not, however the box is branded. Being precise about the difference buys more trust than a bold claim. If catering orders lean toward family-sized portions, paper buckets are a good example of a format where fibre-only construction genuinely cuts plastic content.
Line the three up and the choice usually sorts itself out: match the lid to how the dish behaves, price the whole lifecycle rather than the carton, and only claim what you can document.
Recommended Lid Mix by Order Type
Before the purchase order goes out, it is worth knowing how your lidded volume splits between the two designs. The doughnut chart below maps a typical multi-channel operation – a restaurant that also runs hot delivery, catering and chilled prep – and shows where each lid style does the most work.
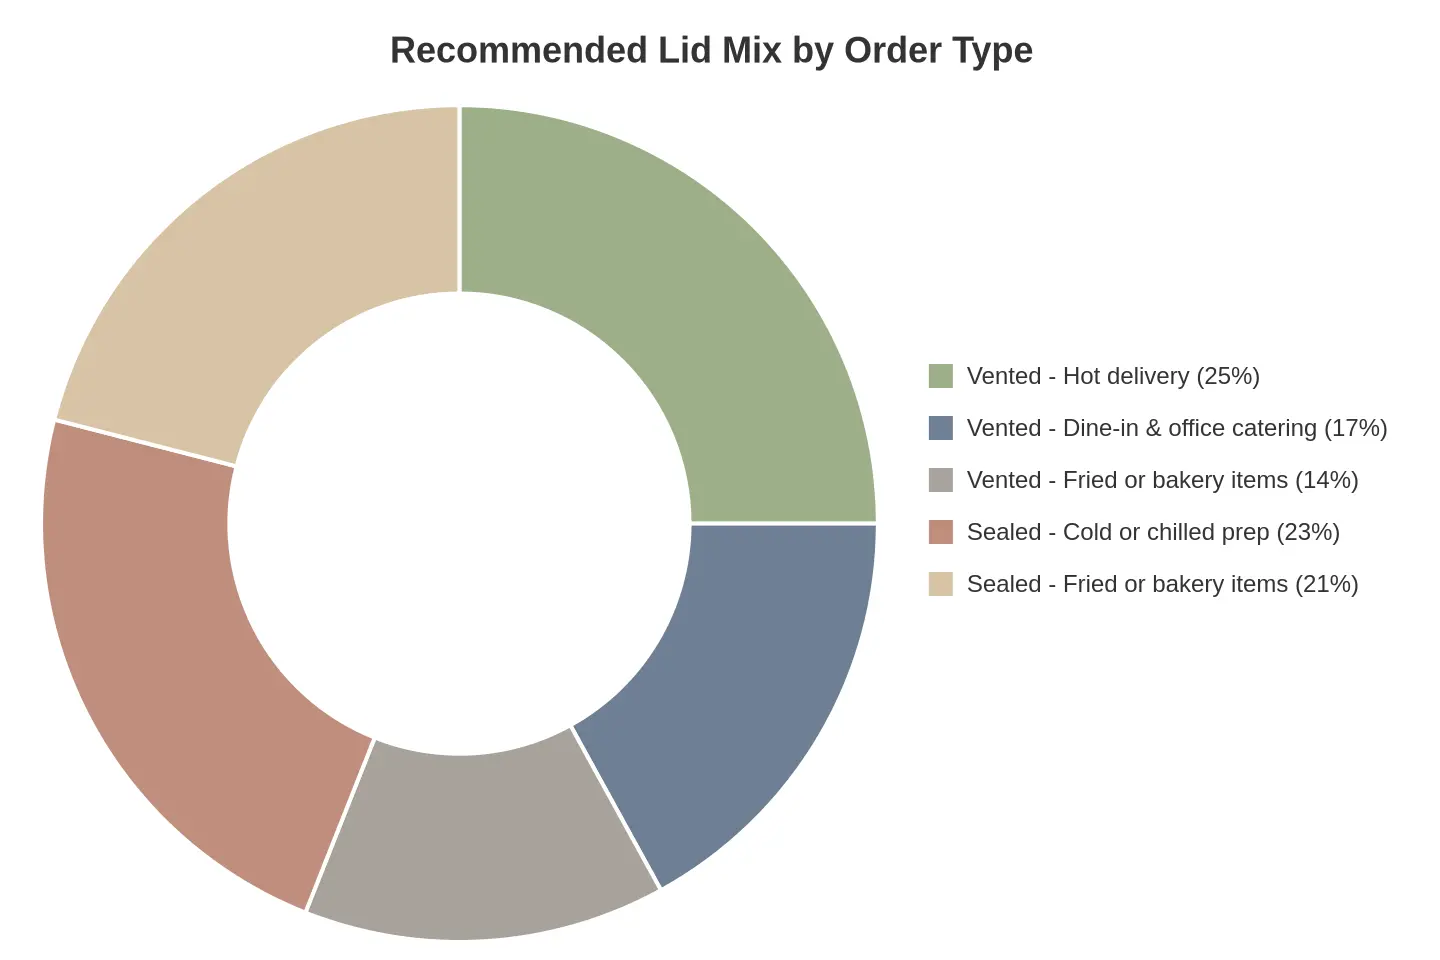
How to read it: each slice is a share of total lidded container volume, labelled with the lid design and the order profile it serves, so a 25% slice means roughly a quarter of your lids should be that vent-and-profile combination. Read the vented slices as food that reheats in the container, and the sealed slices as food that travels, chills or has to stay crisp. Add them up and the vented share comes to 56 percent, the sealed share to 44 percent. Very few operations land at 100 percent of either design; most need both in stock to cover the order mix they actually run.
Turning the Split Into a Practical Order
| Order profile | Lid that earns its place | Why |
|---|---|---|
| Hot delivery | Vented | Steam escapes, so rice, curries and noodles arrive without a soggy lid |
| Dine-in and office catering | Vented | Guests and staff reheat straight in the container |
| Cold or chilled prep | Sealed | Retains temperature and prevents leaks in stacked meal-prep trays |
| Fried or bakery items | Both | Sealed for crispness in transit, vented once the item is microwaved |
If this is the first time you are building that mixed inventory, start with one vented and one sealed option in the sizes you use most. You can browse our paper lid range to match lids to the bowls and containers already on your shelf. Order in roughly the ratios above, then adjust after a month of real orders instead of guessing up front.
How to Match a Lid Design to Your Menu
Lid selection is a menu decision, made once per dish. Four steps, in order.
- Classify each dish by moisture and fat. Soups, curries and sauce-heavy noodles carry the most water, so decide first whether that container travels or gets reheated in place: sealed for the trip, vented for the reheat. Drier items such as rice bowls, pasta bakes or grilled proteins sit comfortably under a fully sealed lid. Fatty sauces also cling and spatter more, so give them a little more headspace.
- Assess transit duration and handling. A five-minute walk to a nearby office is not a two-hour catering drop. Longer journeys and stacked loads favour a tight seal with a locking rim or vent tab, while short local runs can use a simpler snap-fit design.
- Define the reheating instruction you will give customers. If the printed guidance says “vent before microwaving,” a vented lid is the honest match. If you tell customers to remove the lid entirely, a sealed base plus a separate cover keeps things tidier.
- Select the lid and body as one pair. Never approve a lid on its own. Confirm container and lid compatibility by testing the actual rim diameter and wall thickness together, then check that the finished set qualifies as microwave-safe food containers for the reheat times you promise. This is also the point where meal prep food storage containers with lids need a second look, because buyers often reuse them at home well beyond the first delivery.
Then pair accessories that support the lid rather than compete with it. Cup holders keep drinks upright and stable alongside a two-compartment meal box, and paper sleeves add grip and a layer of insulation so a hot bowl stays comfortable to carry. Both cut down the small accidents that make a good lid look bad.
Finish the carrier setup with paper bags sized to the container footprint and napkins packed as default rather than as an extra. Then standardise SKUs: one lid family per body size, written on a single line at the packing station. Fewer combinations mean faster training, fewer mis-picks during a rush, and a reheat instruction staff will still remember at 8pm.
Frequently Asked Questions About Sealed and Vented Lids
Lid choice shows up in heat retention, leak risk and food texture. These are the questions our buyers ask most often.
Can a sealed lid be used in the microwave, and what must staff do first?
A sealed lid can go in only after staff crack it open or take it off completely to release steam pressure. Most sealed lids are built for transport rather than heating, so venting first prevents warping, splatter and burns.
Do vented lids leak during delivery?
Less than an open container, more than a sealed one. Matched to the right body and filled below the vent line, a vented container survives a walk or a short drive upright. Tilt it, stack weight on it or overfill it, and the vent is where liquid appears first. For very liquid dishes in transit, use a sealed lid.
Which lid keeps fried food crisp longer?
Vented, because steam escapes instead of condensing back onto the coating, and trapped moisture softens batter within minutes. That makes vented the better match for fried chicken, fries and hot takeaway trays.
Are vented lids suitable for cold and chilled meal prep?
For short holds, yes, though the vent that helps hot food also lets moisture out and fridge odours in. Keep chilled items refrigerated, and switch to a sealed lid for anything holding more than a day, or for dressings and soups that need a liquid barrier.
How should buyers specify lid compatibility when ordering food packaging containers in bulk?
State the exact container model, rim diameter and material so the supplier matches lids correctly. Request samples, confirm whether the menu needs sealed or vented, and write the specification into the purchase order. You can review compatible paper lid options before finalising volumes.
The Bottom Line for High-Volume Operations
The decision comes down to moisture and hold time. Sealed lids suit high-liquid, leak-sensitive items that travel and sit under short holding windows, where containment matters more than venting. Vented lids suit dry, fried, bakery and grain items, where steam needs somewhere to go so texture survives the trip and the reheat. Most multi-menu operations end up running both, matched to the dish rather than to the kitchen’s default.
Write the choice per dish and per reheating instruction instead of picking by habit or by whatever sits closest to the pass. A menu map that pairs each item with its lid and its reheat note removes guesswork on busy shifts and keeps staff consistent across locations. Sourcing both designs from one supplier keeps SKU management simple, and the prime paper cup, bowl and bucket range is one category worth reviewing when you align lids to your lineup.