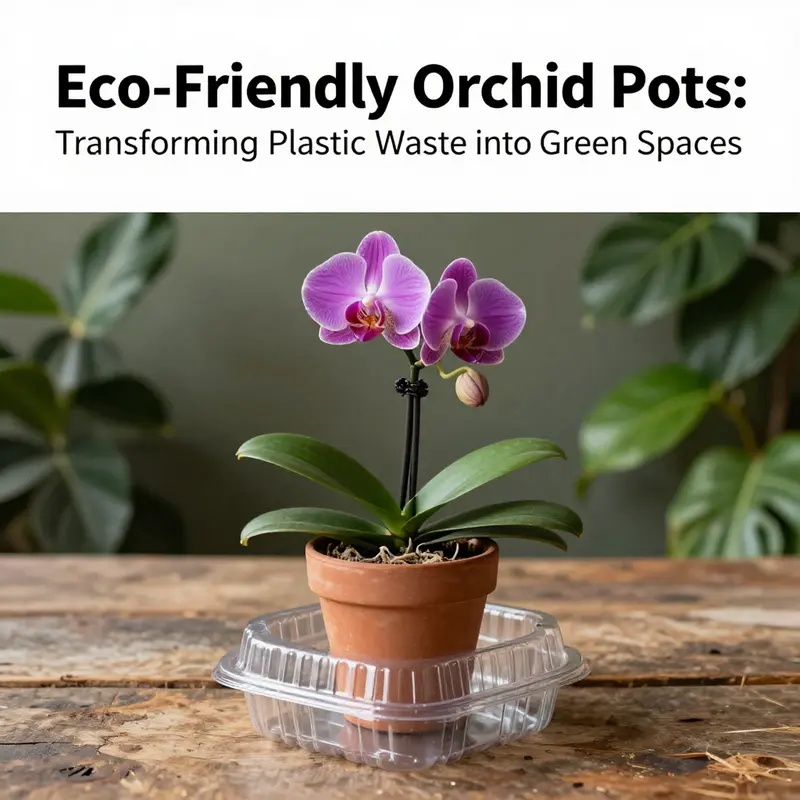
Creating an orchid pot from a plastic food container merges sustainability with creativity, making it an appealing solution for businesses aiming to reduce waste while enhancing their decor. As industries increasingly embrace eco-conscious practices, the opportunity to repurpose containers eliminates the guilt associated with waste, turning it into artistic potential. This detailed guide will assist bubble tea shops, restaurants, food trucks, and catering services in transforming everyday plastic waste into thriving homes for stunning orchids. In the upcoming chapters, we’ll explore selecting the right containers, preparing them for use, ensuring proper drainage, and using the suitable potting mix, culminating in effective plant care strategies that benefit both your business and the environment.
Repurposed Plastic, Real Roots: Choosing and Modifying a Food-Container Pot for Orchids

Orchids are champions of air on their roots and light on their leaves, often thriving in environments that mimic their native tropical or subtropical habitats. Their roots crave space to breathe, and their pots must invite a faithful balance of moisture and aeration. When a person embraces a single act of reuse—turning a plastic food container into an orchid pot—the act becomes more than a clever hack; it becomes a small, everyday ritual of stewardship. Yet not all plastic containers are equal in the world of orchids. The biggest obstacle is moisture control. Even a container that looks sturdy can trap dampness and invite root rot if it lacks proper drainage and air movement. The good news is that a food container can be transformed into a functional orchid pot with deliberate modification, thoughtful choice, and patient handling. The journey from pantry to plant throne begins with a simple question: will this container provide the conditions orchids demand, or will it merely shelter a root problem in disguise? The answer hinges on design and execution as much as on the orchid’s own temperament. In the act of repurposing, we are not merely saving a container from the landfill; we are shaping a miniature habitat that, with care, can support healthy growth for years. The steps that follow describe a cohesive approach to choosing the right plastic food container and transforming it into a pot that respects the plant’s needs while honoring the sustainability ethos that inspired this project in the first place. A practical mindset, combined with a dash of creativity, will yield results that are both functional and aesthetically pleasing. The container’s aesthetic matters less than its function, but with careful planning, you can also achieve a final result that looks intentional on a windowsill or a shaded shelf. This is not about forcing a shortcut; it is about aligning a repurposed vessel with the orchid’s biology so that the plant can thrive within a reused form.
When selecting a plastic container for potting orchids, the design details matter as much as the choice to reuse. The ideal container is wide at the opening and relatively shallow in depth. Orchids grow outward from their roots and need air to circulate around those roots rather than being compressed into a deep, narrow space. A large, shallow plastic food container—think a 1-gallon or larger storage tub—is preferable to a tall, narrow option. The open mouth invites air flow, and the shallow depth reduces the risk of water pooling around the roots after watering. Importantly, avoid containers with a tight-fitting lid if the goal is to keep the plant inside permanently. Orchids welcome ventilation; a lided container can be modified, but the end result should still allow air exchange. The container should also be clean and free of any residues that could harbor mold or pests. Cleaning is not just a hygiene step; it is a necessary foundation for a healthy orchid microclimate. The container’s resilience matters too. Thick, rigid walls resist warping when you drill holes or press in stakes, and they hold up better to repeated moisture changes. A robust construction supports long-term use, aligning with both horticultural success and environmental stewardship.
Before any hole is drilled or plant is placed inside, prepare the container with clarity and care. Start with a thorough wash using warm, soapy water to remove any food residues or chemical residues from the manufacturing process. Rinse well, then allow the container to dry completely. If you want to go a step further, a gentle sanitizing rinse with a mild solution of water and white vinegar can help minimize surface microbes, followed by a final rinse with clean water. The goal is a spotless, dry interior that won’t contribute unwanted organisms to the orchid’s root zone. Once the container is dry, you can begin designing the drainage system. The heart of orchid health is drainage and aeration, and the most reliable way to achieve that in a plastic container is to create multiple drainage holes. You can use a heated metal tool, a small drill bit, or even a sturdy, warm-edged screwdriver to melt or bore through the plastic. The recommended target is six to eight holes, spread evenly across the bottom and, if feasible, along lower portions of the sides. The side holes dramatically improve airflow around the roots, particularly for varieties that appreciate a bit less dampness at the medium’s surface. Space the holes so water can escape quickly and air can circulate without the risk of large gaps that allow the pot to dry out too rapidly. The exact arrangement isn’t sacred; what matters is consistent drainage and a path for air to reach the root zone. After you’ve established the drainage, add a conservative layer that primes the pot for immediate use. Place a 1–2 inch (2.5–5 cm) layer of clean gravel, small stones, or activated charcoal at the bottom. The stones create a steady path for excess water to exit, while charcoal helps absorb impurities and odors, contributing to a healthier rooting environment. It is not a substitute for proper potting medium, but it is a practical buffer that can reduce the risk of stagnation near the roots.
With the container prepared, the storytelling of the pot truly begins: the selection of the potting medium. Orchids require an exceptional balance of porosity and stability. Regular garden soil is a poor choice for orchids because it tends to retain moisture and compact over time, suffocating the roots. Instead, opt for a specialized orchid potting medium. Bark chunks, sphagnum moss, coconut husk chips, or perlite all offer the right degree of aeration without clumping. Fill the container about halfway with this medium, then inspect the center. You should see a space that will accommodate the orchid’s roots while keeping them spread outward in a natural fan. Gently remove the orchid from its current pot. Inspect the roots: trim away any dead, mushy, or shriveled roots with clean scissors. Healthy roots should be firm and white or pale green, with a slight fragrance of mossy freshness. Place the plant in the center of the container, spreading the roots outward so they have room to explore. Begin to fill around the roots with potting mix, pressing lightly as you go. The goal is to anchor the plant without packing the medium so tightly that it inhibits airflow. Orchids do not like to be compacted into their soil; they thrive when the medium remains loose and breathable.
Support and airflow are not afterthoughts but essential features of a functional orchid pot. If the orchid’s stem needs a little help to stay upright, you can insert a stake or bamboo stick close to the plant, using gentle ties to secure the stem without constricting the stem’s growth. Place the pot in a bright location with indirect light and ensure there is good air circulation around the plant. In most homes, a windowsill with filtered sun or a spot near an open-airroom corner can provide the right balance of light and breeze. The container’s construction invites airflow, but it is the plant’s environment that completes the equation. A modest breeze from a fan on a low setting, directed away from the plant, can prevent stagnant humidity pockets that lead to fungal issues.
Watering is the hinge on which the health of this repurposed pot rests. Orchids hate sitting in standing water, so you must practice a watering regimen that respects the medium’s drying rate. Water thoroughly when the potting mix is nearly dry to the touch, allowing the water to trickle through the holes and out of the bottom. Do not let the container sit in a saucer or tray of water for extended periods, or you will invite root rot and unsavory odors. If you want to manage humidity without creating a soggy microclimate, consider placing the entire pot on a tray filled with pebbles and a small amount of water beneath the level of the pot. The water should not touch the pot itself but can increase ambient humidity in a controlled way. This arrangement creates a gentle humidity microclimate that orchids often appreciate, especially in dry indoor settings. After watering, allow the pot to dry out somewhat before the next session. The exact cadence will depend on your environment, the orchid species, and the potting medium’s composition.
Aesthetic touches can transform a purely functional repurpose into a piece that feels appropriate on a living room shelf or a sunlit kitchen window. You can decorate the outside of the container with non-toxic paints, natural fibers, or a layer of fabric that does not seal the surface and thus preserves airflow. Some hobbyists wrap the exterior with twine or natural textures to mimic a traditional terracotta look without sacrificing the practicalities of plastic. The decoration should never block the holes or seal the surface, because airflow remains essential to orchid health. The final result should be a balanced blend of function and form: a pot that demonstrates how a humble plastic container can become a durable, supportive home for an orchid while reminding us of the value of reusing resources.
For readers who want to explore broader packaging sustainability alongside this project, a related resource on eco-friendly recycled packaging options can be enlightening. Consider exploring this guide on eco-friendly recyclable pulp take-away cup holders to see how similar design thinking applies across materials while keeping the focus on airflow and drainage (link: eco-friendly recyclable pulp take-away cup holder). The idea is not to imitate a specific product but to understand how thoughtful design, even in a simple container, can harmonize with living systems.
Finally, while this approach can serve as a practical and creative short- to mid-term solution, the literature on orchid pot design still emphasizes the advantages of purpose-built pots that feature ample side vents and well-planned drainage. If you are contemplating a long-term orchid collection or working with more moisture-sensitive varieties, consider gradually transitioning to pots engineered specifically for orchids. These designs optimize air exchange around the roots and provide built-in drainage paths that reduce maintenance work while supporting robust root systems. The key is to view repurposed containers as a stepping-stone rather than a static fixture; they are a bridge between zero-waste intent and horticultural precision. The orchid’s vitality, after all, is the true measure of success.
External resource for further reading on orchid potting and care: https://www.thespruce.com/orchid-potting-4129875
Breathing Life into a Repurposed Pot: Cleaning and Preparing a Plastic Container for Orchid Growth
A plastic food container can be more than a reminder of yesterday’s leftovers. When you repurpose it into an orchid pot, you begin a small, tangible act of sustainability that supports a delicate, living plant. The journey from waste to thriving orchid starts not with the plant itself, but with a clean slate and a careful understanding of what orchids need to prosper. The container you choose should be sturdy, clean, and capable of providing the right balance of drainage and airflow. It is not enough to simply plant the orchid inside and hope for the best; the pot must play an active role in nurturing healthy roots, steady moisture, and steady air exchange. The steps that follow are practical, precise, and designed to minimize risk to the plant while maximizing the potential for long-term growth. As you proceed, keep in mind that orchids thrive when their roots have access to oxygen and when the potting mix remains airy rather than compact. The container becomes a micro-habitat, and your preparation determines how well that habitat supports the plant through its growth cycle.
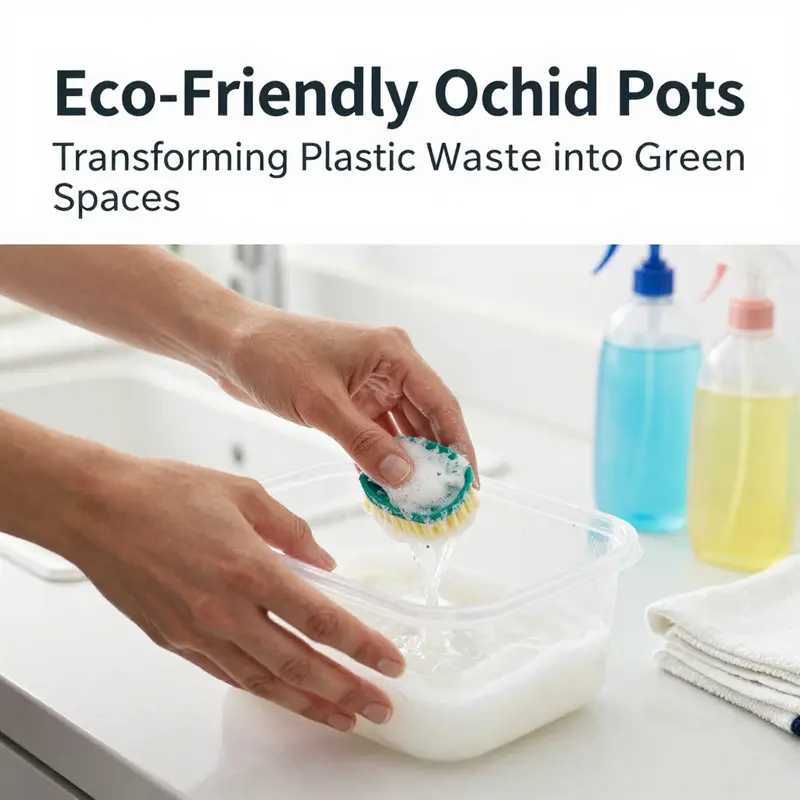
Begin with thorough cleaning. Wash the container with warm water and a mild dish soap to remove any food residues or contaminant traces. Scrub every surface—inside and out—with a soft brush or sponge. This initial cleaning sets the stage for a healthy rooting environment by removing substances that could harbor mold, bacteria, or pests. After scrubbing, rinse the container under running water until every trace of soap is gone. Soap residue can interfere with nutrient uptake and can irritate tender orchid roots, so rinsing thoroughly is essential. If you skip this step, you may invite subtle problems that compromise plant health over time. Drying is the next crucial phase. Allow the container to air-dry completely in a clean, well-ventilated area. A dry start helps prevent mold and rot, especially once the pot is filled with orchid potting mix and exposed to humidity from regular irrigation.
Disinfection follows cleaning. To eliminate lingering bacteria, fungi, or pathogens, use a diluted bleach solution—about 1 part bleach to 9 parts water—or a plant-safe disinfectant. Soak the container for 10 to 15 minutes, then rinse again thoroughly. This disinfection step adds a margin of safety, particularly if the container has been used for food storage for an extended period or stored in environments where pests could linger. After disinfection, ensure the container is completely dry before moving on. Any residual moisture can promote mold and jeopardize root health, so take the time to air out every nook and cranny.
Material quality is not a cosmetic concern here; it directly influences plant health. Verify that the plastic is food-grade and UV-stabilized, with a wall thickness typically between 0.8 and 1.5 millimeters. These properties help maintain durability in the face of occasional handling and watering while providing adequate light transmission for photosynthesis. A container that is too thin may warp or crack, while one that lacks UV stability can become brittle over time, especially with exposed sun or artificial light. When in doubt, accept that purpose-made orchid pots offer consistent dimensions and hole patterns that support reliable drainage and aeration. Still, the goal here is to demonstrate how a humble food container, when properly prepared, can become a functional pot that respects the plant’s biology as well as your budget and environmental values.
If you are looking for ideas and reassurance about sustainable sourcing for related project materials, you can explore eco-friendly packaging concepts that echo this ethos. For instance, you might browse options like eco-friendly, custom paper cups with lids, which illustrate how everyday packaging can be repurposed or reimagined in thoughtful ways. This broader perspective can help you see container design as part of a larger sustainability narrative rather than a one-off craft.
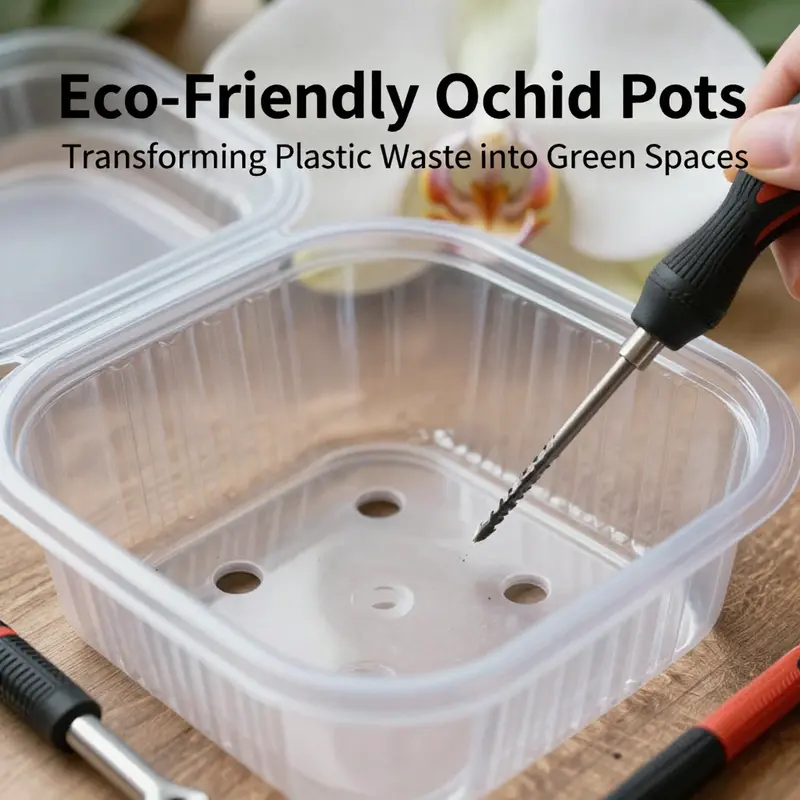
Height and proportion matter for the orchid in a repurposed pot. Determine a suitable height—roughly five to six inches—for a medium-sized orchid, then modify the container accordingly. A clean cut around the sides helps establish a lower profile that still accommodates the plant’s root system and allows adequate air exchange. Use a heated nail, a small drill bit, or a sharp tool to create multiple drainage holes around the bottom and lower sides. Space the holes evenly to promote quick drainage and consistent moisture management. Aim for several holes—six to eight is a practical target for most medium-size specimens. The goal is not to puncture blindly but to shape a network of outlets that prevent water from pooling at the root zone while preserving structural integrity. The holes also facilitate airflow, which is vital for orchid roots, especially in a container that has no natural soil to wick moisture away.
The bottom of the pot needs a dedicated drainage layer to keep roots above standing water. A 1- to 2-inch layer of clean gravel, small stones, or activated charcoal forms a practical barrier against waterlogged conditions. This layer sits at the base of the pot and creates a small reservoir that drains freely. It reduces the risk of root rot by ensuring that excess moisture settles away from the root ball and that aeration remains constant. Activated charcoal has the added benefit of absorbing impurities and helping to maintain a fresher medium. If you choose gravel or stones, rinse them first to remove dust and residues that might cloud the potting mix after assembly.
Next comes the orchid potting mix itself. Orchids require a well-aerated medium rather than typical garden soil. Avoid using soil; instead, select materials such as bark chunks, sphagnum moss, coconut husk chips, or perlite. These components create pore spaces that allow air to reach the roots and facilitate rapid drainage when watering. Fill the container about halfway with the mix, ensuring the layer remains loose and chunky rather than compact. The texture should feel airy, not dense. Your goal is a medium that holds enough moisture to support the plant between waterings while never becoming a stagnant, waterlogged substrate. The health of the orchid’s roots hinges on this balance, so consider the mix to be a living component of the pot rather than a static filler.
With the base prepared, you can carefully remove the orchid from its original pot. Inspect the roots, trimming away any dead, shriveled, or rotted tissue with clean, sharp shears. This step is essential to prevent the spread of decay into the fresh medium. Once the plant is freed, place it gently in the center of the container. Spread the roots outward in a natural fan, then begin to fill around them with more potting mix. Do this gradually, pressing lightly to stabilize the plant without compacting the medium. You want the roots to have plenty of contact with the mix, but you do not want to smother them with a dense, heavy fill. The aim is to create a cushion of medium that supports the plant and enables regular watering without restraint.
Support and airflow are the quiet underpinnings of orchid health in a repurposed pot. If the stem needs reinforcement, insert a stake or bamboo support to prevent wobbling as it grows. Place the container in a location that offers bright, indirect light and good air circulation. Orchids do not thrive in stagnant air, and they benefit from gentle movement of air around the pot to discourage moisture from lingering where it can promote fungus or rot. If your space is consistently still, consider a small fan on low settings or an open placement that catches a breeze from a window or door. The microclimate you create around the plant is just as important as the pot’s physical structure.
Watering is a careful ritual when dealing with a repurposed orchid pot. Water only when the potting mix is nearly dry. This means you should observe a visible light-dryness between waterings, not a deep drought. When you do water, pour slowly and evenly until water begins to trickle from the drainage holes. This indicates the medium has absorbed moisture throughout its depth. Avoid letting the container sit in standing water, as repeated submersion can lead to root rot and fungal issues. A practical tip for maintaining humidity without pooling water is to place the pot on a tray filled with pebbles and a small amount of water that stays below the bottom of the pot. The water beneath creates a humid microclimate while keeping the pot elevated above direct moisture contact that could encourage rot. This approach helps mimic the orchid’s natural environment where humidity is present, ventilation exists, and roots can breathe.
As a final touch, you can decorate the exterior of your DIY pot to reflect your home’s style while keeping airflow intact. It is tempting to seal the surface for a sleek look, but air exchange around the pot remains crucial for orchid health. A tasteful wrap of twine, a coat of non-toxic paint, or a lightweight fabric sleeve can add personality without compromising breathability. The pot should be an accessory that supports growth rather than a barrier to it. The act of decorating, when done mindfully, reinforces the idea that repurposing is both practical and aesthetically rewarding. The pot you have crafted is more than a container; it is a climate-controlled pocket that channels moisture, air, and support straight to the plant’s roots.
If you would like to explore related ideas on sustainable packaging and how it informs pot design in broader terms, you can consider resources that discuss eco-friendly packaging and materials. For example, you can read about eco-friendly, custom paper cups with lids as part of a broader conversation on recyclable and upcycled packaging. This broader lens helps connect a small project like this to a larger trend toward responsible material use and thoughtful design. eco-friendly custom paper cups with lids
Finally, keep in mind that even with careful preparation, your orchid’s needs may vary. Observe how the plant responds to the new pot over several weeks. If you detect signs of stress—yellowing leaves, slowed growth, or stunted root development—reassess the potting mix, drainage, and exposure to light. Orchids tolerate a range of conditions, but the single most reliable determinant of health in a repurposed pot is the interplay between drainage, aeration, and moisture. When these elements are balanced, a plastic food container can become a surprisingly robust home for an orchid, turning a simple household waste item into a thriving microhabitat that demonstrates how small acts of repurposing can ripple into meaningful ecological and horticultural benefits.
External reference for broader context on material sourcing and performance in orchid-related containers: https://www.plasticsnews.com/article/20260125/orchid-nursery-supplies-strategic-sourcing-for-optimal-performance
Drill, Vent, Thrive: Creating Reliable Drainage Holes in Plastic Food Containers for Your Orchid
Tools and Technique
Creating effective drainage holes turns a simple plastic food container into a healthy home for an orchid. Drainage is the single most critical modification you can make. Orchids do not tolerate standing water. Their roots need air and freedom from constantly wet media. That reality should guide where you drill, how large the holes are, and which methods you use.
Start by choosing the right container. Pick a clean, opaque plastic tub with a wide enough base for the root ball to spread. Opaque sides reduce light inside the pot, which helps prevent algae. Avoid clear containers for long-term display. A container with a rigid wall resists cracking when you drill. Thin, brittle plastics can split. If your container is thin, reinforce the base by nesting it in another pot while you work.
Plan hole placement before you touch a tool. Drainage holes belong near the lowest part of the container. Placing them around the perimeter of the base encourages even water exit. Space holes about 1 to 2 inches apart. Aim for three to eight holes depending on pot size. For small containers three or four holes work. For larger takeout tubs six to eight holes are best. Keep holes small rather than many large openings. Small holes prevent mix from falling out and maintain structural integrity.
Select the correct tool for your container and your comfort level. A power drill fitted with a 1/8-inch flat-tipped bit gives clean, consistent holes. Smaller bits reduce splintering at the edge. Wrap masking tape around the drill bit to mark depth and avoid punching through too aggressively. Set the drill to a low speed and support the container firmly while drilling. Clamp the pot to a work surface or hold it inside a larger box to keep it steady.
If a drill is not available, heating a nail or metal rod works. Heat the metal over a flame or in boiling water until it is hot enough to melt through plastic. Press the heated tip into the base, twisting slightly to enlarge the hole. This method produces rounded, sealed edges that resist cracking. Exercise extreme caution. Use tongs and heat-safe gloves. Work in a ventilated area. Avoid overheating thin plastic, which can distort and weaken the base.
Avoid over-drilling. Many gardeners think more holes equals better drainage. That is not true for orchids. Excessive perforation weakens the container and allows potting mix to escape. It also reduces control over how water moves through the medium. A handful of well-placed holes is safer and more effective than dozens of tiny vents.
Smooth the hole edges after drilling. Sharp fragments can damage delicate roots when the plant shifts. Use a countersink bit, fine-grit sandpaper, or the blunt end of a heated rod to bevel the opening slightly. If the plastic leaves rough burrs, gently file them away. For thin containers that may crack at the edge of a hole, reinforce the area with a strip of waterproof tape on the outside. This adds strength without sealing the whole base.
Test the drainage before planting. Put the container upside down on a towel and pour a cup of water into it. Watch how quickly the water exits. Good drainage will allow water to pass within a few seconds. If water pools, check each hole for plastic shavings. Clear blockages with a small tool, or add one more hole near the stubborn area. Re-test until water drains reliably.
Consider adding a 1 to 2 inch layer of coarse material at the base. Clean gravel, small stones, or activated charcoal both aid drainage and prevent the lowest roots from sitting in persistent moisture. Activated charcoal also helps reduce odors and bacterial growth. Place this layer before the potting mix. It creates a physical buffer that speeds water movement away from the root zone.
Think about airflow as well as drainage. Orchids respire through exposed roots. If you plan to keep the plant in a closed container for display, cut additional vents into the sides near the top. These should be small and spaced to maintain structural strength. Never seal a container tightly. If the container has a lid that you want to reuse, either leave it off while the plant is growing or modify it with vents to allow exchange of fresh air.
Match your hole strategy to the potting medium. Coarse bark or coconut chips drain fast. These media tolerate fewer or slightly smaller holes. Fine sphagnum moss retains moisture much longer. When using moss, provide more drainage options and check the plant more often. The drainage holes are one part of the system. Combine them with the right medium and a watering routine that allows near-dry conditions between waterings.
When moving a potted orchid, support the pot from the bottom. Wet media can shift and press against the holes. A firm hand prevents soil loss and root injury. If a plant moves around inside the container, add a little more medium to secure the crown. Use only enough pressure to hold the plant. Avoid compacting the mix.
If you want to disguise the exterior appearance, decorate the container after you make the holes. Wrap the outside with twine, paint with non-toxic acrylics, or apply decorative fabric. Do not cover the holes or block ventilation. Decorative touches should be cosmetic only.
Routine checks matter. Every few weeks, tip the pot and ensure the holes are clear of root knots and compacted media. Root growth will sometimes press against openings. Remove any roots that poke through and trim as needed. Look for signs of slow drainage, like wet, heavy media or a sour smell. These symptoms mean it is time to repot or to add drainage improvements.
Finally, remember that drainage is part of a larger care strategy. Place the pot in bright, indirect light with good air circulation. Water only when the mix is nearly dry. When you water, pour slowly until water runs through the holes. Allow water to flow out completely, and never let the pot sit in a saucer of standing water.
For a practical comparison of container types and more on orchid culture, you can look at examples of suitable takeout-style containers such as a take-away food kraft rectangular bowl. For further guidance on orchid care and detailed cultural notes, refer to recommendations from the American Orchid Society: https://www.americanorchidsociety.org
Layered Foundations: Building a Drainage System for Orchids in Plastic Food Containers
Turning a plastic food container into a healthy pot for an orchid means prioritizing drainage and airflow. Orchids do not thrive in compact, waterlogged media. They evolved to cling to tree trunks and breathe through roots exposed to air. Recreating that environment in a repurposed container requires thoughtful layers that keep roots moist but never soggy, allow air movement, and filter impurities. This chapter walks through the layered approach and explains why each material matters, how to place it, and how to troubleshoot common drainage problems.
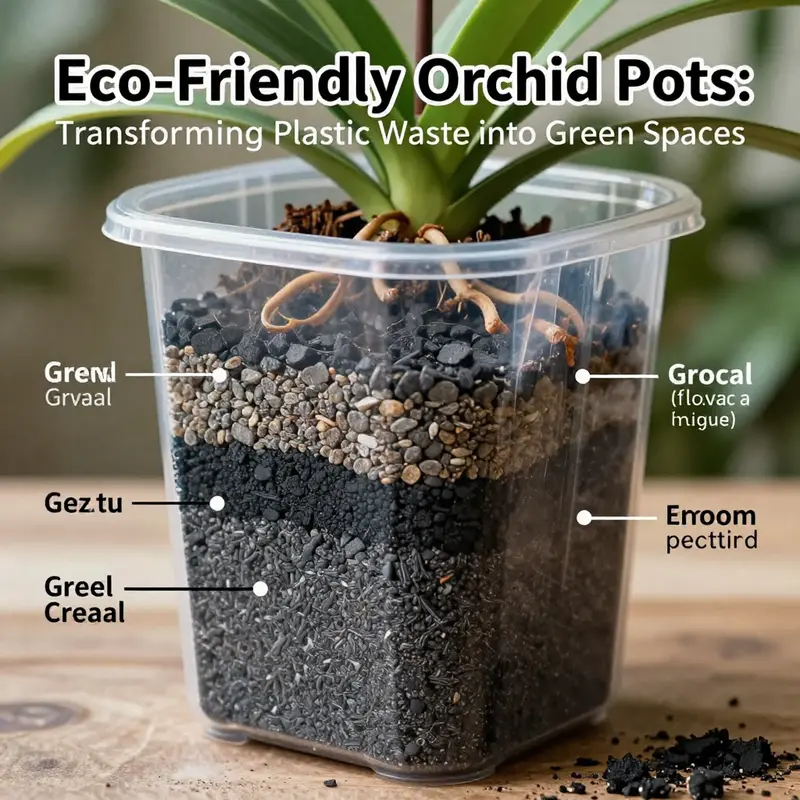
Start with the foundation. The first choice you make at the bottom of the container affects everything above it. A 1–2 inch bed of perlite creates a lightweight, highly porous base. Perlite is volcanic glass expanded by heat, full of tiny air pockets. Those pockets stop the potting medium from pressing down into a dense mass and let excess water move away from roots quickly. Spread the perlite evenly so it covers the bottom without blocking the drainage holes. If your container is shallow, reduce the depth of this layer but keep it continuous.
Directly above the perlite, a thin layer of activated charcoal adds a step of water purification. Charcoal helps adsorb toxins and odors, and it prevents stagnant water from becoming a source of root disease. Use just a light dusting or a slender layer; it should not impede airflow. The charcoal also gives a neat, dark contrast that helps you visually separate the functional layers when you check the pot later.
The main body of the pot should mirror an orchid’s natural substrate. Use chunky bark pieces—fir, pine, or other coarse bark chips—to create a chunky, open matrix. Bark provides large gaps for air to circulate and quick drainage after watering. Fill the container about halfway with these chunks, then position the orchid so its roots fan gently over the bark layer. Add more chunky bark until the plant sits stable and the roots are supported but not compressed. Press lightly; avoid packing. The goal is to hold the plant upright while keeping spaces between chunks for root breathing.
If you like, mix in a small proportion of sphagnum moss or coconut husk chips around the very top of the root ball. These materials hold moisture near the root surface without forming a continuous wet mass. Use them sparingly, and limit them to the uppermost layer where they can supply humidity between waterings. Too much moss will retain water and defeat the layered drainage purpose.
Drainage holes are non-negotiable. Drill or melt at least six to eight holes across the bottom, spaced evenly. Holes near the edges allow water to run out quickly when you water, rather than puddling under the roots. If your plastic container has a rim that sits flat, raise the pot slightly on small feet or stones to ensure that water can escape freely and the holes don’t sit against a sealed surface.
Elevating the pot further improves airflow beneath the container. A simple repurposed plastic bottle base, cut and inverted beneath the pot, will lift it and act as a water reservoir you can empty. You can also use a commercial-style pot pad with perforations. Elevation prevents the bottom layer from sitting in pooled water while letting air flow under the pot. This tiny gap dramatically reduces the risk of root suffocation.
Think of the layered system as a team: perlite drains and aerates, charcoal filters, bark creates breathing space, and the raised base keeps the whole assembly dry at the lowest point. When you water, pour slowly and evenly. Let water soak through until moisture appears at the drainage holes, then stop. Immediately lift the pot briefly to check weight. If it feels heavy, let it dry longer before the next watering. Orchids prefer cycles of wet and dry rather than constant dampness.
Placement and monitoring tie the hardware to plant health. Keep the container in bright, indirect light and in a spot with gentle air movement. Air exchange around the pot helps evaporate excess moisture from the bark and allows roots to breathe. Periodically slide the plant out and inspect roots through the top or through a clear container. Healthy roots are plump and firm. Blackened, soft, or foul-smelling roots signal overwatering or poor drainage despite your layered system. In that case, remove the orchid, trim dead roots, rinse the bark, and repot using fresher, chunkier media.
Adapting to different container shapes matters. Many plastic food containers are shallow or have narrow openings. If yours is shallow, reduce the depth of the perlite and charcoal but increase the chunkiness of the bark. If the opening is narrow, place larger bark pieces vertically to create channels for airflow. For deep, narrow containers, stagger the drainage materials so water doesn’t funnel and pool at the very bottom.
Small creative tweaks increase long-term success. Add a coarse mesh disk above the drainage holes to prevent media from falling through while letting water out. Wrap the outside of the pot with breathable material to insulate roots from temperature swings, but avoid sealing the surface. Label the container with the repot date and the mix used. That record helps you time future repottings and spot trends in watering behavior.
If a fully plastic solution doesn’t suit your style, consider alternative repurposed vessels. A disposable kraft bowl can work as a temporary or decorative outer container when you need a lightweight, eco-friendly option. Use it as an outer sleeve to hide the utility container, or modify it to act as the pot itself if you add proper drainage. One practical option is the disposable kraft paper bowl, which can be adapted for small orchids when reinforced and perforated appropriately. disposable kraft paper bowl
Common mistakes to avoid include compacting the bark, overloading the pot with moisture-retentive materials, and failing to check that drainage holes remain clear. Also avoid lid-like covers that lock in humidity without allowing air exchange. Orchids need a balance of humidity and airflow. If you want extra humidity, use a pebble tray beneath the raised pot so ambient moisture increases without allowing standing water near roots.
Finally, adapt the watering schedule to the season and the environment. In cooler, darker months your orchid will need less frequent water. In warm, bright conditions it may dry out faster. Trust the feel and weight of the pot more than a calendar. Lift the container after watering and again after a few days to learn how quickly it loses moisture. That personalized rhythm, combined with the layered drainage system, is what keeps orchids thriving in repurposed plastic food containers.
For a step-by-step visual and construction guide that follows the same layering principles, see this practical DIY resource: https://www.gardenersworld.com/plants/orchid-care/creating-a-diy-orchid-pot-with-improved-drainage/
Breathing Space: Mastering Orchid Potting Mix for Recycled Plastic Pots
A plastic food container, once destined for the bin, can become a surprisingly kind home for an orchid when we marry the right potting mix with smart spacing and air. The magic lies not in the container’s transparency or its reusability alone, but in how the medium around the roots furnishes them with air, drain, and just enough moisture to imitate their natural epiphytic habitats. In this light, choosing a potting mix for orchids grown in plastic containers becomes a quiet act of design with consequences for plant health, long-term vigor, and even the rhythm of watering. Plastic pots, especially clear or translucent ones, invite the eye to travel down the root zone; this visibility can be a practical ally, letting a careful grower monitor root color and medium hydration. But visibility without a well-structured mix is like reading a map with no terrain. The right combination of components helps the roots breathe, anchors the plant, and reduces the risk of root rot, all while maintaining the benefits of a repurposed container.
The core principle behind a successful orchid mix for plastic pots is balance. Unlike regular garden soil, which holds moisture and compacts under weight, orchid media is engineered to be light, porous, and well aerated. In plastic pots, this becomes even more critical because the surrounding walls can trap heat and create microclimates that ride the line between cozy and hostile to delicate orchid roots. An ideal mix will hold enough moisture to carry the plant through short dry spells, yet drain quickly enough to prevent standing water that invites rot. It will also maintain its structure over time, so the roots never have to contend with a collapsing medium that smothers them or yanks them from their anchors. When the container is translucent, the mix should not only perform well but also remain easy to inspect. A well-chosen medium lets you see when roots start to darken or dry out, so you can tailor your watering cadence rather than guessing from outside cues alone.
A practical starting point for plastic pots—especially those that light can reach through—is a thoughtfully layered mix. The recommended composition emphasizes three essential functions: drainage, aeration, and moisture retention in a way that avoids waterlogging. The commonly cited ratio is roughly 70 percent medium-grade fir bark, 20 percent sphagnum moss, and 10 percent perlite or charcoal. Each component plays a specific role. Fir bark provides the structural backbone of the mix. It creates a chunky, well-ventilated matrix that never settles into a dense, compact mass, which would squeeze the roots and hamstring their access to air. Sphagnum moss contributes a degree of moisture-holding capability without becoming waterlogged. It also helps the medium feel more pliable around delicate root tips, reducing the risk of root damage during watering and repotting. Perlite or charcoal rounds out the blend by enhancing drainage. Perlite creates air pockets that keep the root zone breathable even after a thorough watering, while charcoal can contribute to better microbial balance and odor control in the root zone. Together, this trio creates a growing environment where roots have constant access to air, yet the medium does not dry out too abruptly in the absence of evaporation. In a plastic container, this balance matters more than ever. The film of plastic can trap a bit more heat and humidity, so the medium should resist crumbling while maintaining its airy texture.
The translucence of the plastic pot adds another layer to consider. Light reaching the roots is not inherently harmful for many orchids, but it can drive moisture loss and influence temperature dynamics within the root zone. A mix that holds shape and drains rapidly helps counteract those effects. The broader implication is that you can monitor moisture status with a glance, but you must base watering on the media condition rather than a fixed schedule. The mix’s ability to maintain porosity over time matters as much as its initial structure. Regularly evaluating media breakdown and replacing it when it breaks down into a crumb-like texture ensures the roots always have access to air. In the long run, this reduces stress on the plant and supports steady growth, even as you continue to repurpose a familiar container into a thriving orchid pot.
Repotting, when done in this context, becomes less about the pot’s size and more about the media’s vitality. Dr. Linda Chen, a horticulturist and orchid specialist at the American Orchid Society, has underscored a simple yet powerful principle: repotting should be guided by the condition of the media rather than the pot’s dimensions. An orchid in a small pot with fresh, well-drained media often thrives more than one in a larger pot with degraded media. This insight is especially relevant for the plastic container route, where the container dimension might tempt us to oversize the pot in search of more room. In reality, a container that stays a bit snug but is filled with fresh, properly aerated mix can keep the roots healthier. The goal is to preserve the air-filled spaces that support respiration in the roots, while ensuring the medium does not compact and choke those spaces gradually. This approach also invites a practical habit: replace old or broken-down media regularly. Fresh media not only improves moisture management but also maintains the long-term rhythm of orchid care in a continually upcycled vessel.
In practice, translating these principles into a functional potting routine begins with a thoughtful selection of the container and a careful preparation of the media. Start with a clean, dry plastic container that has adequate drainage. The container’s bottom should host multiple drainage holes to prevent any stagnation, a feature particularly crucial in recycled vessels that can accumulate mineral deposits or residues that affect water flow. The next step is the layered foundation—an initial 1- to 2-inch base of clean gravel or small stones provides a rapid drainage channel. A thin layer of activated charcoal can also be added to this base if you wish to help manage odors and microbial growth, though it is optional. Then, spoon in the prepared orchid media mix to fill the container to about halfway. Place the orchid in the center, spread the roots outward, and gently work more mix into the root zone. It’s important not to compact the media too tightly; the goal is to keep those air spaces open and accessible. If the orchid has especially long roots, you can open nooks around the plant to settle the roots without pressing the media too firmly against them. After planting, a light touch with a stake or support can help the stem stay upright while the plant acclimates to its new home. The surrounding environment should be bright, indirect light with good air movement. The plastic container’s transparency will allow you to monitor both root appearance and moisture, making it easier to adjust watering times. Watering should be measured and moderate: water thoroughly until it runs from the drainage holes, then let the medium nearly dry before the next watering. In plastic pots, the risk of water lingering in the bottom is real, so avoid leaving the pot sitting in a tray of standing water. A humidity tray with pebbles can help maintain ambient humidity without keeping the pot’s base in constant contact with moisture, thus supporting healthier roots and fewer risks of rot.
An often-overlook aspect of mixing for plastic pots is the stylistic and practical synergy between the plant, the vessel, and the surrounding microclimate. The act of upcycling a plastic container into an orchid pot invites considerations beyond the potting mix. It prompts a broader look at the plant’s daily care and a gentle reminder of how small, mindful changes can broaden a plant’s chances for success. This mindset aligns with the broader ethos of upcycling and sustainable design—finding utility in our everyday objects while preserving their value through thoughtful maintenance. It is possible to think of the orchid’s container as a micro-ecosystem that requires careful attention to media structure, drainage, airflow, and humidity. The mix is at the heart of that system, providing the scaffold that keeps the plant alive and thriving. When watered appropriately and repotted with a media that resists breakdown, a modest plastic container can become a surprisingly durable home for an orchid, a testament to the idea that stewardship of materials goes hand in hand with attentive plant care. The combination of a well-chosen orchid mix with the physical realities of a plastic pot creates a living lesson in balance—how the right blend can transform waste into a flourishing habitat.
To connect the concepts of sustainability and horticultural success to daily practice, consider how the choice of media interacts with your watering schedule and your environment. The transparency of the container is not merely aesthetic; it makes moisture management and root health visible. You can slow down your watering cadence when the mix retains moisture for longer periods, and you can speed it up when the mix dries more quickly. In other words, the medium’s structure becomes a practical gauge for your orchid’s needs. If you begin with the ideal 70/20/10 mix and observe roots that appear healthy and a root zone that maintains a pale, healthy color, you are already aligned with best practices. If you notice browning tips or a spongy feel to the medium, you can adjust by adding more bark or perlite to reopen air spaces, or by testing whether the root zone has dried too deeply between drinks. The monitoring process is simpler in a translucent plastic pot because you can see changes in the root color and the medium’s dryness without lifting the plant from its home.
In the end, the potting mix chosen for our repurposed orchid pot becomes a deliberate design choice, one that respects the plant’s needs while honoring the container’s upcycled form. It is not merely about filling a space with components; it is about shaping a breathable, resilient rooting environment that supports sustained growth and aesthetically pleasing form. If you ritualize media replacement as part of your orchid’s care, you can ensure that the container remains a welcoming, stable home, even as the plant expands and natural cycles unfold. And as you become more confident in judging the medium’s condition, you may find you are watering less often or adjusting the light exposure with greater ease, because the plant’s root system and the media share a more precise dialogue about what they need. The result is not only a thriving orchid but a compact, eco-conscious practice—one that demonstrates how careful choices in potting media, even within a reused plastic vessel, can support long-term plant health and a more sustainable hobby.
For readers seeking to expand their understanding of orchid care and repotting principles, the broader guidance offered by reputable orchid societies can be a valuable complement to hands-on practice. Dr. Linda Chen’s emphasis on media health over pot size echoes in this approach to plastic containers, reinforcing the idea that plant vitality hinges on the media’s condition and structure as much as on the vessel’s shape. In this light, the path from waste to wonder becomes not a novelty but a deliberate, knowledge-driven process that cultivates both gardener and plant alike. And if you want to explore related ideas about sustainable packaging and upcycling beyond orchid care, you can explore resources that discuss eco-friendly materials and their practical applications in everyday horticulture. For an external reference on repotting and orchid care, see the Orchid Society’s repotting guidance, which provides detailed practices and the most current expert recommendations. External resource: https://www.americanorchidsociety.org/orchid-care/repotting-orchids
Internal link reference: To further connect the ethos of upcycling with practical container choices, you can explore this example of eco-friendly packaging concepts: disposable-eco-friendly-printed-logo-single-wall-paper-cup.
External resource: Orchid Care – Repotting Orchids (American Orchid Society): https://www.americanorchidsociety.org/orchid-care/repotting-orchids
Final thoughts
Creating orchid pots from repurposed plastic food containers combines sustainability with floral beauty, uniquely enhancing the environment of any food establishment. By following the guidance outlined in each chapter—from selecting appropriate containers to maintaining optimal conditions for orchid growth—restaurants and food services can beautify their spaces while reducing waste. This environmentally-friendly practice not only reflects a commitment to sustainability but also creates an inviting atmosphere that can enhance customer experience. Make the shift to greener practices—your business and the planet will thank you!