
Maintaining the cleanliness of your plastic Ninja cups is not just about aesthetics; it’s vital for health, hygiene, and the longevity of your products. As beverage businesses—whether bubble tea shops, restaurants, or food trucks—serve more customers, these cups endure heavy usage, becoming prone to stains, odors, and bacteria. This guide offers targeted cleaning techniques tailored specifically for commercial environments. We will explore effective regular cleaning methods to keep your cups pristine, powerful stain removal techniques, and natural odor-eliminating strategies. Together, these practices ensure that your Ninja cups remain not only functional but also appealing to your customers.
Chapter 1: Gentle, Regular Cleaning Techniques for a Plastic Ninja Cup: A Practical Routine for Longevity and Freshness
Every kitchen companion has a story, and your plastic Ninja Cup is no exception. It travels in and out of the daily routine, carries sips of tea and water, occasional smoothies, perhaps a splash of garlic-infused broth from a late-night meal, and it sits at arm’s reach as a small, loyal vessel for your little moments of refreshment. Because plastic cups are convenient and durable, they can also harbor residues, odors, and hidden microbial life if they aren’t cared for with intention. Cleaning, then, isn’t merely a chore to check off a list; it’s a careful practice that protects your health, preserves the cup’s integrity, and extends its useful life. The goal is simple: remove residue, neutralize odors, and prevent the formation of stubborn films without compromising the plastic’s surface or integrity. When you approach cleaning with a steady routine, you’ll notice fewer stubborn stains, a milder scent, and less chance of buildup that can affect taste or mouthfeel. The method described here emphasizes safety, gentleness, and consistency, which together create a reliable maintenance cycle you can rely on every day, week, and month.
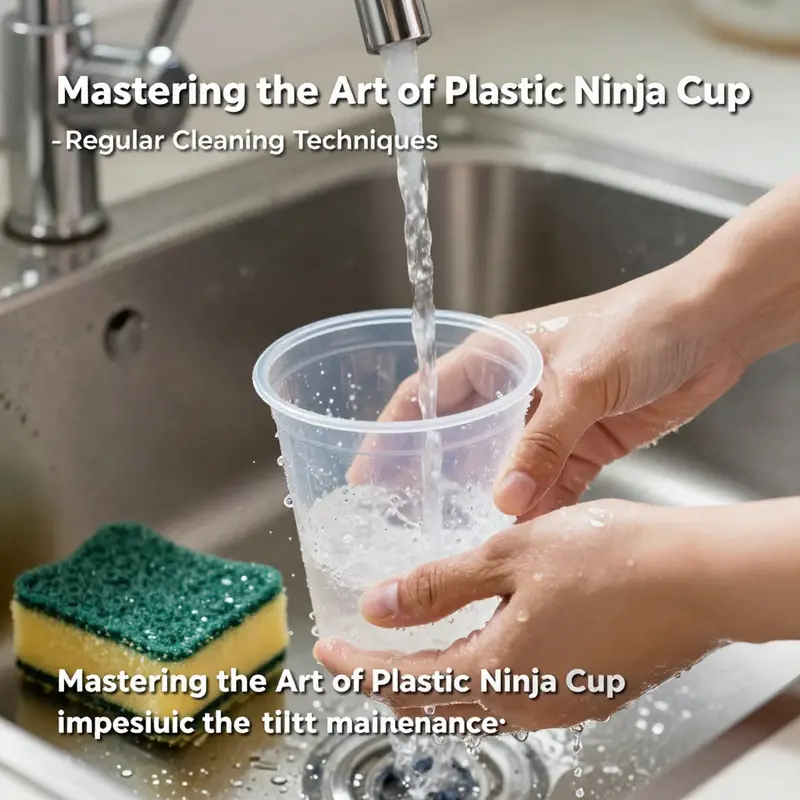
The most basic, and often most overlooked, step is the post-use rinse. After you’ve emptied the cup, a quick rinse with warm water clears away loose particles and reduces the chance that anything will dry onto the interior or the base. The next move is the regular wash, which uses warm water and mild dish soap. The water should be warm, not hot, to protect the plastic’s structure. Warm water helps dissolve oils and dairy fats more effectively than cold water, while the detergent’s mild formulation remains gentle on the plastic’s polymer lattice. A soft sponge or a bottle brush designed for narrow containers makes the interior scrub easier without scratching the surface. The rim, the base, and any corners where residue could linger deserve particular attention. A thorough scrub around the cup’s mouth helps prevent chalky films along the top edge, which can be a magnet for lingering tastes or odors if left unchecked. Rinsing thoroughly is the final part of this daily routine. Leaving soap behind can create an odd soapy aftertaste or appear as a faint film when you next fill the cup. The practice of washing immediately after use contributes significantly to preventing stubborn stains and odor buildup. It’s a simple habit, but it pays dividends in hygiene and longevity.
When stains first appear or odors begin to cling, you’ll want to lean on safe, natural agents that won’t etch or weaken the plastic. Tea and coffee, with their tannins, are notorious for leaving stubborn stains that cling to the plastic’s interior. A common, effective approach is a vinegar soak. White vinegar can be used to half-fill the cup, or you can acoustically layer your approach by contenting with a higher liquid volume depending on the stain’s extent. A half-filled approach—vinegar and water—works well for many routine cases. Let the mixture sit for about 30 minutes to an hour; if stains prove stubborn, an overnight soak can help. After soaking, rinse thoroughly with clean water and, if needed, give the interior a gentle scrub with a sponge. The acid in vinegar loosens tannins and organic residues without compromising the cup’s plastic surface. For those who prefer less acidity exposure, a baking soda paste offers a reliable alternative. Mix baking soda with a small amount of water to form a paste, then apply it to stained areas with a sponge or a soft toothbrush. Scrub gently to avoid micro-scratches that can harbor bacteria, and rinse well. Baking soda’s mild abrasiveness helps lift stains while leaving behind a mild deodorizing effect. Both vinegar and baking soda strategies align with the principle of using non-abrasive, non-toxic agents to restore the cup’s original tone without damage. It’s important to avoid harsh scrubbers, like steel wool or abrasive pads, which can scratch the plastic and create micro-environments where bacteria can hide. Gentle tools, used with care, are your best allies here.
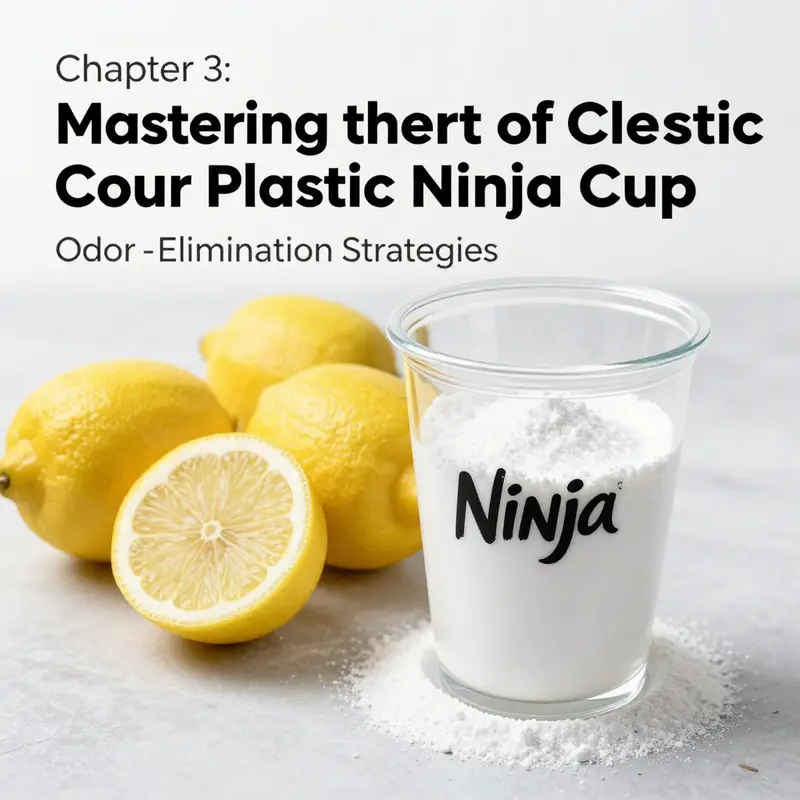
Odors can be more challenging than stains because they’re less about visible residue and more about molecules that linger in micro-pores or the cup’s base where gunk tends to accumulate. Citrus is a classic ally for odor control, offering a natural fragrance while contributing to breakdown of lingering scent molecules. A lemon or citrus-peel soak is an accessible option. Place fresh lemon slices or orange peels into the cup, add warm water, and allow it to sit for four to six hours, or even overnight for the most persistent aromas. Afterward, rinse thoroughly to remove any citrus pulp and scent residuals. The citric acid in citrus fruits helps neutralize odors and leaves a fresh, clean note. If you prefer a longer, deeper deodorizing process that’s also gentle, a baking soda soak can be effective. Dissolve one to two tablespoons of baking soda in warm water and soak the cup for one to two hours. This method assists with both odor removal and light mineral buildup that can accompany repeated use. After any odor-focused treatment, a thorough rinse is essential, followed by air drying. And this brings us to a crucial step that many overlook: drying. Once you’ve completed the wash or soak, allow all components to air dry completely before reassembling. Leaving parts disassembled is often the simplest way to prevent mold or bacterial growth, especially if the lid and gasket are removable. A drying rack with good airflow is ideal. If you’re dealing with a team of cups or multiple pieces, separate drying areas for the cup body and any lids or gaskets help minimize cross-contamination.
For longer-term housing or storage, a deeper cleanup can keep a Ninja Cup in good shape even when it isn’t used for weeks. The sequence here is straightforward. Start with a regular wash to remove any surface film, then perform a vinegar or baking soda soak similar to what you’d do for a stain or odor issue. The key difference is the time horizon: you’re aiming for a thorough refresh that repurposes the cup for extended storage. After the soak, rinse thoroughly and ensure the cup and any removable components are completely dry before sealing or stacking. Storing a damp cup invites mold and bacterial growth, which can be much more challenging to address later. The practice is not merely about cleanliness; it’s about preserving the plastic’s elasticity and preventing warping or discoloration that sometimes accompanies heat, sunlight, or long-term contact with cleaning agents.
Many cleaning mistakes are easy to make, and they’re often small missteps that add up over time. Bleach or strong chemical cleaners should be avoided because they can degrade plastic and potentially leach toxins into your beverage. Dishwashers are also a trap for many plastic cups; unless the manufacturer labels the cup as dishwasher-safe, hand washing is the safer route. Heat is another hazard to watch; never boil water or place the cup in the microwave, as the resulting high temperatures can warp the plastic or alter its structural integrity. These guidelines may feel conservative, but they reflect a practical understanding of how plastic behaves under various cleaning conditions. The right routine preserves the cup’s original clarity, strength, and finish.
If you’re establishing a routine that works for you, consider a simple cadence that covers daily care, weekly care, and monthly checks. After each use, a quick rinse with warm water and a wash with mild dish soap should be standard practice. Weekly, you can commit to a vinegar or baking soda soak to keep residue from building up and to maintain a clean baseline for odor reduction. Monthly, inspect the cup for wear, cracks, or discoloration, and replace if damaged. This approach is practical, manageable, and scalable for households with multiple Ninja Cups in rotation.
To connect this routine to broader contexts, consider how cup care fits into the wider ecosystem of reusable and eco-friendly tableware. For those who use coffee or tea in disposable or reusable cups, this is a reminder that materials respond differently to cleaning processes. When thinking about your cups as durable goods, you’ll want to extend their life through thoughtful handling and cleaning. You can find broader guidance on related cup care and packaging contexts, including durable drinkware and lids, in related resources that discuss care standards and best practices for cup-related products. For a broader perspective on related cleaning challenges and approaches, you can also explore external guidance that demonstrates efficient, safe cleaning methods for cup-like vessels without disassembly.
A practical, real-world example of a time-efficient, safe cleaning strategy comes from a kitchen-focused guide that demonstrates a quick, hands-off approach to refreshing a container with a vinegar-water solution and a gentle blend action. The method emphasizes safety and simplicity, aligning with the core ideas here: use safe cleaners, avoid harsh tools, and rely on a brief, controlled process to restore cleanliness. If you’d like to see how this approach translates to similar vessels, it’s worth checking out the linked resource, which models a self-cleaning-like effect through blending a vinegar-water solution to loosen residues before a final rinse. This example reinforces that the most reliable cleaning results come from deliberate steps rather than scrubbing at high intensity. The link below provides one practical reference that supports the fundamental techniques described above.
For readers who want a quick, concrete reference, this internal example serves as a bridge to related care practices in the broader ecosystem of cup care. See this related guide on deep cleaning blender cups, which demonstrates a safe, efficient method to refresh containers that share a plastic interior with your Ninja Cup, including the vinegar-water approach and a brief blending action to dislodge residues. This cross-reference reinforces the idea that gentle, moisture-assisted cleaning can be both effective and efficient for similar plastic vessels. See: disposable single-wall kraft coffee cups with lids.
In summary, maintaining a plastic Ninja Cup is a matter of steady, mindful care rather than dramatic scrubbing or aggressive chemical use. The combination of regular washing, selective natural treatments, thorough drying, and prudent storage creates a durable, hygienic cup that remains pleasant to use over time. The steps are simple, repeatable, and adaptable, so you can tailor the routine to your household’s rhythm without compromising the cup’s material strength or its aesthetics. And while the immediate goal is cleanliness and odor control, the underlying aim is to protect your health and ensure that every glassful, sip by sip, is as enjoyable as the first.
External guidance and practical demonstrations can further illuminate these concepts. For readers seeking a broader, method-based perspective on efficient cleaning with minimal disassembly, an external resource offers a complementary approach that mirrors the spirit of the methods described here. It presents a concise, time-efficient method for deep cleaning similar containers using a vinegar-water solution and blending action. This example highlights how controlled action can lift residues quickly while preserving plastic integrity. If you’re curious to explore this model, you can consult the external resource linked at the end of this chapter.
External resource: How To Deep Clean Your Blender In Under 5 Minutes Without Disassembling
Chapter 2: Stain Rescue and Odor Reversal for a Plastic Blender Cup: Gentle Methods for Lasting Clean

A plastic blender cup carries the rhythm of your mornings, the pulse of your smoothies, and the stubborn residue of colors and scents that linger long after the last sip. Cleaning it well is not just about appearance; it is about preserving the plastic’s integrity and keeping future blends safe for flavor and quality. A careful approach blends science with daily habit, turning a routine task into a small, purposeful ritual that keeps gear reliable and inviting to use. When you treat the cup with consistent, safe methods, you reduce wear and minimize micro-scratches that can harbor bacteria and odors. The core idea is simple: gentle, non-abrasive agents and controlled agitation, followed by thorough drying. The rest is about building a routine that covers stains, odors, and long-term care without turning cleanup into a chore.
Stains, especially from berries, beet, turmeric, or tomato products, behave differently depending on how deeply they’ve penetrated. Surface-level color sits on the surface and is easiest to lift; deeper staining can tint the surface and, if left untreated, become a memory baked into the walls. Start with a basic but effective step: surface cleaning with warm water, mild dish soap, and a soft brush or sponge designed for narrow containers. Clean the inside and the lid’s threads, then rinse thoroughly. A quick rinse after each use keeps most stains at bay and reduces the need for harsher interventions.
For stubborn color, a targeted method can be both safe and effective. The baking soda paste method offers a gentle abrasive action that lifts color without scratching the plastic. Mix a tablespoon of baking soda with warm water to form a smooth paste, apply to the stained areas with a soft sponge, and let it sit for a few minutes. If the tint is deeper, leave it a bit longer, then rinse thoroughly. If color persists, repeat the paste treatment or follow with a light vinegar rinse (one part white vinegar to one part water) used in the same gentle manner. The combination is practical, kitchen-approved, and free of harsh chemicals.
Odors are often the other side of the coin. Ingredients with strong scents—garlic, onions, dairy, or certain seeds—can linger and affect future blends. Neutralize odors with natural deodorizers: citrus or vinegar. A citrus soak uses warm water and lemon juice or citrus peels. Place a few slices or peels into the cup, fill with warm water, and let the citrus work for several hours or even overnight if needed. Rinse well afterward to remove any residual acidity. If citrus isn’t available, a baking soda soak can do the trick: dissolve one to two tablespoons of baking soda in warm water and let the cup soak for one to two hours before a thorough rinse. These steps target odor molecules and the residual film that can trap them.
The drying phase is simple but essential. After washing and rinsing, air dry the cup with the lid removed. Place it upside down on a drying rack or clean towel so air can circulate through the interior. This minimizes moisture buildup that can invite mold or mildew and helps ensure the interior dries completely before storage or next use. The habit of thorough drying is one of the most effective long-term defenses against lingering odors and bacterial growth.
General cautions from appliance care experts are worth heeding. Avoid abrasive tools like steel wool or scouring pads that can scratch plastic. Bleach or strong chemical cleaners can degrade the polymer and affect flavor in future blends. If a label warns against dishwasher use, respect that guidance; high heat and detergents can warp or weaken the cup. A good habit is to check the manufacturer’s instructions and adapt your routine accordingly. If you notice cracks, warping, or compromised seams during routine checks, set the cup aside for replacement. It’s often cheaper and safer than risking leaks or contamination.
When the cup has been stored for a while or you’ve used it heavily for spicy or aromatic blends, a deeper clean may be warranted. Begin with a standard warm-soapy wash, then perform a vinegar or baking soda soak as described above. A vinegar soak (one part white vinegar to one part water) can help dissolve mineral buildup and restore a fresh smell. If odors persist, repeat the soak or follow with a baking soda soak. The emphasis remains on gentle care rather than brute force.
In practice, building a weekly or biweekly cleaning ritual helps you catch early signs of wear and keeps your cup performing well. Look for discoloration, cracks, or any seam separations, and address them early. A small investment in preventive care—regular cleaning, timely stain or odor treatment, and complete drying—extends the life of the cup and preserves flavor fidelity for many smoothies to come.
If you ever explore alternatives to plastic, carry the same care principles with you: mild cleaners, gentle scrubbing, and thorough drying. The goal is consistent care that keeps your gear appealing and safe across materials and sizes, whether you stay with plastic or try something new.
With these practices, your blender cup can remain visually appealing, odor-free, and ready for the next blended creation. A light routine today pays off tomorrow with cleaner colors, fresher flavors, and lasting performance.
Neutralize and Refresh: Odor-Elimination Strategies for a Plastic Ninja Cup
Freshening Strategy for Stubborn Odors
A plastic Ninja cup can absorb and hold onto strong smells. Garlic, onion, coffee, and citrus oils cling to plastic surfaces and to the tiny crevices near the blade housing. Left unchecked, those odors affect future blends and indicate trapped organic residue. Dr. Alan Reeves, an appliance materials engineer, explains that “residual organic matter in moist environments fosters bacterial growth, which not only causes bad smells but can also lead to flavor transfer and potential health risks.” That means odor control is about comfort and safety.
Start with a practical mindset: odors are chemical and biological problems. They respond to chemistry, time, and gentle mechanical action. A single tactic rarely solves every case. Combine soaking, neutralizing, mild abrasion, and thorough drying to fully restore freshness. The most reliable, safe, and plastic-friendly approach uses household ingredients: baking soda, white vinegar, and lemon. These are effective without the risk of degrading the plastic.
Begin with a simple rinse after every use. Warm water loosen silt and dilute oils. A quick rinse prevents residue from drying into stubborn stains and smells. When odors appear despite rinsing, treat the cup as you would a narrow bottle: fill, soak, and agitate. For a robust first treatment, add about one cup of warm water, one tablespoon of baking soda, and one quarter cup of white vinegar. The fizzing reaction lifts trapped particles and neutralizes acidic or sulfurous compounds. Let the mixture sit for at least 15 to 30 minutes. For strong odors, allow an overnight soak. The chemical action softens deposits, making them easier to remove with light brushing.
After soaking, scrub gently. Use a soft sponge or a bottle brush designed for narrow containers. Pay close attention to the base and the ring where the blade assembly seats. These areas collect residue. Avoid metal scouring pads and abrasive cleaners. Scratches trap bacteria and intensify odors over time. A toothbrush can reach seals and grooves safely. When scrubbing, work with short strokes. Rinse frequently to check progress. If scent persists, repeat the soak or switch to a paste of baking soda and water applied with the toothbrush. Baking soda acts as a gentle abrasive and deodorizer without harming the plastic.
Citrus provides a complementary pathway: acid plus fragrance. After any deep clean, a lemon or orange soak freshens the cup and breaks down lingering aromas. Slice a lemon and add warm water. Let it sit for four to six hours or overnight. The citric acid targets odor molecules and leaves a pleasant scent behind. For quick deodorizing between uses, rub a cut lemon over the interior, then rinse. Avoid prolonged storage of acidic solutions that could stress certain plastics; rinse thoroughly after the treatment.
When odors resist household acids, oxygen-based cleaners offer another safe option. A diluted solution of oxygen bleach (not chlorine bleach) breaks down organic compounds and brightens discolored surfaces. Follow manufacturer instructions for dilution. Use oxygen cleaners sparingly and rinse completely afterward. Do not mix oxygen bleach with vinegar or other acids: mixing chemicals can release gases or reduce effectiveness.
Steam and heat are tempting solutions, yet they carry risk. High heat warps plastic and can compromise seals. Do not use boiling water or microwaves unless the cup is explicitly heat-safe. Instead, rely on warm water and extended soak times. If steam cleaning is part of your appliance safe-care routine, follow manufacturer guidance and only apply it to heat-stable parts.
Odor control also relies on preventing recontamination. After cleaning, dry the cup completely. Leave it upside down on a clean rack or towel to air-dry. Moisture trapped beneath lids or inside grooves invites mold and bacteria that cause odors. Store the cup with the lid removed or loosely set to encourage airflow. For long-term storage, perform a deep clean followed by a full dry and keep the cup in a ventilated, dry place.
Small scent enhancers can be helpful after deep cleaning. A run with a few ice cubes and a slice of lemon inside provides a light polishing and a fresh scent. A drop of a food-safe essential oil, such as citrus or tea tree, can mask residual smell and offer antimicrobial benefits. Use oils sparingly and always rinse well before using the cup for food or drink. Essential oils are potent and can leave an oily residue if overused.
If odors persist after repeated cleaning, inspect for hidden damage. Cracks, deep scratches, and cloudy areas trap bacteria and resist cleaning. Replace the cup when you see damage. Regular inspection reduces the chance of persistent odors becoming a chronic problem. Also check seals and gaskets; rubber components retain odors more than hard plastic. Remove and clean gaskets separately when possible, following the manufacturer’s instructions.
For a quick, effective regimen, adopt this routine: after each use, rinse and wash with mild dish soap and warm water. Once a week, perform a targeted soak with baking soda and vinegar, or a baking soda paste scrub. Monthly, check for wear and do a longer soak with lemon or an oxygen cleaner if needed. This layered approach prevents build-up and keeps the cup tasting neutral.
There are also situational strategies worth knowing. When blending particularly pungent foods, rinse immediately with warm water and a drop of dish soap to remove oils. Follow with a short baking soda rinse if the smell lingers. If garbage or pet odors find their way in through careless storage, give the cup an overnight vinegar soak and repeat the baking soda paste treatment. For coffee and tea tannin stains, a paste of baking soda works well and helps remove the source of the odor.
Avoid common mistakes that worsen or prolong odors. Never use chlorine bleach on plastics intended for food; it degrades many polymers and can leave residues. Avoid abrasive scouring tools and strong solvents like acetone. They can mar the surface and create microgrooves that trap smells. Be cautious with dishwashers: high heat and harsh detergents can warp or cloud plastic. Only use the dishwasher if the manufacturer explicitly labels the cup as dishwasher-safe.
When a plastic cup reaches the end of its useful life, consider responsible disposal and a replacement strategy. A damaged cup can harbor bacteria despite thorough cleaning. Replace it if discoloration, warping, or cracks appear. If you need a temporary alternative for single servings while replacing the cup, a disposable single-wall paper cup can be useful. For example, a disposable single-wall paper cup is an easy short-term option when you cannot use your cup. Use disposables sparingly, and choose compostable or recyclable options when possible.
Odor elimination is a mix of chemistry, time, and care. Baking soda neutralizes acids and absorbs smells. Vinegar dissolves organic residues and breaks down oils. Citrus adds acid and a natural fragrance. Mechanical action removes particles, and complete drying prevents microbial regrowth. Use these elements together rather than relying on one method alone.
Finally, integrate evidence-based habits. Rinse immediately after each use. Use a weekly neutralizing soak. Inspect monthly and replace any suspect parts. If you want a fast, authoritative refresher on deep-cleaning techniques for similar appliances, a detailed guide demonstrates a quick five-minute method that cleans without disassembling. That source offers fast, practical steps that complement the deeper routines described here: https://www.applianceadvice.com/deep-clean-blender-in-5-minutes/
Follow this approach and the cup will stay fresh longer. The goal is a neutral-tasting vessel, safe for food, and free of lingering smells. With intentional cleaning, gentle tools, and the right combination of household ingredients, stubborn odors become manageable. Maintain good habits, avoid harsh chemicals, and replace damaged parts. Those steps will keep your plastic Ninja cup ready for clean, fresh blending every time.
Disposable single-wall paper cup
Final thoughts
In conclusion, maintaining clean plastic Ninja cups is essential for any beverage-focused business. Through regular cleaning, effective stain removal techniques, and innovative odor elimination strategies, you can ensure that your cups remain hygienic and pleasant for use. By prioritizing these practices, you not only enhance the customer experience but also prolong the life of your equipment. A clean and fresh cup service speaks volumes about your professionalism and dedication to your customers’ satisfaction.