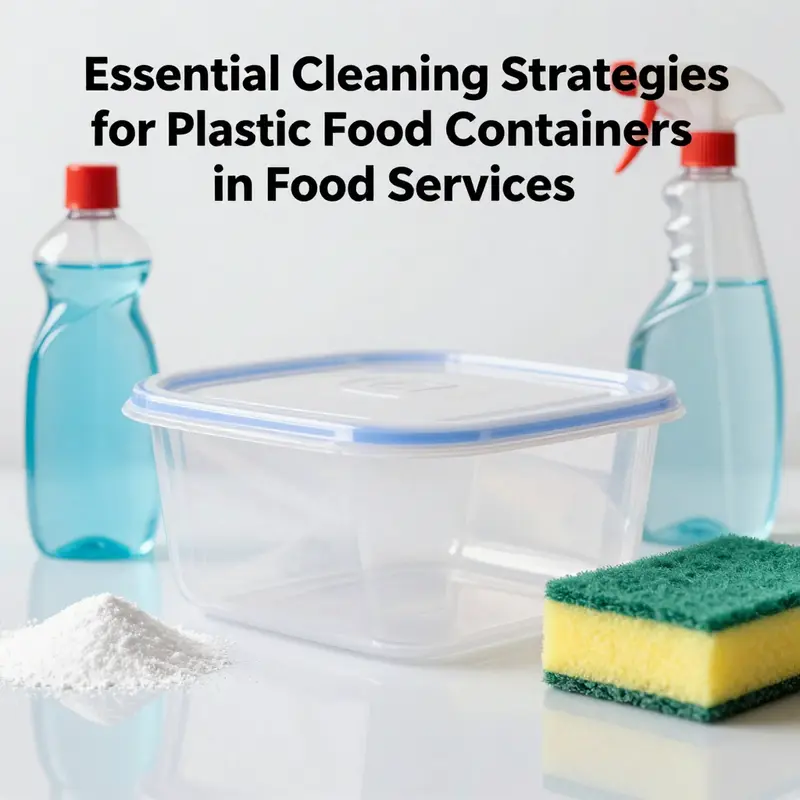
In the world of food service, maintaining cleanliness and hygiene is crucial, especially for plastic food containers. These containers, commonplace in bubble tea shops, restaurants, food trucks, and catering services, can harbor unwanted odors and bacteria if not cleaned properly. Understanding the right methods to keep these containers in top condition can enhance food safety and customer satisfaction. This article breaks down effective techniques for daily cleaning, removing stubborn odors, deep cleaning, and tackling specialized stains, providing a comprehensive guide to ensure your plastic food containers are always up to standard.
The Gentle Steward’s Guide to Cleaning Plastic Food Containers: Odors, Stains, and Sanitary Confidence

On a normal day, the act of washing a plastic container begins with a soft touch and a simple premise: use a mild detergent, warm water, and a non-abrasive implement. The surface of plastic can scratch easily, and those tiny scratches aren’t just cosmetic. They become tiny nooks where food particles cling, odors linger, and bacteria quietly gain a foothold. So the first rule is kindness. A mild, neutral dish soap paired with warm water is enough to dislodge most leftovers, while a soft sponge, cloth, or non-abrasive brush does the heavy lifting without inviting micro-scratches. Rinsing is the counterpart to washing. A thorough rinse washes away soap residue that can leave a film, dull flavors, or a chemical tang. When you rinse, you’re not just removing soap; you’re restoring the container’s readiness for its next use, and you’re preemptively preventing any slipstream of detergents from tainting future meals. The routine is short, sweet, and repeatable, which is exactly what makes it sustainable in the long run.
For stubborn grease, a little extra care can go a long way without resorting to harsh cleaners or rough tools. Baking soda stands out here not as a flashy trick but as a practical ally. Mix a paste with a touch of water and apply it directly to the oily areas. Let it sit for ten to fifteen minutes. The mild alkalinity of baking soda gently emulsifies fats, loosening stuck-on residues so that a gentle wipe or light scrubbing can lift them away. If the grease stubbornly clings, a second pass with the baking soda paste often suffices. The goal is to avoid aggressive scrubbing with steel wool or stiff brushes, which can scratch the plastic and create hideouts for bacteria. In everyday use, this patience is a virtue; it keeps the container looking better longer and protects its integrity over time.
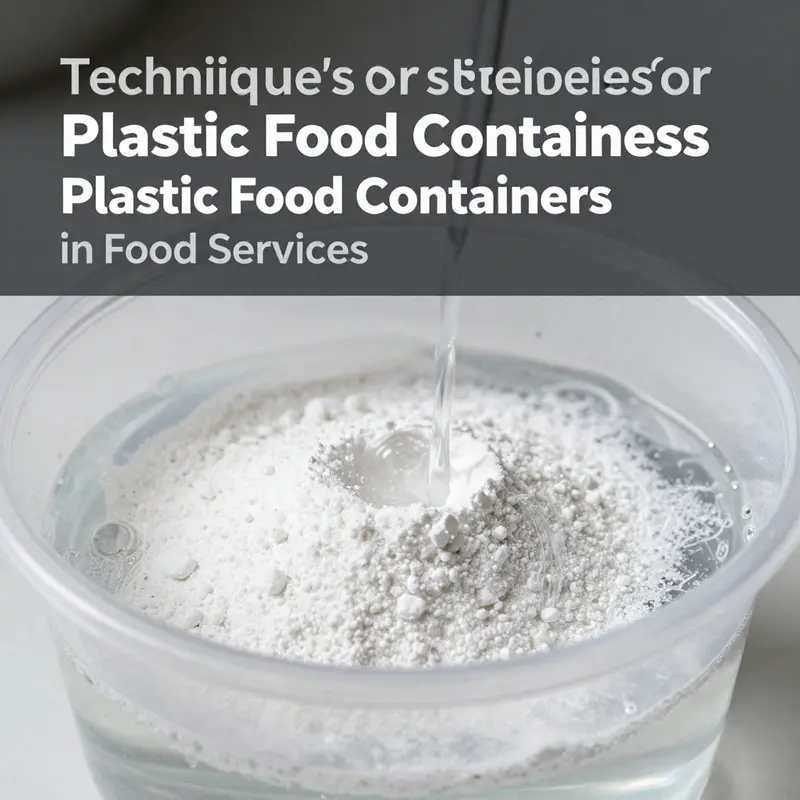
Odors are a common and stubborn feature of plastic containers. Garlic, fish, curry, or even lingering dampness can imprint on the plastic, sometimes more tenaciously than any visible stain. Addressing odors is a matter of both chemistry and time. A straightforward approach begins with a vinegar soak. A solution of equal parts white vinegar and warm water poured into the container and left to sit for thirty minutes can neutralize many odor-causing molecules. After the soak, thorough rinsing is essential to remove any vinegar scent or residue. In many cases, a lemon juice soak serves a dual purpose: it is a mild acid that helps break down oils while imparting a fresh citrus note. Squeeze fresh lemon into the container, add warm water, and let it sit for twenty to thirty minutes. The citric acid not only aids cleaning but leaves the interior with a pleasant aroma. For stronger or longer-lasting odors, a baking soda soak—dissolving one to two tablespoons of baking soda in warm water and soaking for several hours or even overnight—can be transformative. Baking soda has a remarkable capacity to adsorb and neutralize odor molecules, a reminder that simple chemistry can yield meaningful results in the kitchen. For those seeking a more hands-off approach, activated charcoal can be a quiet helper. Place a small sachet of activated charcoal inside the clean, dry container and seal it for twenty-four hours. The charcoal acts as a powerful adsorbent, drawing odors from the container’s interior. These odor-control methods are not mutually exclusive; you can combine them as needed, moving from one tactic to another depending on the intensity of the aroma and the sensitivity of the plastic material.
When deeper cleaning or disinfection is necessary, the material matters. Polypropylene (#5) and high-density polyethylene (#2) are among the sturdier plastics that tolerate hot water, and in the right circumstances they can be submerged briefly in near-boiling water. If a container is labeled as PP or HDPE and the care instructions allow it, submerging in boiling water for one to two minutes can be an effective way to reduce bacterial load. Always check the label first, and never treat PET (#1) or PS (#6) containers in this way, as heat can warp or melt those materials. Following heat treatment, sunlight can become a complementary ally. Placing the cleaned, completely dry container in direct sunlight for several hours lets UV rays do a natural disinfecting job and helps evaporate residual moisture and odors. This approach is most effective when paired with thorough drying and, ideally, a lid that’s either disassembled or left off during sun exposure to maximize air circulation. The sun’s gentle energy, unlike chemical methods, avoids introducing new residues into the container’s interior.
Dishwashers can be convenient, but plastic containers deserve a mindful approach. If the container carries a “Dishwasher Safe” label or symbol, it can be placed on the top rack where the hottest water and drying cycles won’t subject it to the most intense heat. The placement—top rack rather than bottom—is more than a matter of convenience; it reduces the risk of warping and helps preserve the container’s shape and clarity over multiple uses. If there’s any doubt about dishwasher safety, hand washing remains the most reliable method. The idea is simple: gentle cleaning, careful rinsing, and a thorough dry.
Beyond routine cleansing, a few specialized techniques address common stains and issues without demanding harshness. Grease and oil stains respond well to corn starch or flour. Sprinkling a little onto the oily area, letting it absorb briefly, and then wiping away before washing normalizes the surface and reduces the chance of future staining. Color stains from tomato sauces or curries can be stubborn, but several gentle options can fade them over time. An oxygen-based bleach, such as a commercially available oxygen cleaner, or a baking soda and water solution can be used to soak the container for several hours. Sunlight can also help fade pale stains gradually after a thorough wash and dry. Mold is a more serious concern. If mold appears, clean the area with white vinegar or a diluted bleach solution following product instructions, taking care to scrub all affected surfaces. If mold persists or if there are deep cracks or cracks in seals that harbor growth, discard the container. While discarding is a last resort, it is the safest option when the container cannot be reliably sanitized.
Storage and ongoing maintenance are the quiet part of the process. Drying is critical; moisture trapped in corners or seals invites bacteria and mold growth. After cleaning, dry completely and store in a cool, dry place away from heat sources that could degrade the plastic. Direct sunlight should be avoided for extended periods because UV exposure can degrade plastic over time, making it brittle and potentially unsafe for use. Regular inspection is equally important. Cracks, warping, discoloration, or a chalky texture indicate material breakdown, and those signs should trigger replacement rather than ongoing use. This simple vigilance is a practical form of risk reduction: it helps ensure that what you reach for in the morning is a container you can trust with food.
The overarching rule, echoed across reputable guidelines, is to know your container’s material. Look for the recycling code on the bottom—labels like PP (#5) stand out as generally safer for heat and dishwasher use, while other codes may signal more careful handling or avoidance of heat. When in doubt, choose the gentlest method: hand washing with a mild soap and warm water, avoiding high heat or harsh chemicals. This is not merely about cleanliness; it is about preserving the container’s integrity and its role in safe food storage. The science behind these practices is straightforward: mild detergents reduce the risk of surface scratches; soft tools prevent tiny crevices where bacteria hide; and controlled exposure to heat or sunlight can aid disinfection without compromising material safety. By aligning daily habits with the container’s material and a few thoughtful steps, you can maintain hygienic storage without sacrificing convenience.
For those seeking formal guidance on the safety aspects of food-contact packaging, official resources from food-safety authorities provide a broader context for how materials interact with foods over time. You can explore the official consumer guidance available from the U.S. Food and Drug Administration, which outlines how plastics used in food packaging are regulated and how they should be handled to minimize risk. This can help you feel confident in the routine you’ve adopted at home and give you a clearer sense of when to replace items that show signs of wear or degradation. https://www.fda.gov/food/packaging-labeling-safety/food-contact-packaging
Odor Erasers: Practical, Science-Backed Ways to Freshen Stubborn Plastic Food Containers
Odors cling to plastic containers long after the last bite is gone. Oils from dairy, curry spices, garlic, fish, or cooked vegetables can embed themselves in tiny crevices and seals, where a simple rinse won’t reach. The challenge is not just cleanliness but the chemical reality of odor molecules and the way plastic stores them. To restore freshness, we must treat both the surface and the micro-environments inside the container. The approach is iterative and calm, grounded in basic kitchen chemistry and a careful assessment of the container’s material. By combining gentle cleaning with odor-focused treatments, you can reclaim containers that once seemed hopelessly perfumed by last week’s lunch. The guiding principle remains practical: know your container’s material, then choose safe methods that avoid harsh chemicals or heat that can warp or degrade the plastic. In practice, this means starting with mild cleaning and advancing to odor-specific steps as needed, all while keeping an eye on the container’s condition. A clean, odor-free container is not just about taste; it’s about reducing the chances of cross-odor transfer during future uses and preserving the container’s integrity for as long as possible. This narrative moves through a sequence of time-tested techniques, each chosen for its compatibility with common plastics and its ability to target the stubborn smells that linger after meals, sauces, or prolonged storage. The chemistry is simple enough to follow, but the results can feel transformative when a fridge staple returns to neutral. The journey begins with the gentlest approach and escalates only as needed, ensuring you protect both your food and your investment in the containers themselves.
First, the baseline cleaning that makes odors easier to tackle. Use a mild detergent and warm water, and pair them with non-abrasive tools. The goal is to remove loose food particles and surface oils without scratching the inner walls or sealing areas where aromas hide. Scratches and rough patches create micro-niches that trap odor molecules and harbor bacteria. Soft sponges, cloths, or non-abrasive brushes are essential. It’s worth repeating the rinse step: residual soap can leave a film that not only tastes odd but can alter the scent of future foods. After a thorough rinse, a quick air-dry or a towel dry helps to minimize moisture that could react with residues and encourage odor survival.
When odors persist, it’s time to bring in odor-neutralizing agents that act without harshness. Baking soda is first among equals for many households because it is a gentle, natural alkaline agent that can neutralize acidic odor molecules and help break down oils. A practical method is to dissolve two tablespoons of baking soda in a liter of warm water and submerge the container. Allow a minimum soak of several hours; overnight is ideal for entrenched smells like curry or fish. After soaking, a soft scrub in corners and around the seal helps dislodge residue that has become embedded over time. A thorough rinse then follows, ensuring no baking soda traces remain, which could otherwise leave a faint, soapy taste during the next use. For especially stubborn odors, this baking soda soak can be extended to several hours or overnight, turning the inside of the container into a neutralized space where lingering scent molecules no longer cling to the walls.
Another dependable ally is white vinegar, a mild acid that can dissolve oily residues and neutralize sulfur-based smells. A simple equal-part vinegar-and-water solution works well: pour in, cover the container, and shake or swirl for a few seconds. Let it sit for 30 minutes to an hour, then rinse thoroughly and wash with dish soap to remove any vinegar tang. When the odor seems particularly stubborn, a gentle reheating of the vinegar solution—carefully keeping below safe temperatures for plastic—can improve efficacy. The key caveat with vinegar is to ensure a complete rinse and a regular soap wash afterward to prevent any lingering sour taste from transferring to food.
Lemon juice introduces a fresh scent while contributing to odor control. The citric acid in lemon cuts through oils and can help reset the aroma profile of the interior. A straightforward method is to rub the cut side of a lemon along the interior, or squeeze lemon juice into warm water and soak for 20 to 30 minutes. You can also boil lemon slices in water and pour the hot liquid into the container, letting it cool before rinsing. While lemon is effective for brightening the scent of the container, it is still essential to rinse well because prolonged exposure to acid can, over time, affect certain plastics if used repeatedly or in high concentrations. A final rinse removes any lemon residue and potential acidity that could degrade the plastic with repeated use.
Activated charcoal presents a different kind of odor-management approach. Its adsorptive action makes it a strong candidate for trapped odors that resist chemical neutralizers. Place a small pouch or a clean, dry sachet of activated charcoal inside the container and seal it for 24 hours. The charcoal acts like a porous magnet for odor molecules, drawing them away from the plastic surface. After 24 hours, remove the charcoal and rinse the container. If you prefer, used tea leaves (green or black) or coffee grounds can serve as a more readily available adsorbent, following the same principle and leaving a mild, pleasant aroma rather than a strong chemical scent. It’s important to ensure these adsorbents are fully dry before use to prevent any mold growth inside the container.
For odors that linger despite these focused steps, a combination approach can be especially effective. You can start with a baking soda soak to lift oils, follow with a vinegar rinse to neutralize lingering residues, and finish with a sun exposure session to expedite the volatilization of remaining odor compounds. The science behind sun exposure is simple: UV light and heat help break down volatile organic compounds, gradually reducing their perceptibility. This sun-based deodorization works best on containers that are free of deep cracks and cracks through which odors can linger. The sun isn’t a universal remedy—some plastics may warp or degrade under prolonged exposure, especially if they are older or of lower grade. When choosing this option, you should assess the container’s material and any labeling about heat or light tolerance. This is where material literacy becomes crucial. The common household guidance emphasizes polypropylene (#5) and high-density polyethylene (#2) as relatively sturdy choices for heat and dishwashing, but always verify the label. If there is any doubt about how heat-tolerant a container is, avoid boiling or long sun exposure.
A lemon-lysis twist or an oxygen-based approach can also help with stains tied to dyes, sauces, or turmeric compounds. If stains are a concern, soak in a mild oxygen-based bleach solution or a baking soda-and-water mixture for several hours, followed by sun exposure. While staining isn’t dangerous, it can affect the presentation of a container and, in extreme cases, the perceived cleanliness. Sunlight is a forgiving ally for fading color stains over time, yet the combination with the other methods is often the most pragmatic path to comprehensive odor elimination. The goal remains to release any trapped smell molecules, not simply to mask them with a newer scent.
A note of caution accompanies every method: always dry completely before storage. Moisture in corners or seals creates a favorable environment for bacteria and mold to reappear. Direct sunlight is useful, but not a universal remedy for all plastics. Some lower-grade plastics, notably certain thin PET or polystyrene variants, can warp when exposed to heat or strong light. Always check the container’s label for heat and dishwasher guidance. If a container repeatedly emits odors despite various methods, it may indicate structural degradation or the presence of additives that are not compatible with safe food contact. In such cases, replacing the container with a food-grade option is a prudent choice. The overarching principle is simple: protect the container’s material integrity, avoid aggressive chemicals, and approach odor removal with patience and measured steps.
A practical reminder for everyday reliability ties back to the material codes on the bottom of the container. The recycling symbol is more than a label; it’s a quick guide to the container’s behavior under heat and chemical exposure. Among the codes, polypropylene (#5) stands out as a relatively robust option that tolerates heat and dishwasher cycles better than many others. When in doubt, favor hand washing and mild cleansers, and avoid hot water or strong cleaning agents that could accelerate degradation. This not only reduces odors but extends the life of the container, enabling safer, more sustainable use over time.
These methods are not about a magic single step but about a thoughtful sequence that respects both chemistry and plastic physics. They are designed to be accessible—no specialized equipment required, just common household materials, a bit of time, and a cautious eye on the container’s durability. The process rewards patience: start with the lightest option—mild soap and warm water—then escalate to targeted odor agents as needed. When used together and in the right order, these techniques transform stubborn odors into neutral, clean air inside the container. In practical terms, this means fewer wasted containers, less re-storage of off-odors, and a more reliable food-prep routine that keeps flavors true and odors contained. The core takeaway remains consistent: know your container’s material, and choose methods that respect that material while addressing the stubborn odor molecules with simple, natural agents.
Final guidance: if odors persist after multiple attempts and the container shows signs of wear—cracks, warping, chalky texture, or persistent odor despite thorough cleaning—consider replacing it with a higher-quality option. A food-grade polypropylene container or a durable, odor-resistant alternative can offer better long-term performance and safety. The aim is practical, safe, and sustainable usage, not forcing a delicate plastic to perform beyond its design.
For those seeking a reliable reference on best practices, Consumer Reports provides a detailed overview of cleaning and deodorizing plastic containers, offering evidence-based guidance to support the methods described here. See the external resource for a broader context and additional tips that complement these techniques: https://www.consumerreports.org/plastic-containers/cleaning-plastic-food-containers-a376782
Restoring Clarity: Deep Cleaning and Disinfecting Plastic Food Containers for Everyday Confidence
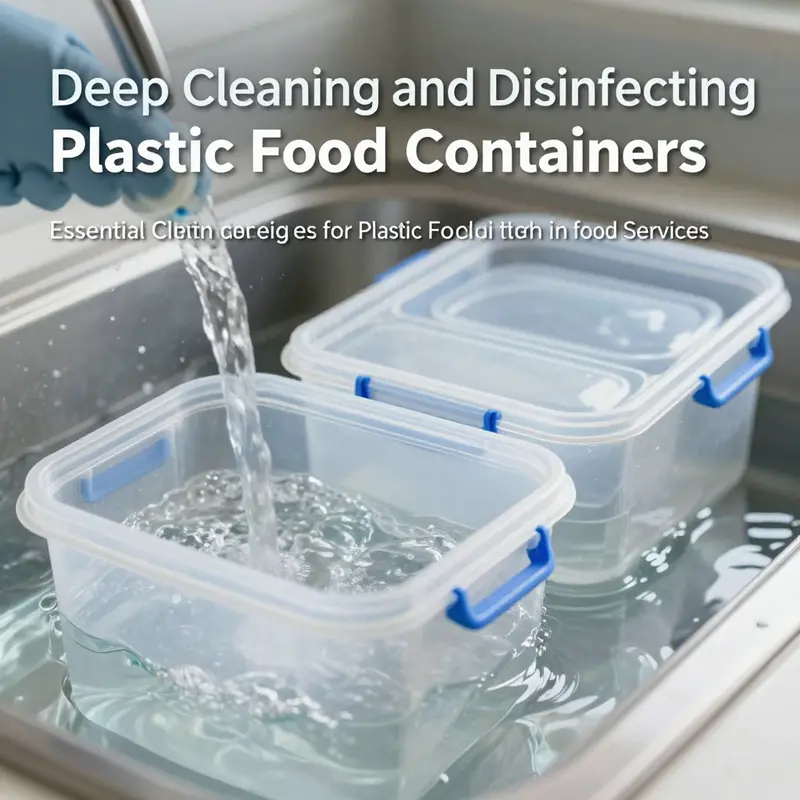
Restoring clarity to plastic food containers isn’t about heroic scrubbing; it’s about understanding why they cloud and choosing gentle, proven methods. Over time, even clean containers can accumulate a subtle haze from residual oils, soap film, mineral deposits from hard water, and tiny scratches that trap odors and food particles. That haze isn’t just cosmetic; it can mask lingering smells and make it harder to tell when a container truly needs replacement. The goal of deep cleaning, then, is not to erase every mark but to restore a smooth surface where oils, residues, and microbes have fewer places to cling, while staying within the limits of what your plastic can safely endure. A careful approach begins with the simplest rule: use the mildest effective method first, and avoid anything abrasive that invites micro-scratches, because scratches become hidden reservoirs for bacteria and odors. With that in mind, you start with a gentle routine that relies on common kitchen staples whose chemistry has stood the test of time. Baking soda is a gentle abrasive when used appropriately, and it also acts as a mild alkali that helps dissolve oily residues without etching the surface. In practice, you can begin by creating a warm water bath and dissolving a modest amount of baking soda into it. A typical ratio is about one tablespoon per quart of water, enough to lift embedded grime without turning the liquid caustic to the plastic. Place the container in the bath and let it soak for thirty minutes to several hours if the inner layers hold stubborn film. After soaking, use a soft sponge or cloth to lift away loosened grime, then rinse thoroughly to remove all cleaning agents. It is crucial at this stage to avoid steel wool, harsh brushes, or any tool that can scratch the surface. Scratches create micro-niches that hold dirt and odors, defeating the purpose of deep cleaning and potentially creating micro-growth zones where bacteria could hide. For particularly opaque or clouded surfaces that owe their haze to mineral buildup from hard water, repeating the baking soda soak with a bit more persistence may be necessary, but always finish with a careful rinse. In parallel with the baking soda method, consider a vinegar-based disinfection and deodorizing step. Mix equal parts white vinegar and water, pour it into the container, and allow it to soak for fifteen to thirty minutes. The acetic acid in vinegar is effective at neutralizing alkaline odor molecules and dissolving some mineral residues; it also leaves a faint, clean scent that many users find pleasant. After the soak, rinse the container thoroughly to remove any vinegar residue, especially if you have soft water that can react with remaining minerals to form a temporary film. For oil-heavy stains or stubborn smells such as garlic, fish, or curry, lemon juice can be a quick and refreshing ally. Fresh lemon juice added to warm water creates a gentle citric acid wash that helps break down oils and brighten the container. Soak or rub a lemon half along stubborn areas, and then rinse. If the container tolerates it, you can also create a lemon-and-water soak for twenty to thirty minutes and finish with a rinse. Beyond these milder methods, activated charcoal provides a powerful, natural approach to odor adsorption when stored in a dry, clean container for about a day. A small sachet or a loose packet placed inside the empty, dry container and sealed for twenty-four hours can significantly reduce musty or lingering odors that resist other treatments. This method works because activated charcoal has a porous surface that traps odor molecules, preventing them from escaping into the air or into the next use. While these odor-focused techniques address the smell, a separate line of defense is disinfection, which must be tailored to the plastic’s heat tolerance. Some containers are heat-tolerant enough to withstand safe boiling, specifically certain types of polypropylene (the commonly labeled #5) or high-density polyethylene (#2). If your container carries a label that allows boiling, you can submerge it in boiling water for one to two minutes to help kill bacteria, provided the container remains intact and free of cracks. It is imperative to check the label and avoid boiling anything made from PET (#1) or PS (#6), as these plastics are more prone to warping or deforming under high heat. For those unsure about heat tolerance, or for a more conservative approach, a more gradual disinfection method uses a diluted vinegar soak or a dedicated food-safe disinfectant following manufacturer guidelines. In addition to heat-based disinfection, sunlight offers a natural, supplementary option for deodorizing and, to a degree, sanitizing. Placing the cleaned and completely dry container in direct sunlight for several hours can reduce odors and freshen the plastic through UV exposure. This is particularly helpful after long storage periods or when a musty fragrance lingers despite washing. Yet sunlight can also be harsh, and prolonged exposure can erase color or cause some plastics to become more brittle over time, so it should be used judiciously and combined with proper drying and storage practices. When it comes to washing, many people wonder whether the dishwasher is a viable option for plastic containers. The safe answer is: check the label. If the bottom of your container indicates it is dishwasher-safe, place it on the top rack to shield it from the hotter cycles and the extended heat of the bottom spray and high-heat drying. In general, hand washing remains the safer default method because it gives you control over the temperature of the water and the abrasiveness of the detergent. Some containers tolerate warm, mild soap well enough for daily cleansing, but dishwashers can accelerate wear and micro-scratching over time, especially for older or thinner plastics. The goal of deep cleaning is not to erase every mark or blemish but to recover the container’s clarity and neutralize odors while preserving structural integrity. In this light, a few practical notes about stains and mold help round out the approach. For grease and oil stains, a quick absorptive measure can curb slickness before washing: sprinkle a little cornstarch or flour on the oily area to absorb the excess. Allow it to sit briefly to absorb fat, then wipe away before proceeding with the usual wash. Tomato-based stains or curry can leave pigments that stubbornly cling to certain plastics. If those colors resist, soak the container in an oxygen-based bleach solution (or a baking soda and water mix) for several hours, then rinse thoroughly and, if possible, expose to a bit of sunlight to help fade the stain through natural light. Speaking of fading, surface-level haze caused by residue is not the same as a mold problem. If mold appears, address it immediately with a solution of white vinegar or a properly diluted bleach solution, following the product instructions carefully. Scrub all affected areas, paying attention to corners and seals, and rinse well. If mold persists or the container shows deep cracks or delamination, discard it for safety. In addition to cleaning and disinfection, proper storage and maintenance play a critical role in keeping plastic containers safe and usable. Always dry containers completely before storing to prevent the growth of mold and mildew in crevices and seals. Avoid storing containers in direct sunlight or next to heat sources like stoves, radiators, or car dashboards, as heat and UV exposure can accelerate plastic degradation and increase the chance of chemical leaching. Regular inspection helps too: look for cracks, warping, or discoloration, or a chalky texture that can signal aging plastic and the need for replacement. The overarching guidance is simple yet powerful: know your container’s material. The recycling code on the bottom—ranging from #1 to #7—tells you a lot about what you can safely do with it. In many households, the safest option for heat and routine dishwashing is PP (#5), though even this is not universal. When in doubt, opt for gentle hand washing with mild soap and warm water and avoid exposing plastic to extremes of heat or harsh chemicals. The long-term goal is to extend the life of containers that suit your kitchen while maintaining food safety and minimizing risk. This chapter’s deep-cleaning approach emphasizes that restoring clarity and cleanliness to plastic containers is not a one-off trick but a practiced routine that respects the plastic’s limits and your health. For more detailed guidance, consult guidelines from reputable sources that summarize best practices and cautions for different plastics and cleaning methods. External readers seeking practical, tested advice may also find value in industry-standard home maintenance resources, including practical how-to guides that outline step-by-step methods, such as the one found here: https://www.familyhandyman.com/article/how-to-clean-cloudy-plastic-food-containers-with-baking-soda-magic/.
Beyond Clean: Mastering Mold, Odor, and Stain Challenges in Plastic Food Containers

Plastic food containers are crafted to keep foods fresh and portable, yet their everyday use often leads to stubborn stains, lingering odors, and hidden mold. The problem isn’t only about aesthetics; it’s about the microenvironments that develop in the small crevices of lids, seams, and corners where moisture can stagnate. A single imperfect seal or a forgotten residue can seed a cycle of odor and growth that undermines confidence in even the cleanest kitchen. To truly extend the life of these containers, it helps to adopt a calm, methodical approach that treats mold, grease, and odors as interconnected clues rather than isolated annoyances. A well-rounded routine recognizes the biology of molds, the chemistry of cleaning agents, and the physics of drying and storage. It also starts with material awareness, because the same stain or smell will respond differently depending on the type of plastic at hand. When you know what you’re dealing with, you can tailor a method that preserves the container and protects the food you store inside it.
Mold is perhaps the most alarming specialized issue because it thrives in damp, dark corners that are easy to overlook. The lid gasket, the strap hinges, the inner corners where pooled moisture can linger—these are the typical trouble zones. When you notice a musty odor, a visible fuzzy growth, or a greenish or black speck along the seam, it’s a signal to intervene with a plan that is both thorough and cautious. Begin with a routine that keeps the interior surface free of organic residues. A gentle rinse with warm water and mild detergent is a baseline, but when mold enters the picture, moving beyond ordinary cleaning becomes necessary. White vinegar and baking soda are often the first lines of defense because they are gentle yet effective enough to disrupt mold cells without aggressively attacking the plastic. A vinegar soak—equal parts white vinegar and water, submerging the affected container or at least the lid and gasket for 30 minutes—can weaken colonies and loosen adherent particles. After soaking, scrub with a soft brush or sponge, then rinse thoroughly to remove any vinegar residue that could affect taste. For more stubborn spots, a cotton swab dipped in undiluted vinegar can reach tiny crevices.
If mold persists or if it has penetrated into the plastic’s porous microstructure, it may be a sign that the contamination is more than surface level. In such cases, a baking soda paste provides a mild but persistent abrasive action that helps lift mold residue from seams and textures without scratching. Apply the paste, let it sit briefly, then scrub gently before a final rinse. Sunlight can further assist in neutralizing spores and odors; placing a cleaned container in direct sun for several hours helps use UV radiation as a natural disinfectant. When mold remains stubborn and you are uncertain about the integrity of the container, it is prudent to discard. Bleach offers a last-resort option for severe cases, but it must be used with care: a dilute solution—about 5 milliliters of household bleach per liter of water—can be used to soak for 10 to 15 minutes, followed by extensive rinsing (at least five thorough rinses) to remove all chemical residues. This step should be avoided on colored or delicate plastics that may fade or become brittle.
Moving from mold to odor and stains requires a similar blend of science and patience. Odors—garlic, onion, fish, curry—tlicker in the microcracks and seams even after washing, so they demand proactive strategies that neutralize molecules rather than simply masking them. Activated charcoal—placed in a small breathable pouch in a clean, dry container and left sealed for 24 hours—acts as a powerful adsorbent, trapping odor molecules without leaching into foods. If a lighter, more immediate deodorizing approach is preferred, lemon juice can be a friendly ally. Squeeze fresh lemon into the interior, add warm water, and let it soak for 20 to 30 minutes. The citric acid helps break down oils and leaves a fresh scent, and rubbing a lemon half directly on stubborn areas can dislodge residues that harbor odors. For those who want a longer-lasting deodorizing cycle without chemicals, a short soak in strong brewed tea—rich in tannins—can help neutralize odors while imparting a gentle, pleasant scent. A simple, often overlooked, tactic is to rinse with hot water and dish soap, but sometimes pairing this with a quick exposure to sunlight after drying is what finally banishes a stubborn odor.
Stains present a different challenge, particularly color stains from tomato sauce, curry, or beet-rich ingredients. The stains do not always indicate bacterial danger, but they can be psychologically discouraging and may eventually impact taste perception if not addressed. Oxygen-based cleaners, such as oxygen tablets or a homemade solution with baking soda and water, can lift these stains through gentle oxidation without harsh abrasion. For tougher blotches, a longer soak—several hours or overnight—in an oxygen-based solution can yield meaningful results, especially when followed by a sun-drying period that can naturally fade color pigmentation over time. In some cases, the combination of sun exposure and a baking soda solution creates a gradual, cumulative fade that helps restore the container’s original clarity.
Grease and oily residues demand attention because fats can embed themselves in microtextures, inviting new odors and harboring residues that taste off. A standard approach is to treat fresh grease with a baking soda paste; the mild alkali helps to saponify fats and lift them from surfaces. Let the paste work for 10 to 15 minutes, then scrub and rinse. For oily films that are harder to dislodge, a vinegar-and-water solution in a 1:10 ratio can cut through oils by breaking down the slippery film while stabilizing the surface. A light hand with cornstarch or flour can absorb fresh oil spills; sprinkle, let sit, and wipe away before washing. For routine maintenance, hot water in combination with a neutral dish soap is often sufficient, but sometimes a quick application of isopropyl alcohol wipes can help with surface oils and leave the interior feeling clean and residue-free without extensive washing. A practical note: never mix harsh solvents with plastics or leave alcohol in contact for extended periods, as repeated exposure can degrade some plastics and dull their clarity.
Deeper maintenance and seasonal care draw attention to the lifecycle of the container beyond one-off cleanings. Drying completely is essential; water trapped in corners or seals becomes a breeding ground for mold and a reservoir for odors. After washing, prop containers open or place them upside down in a well-ventilated area to eliminate moisture more efficiently. Store containers away from direct sunlight or heat sources that can degrade the plastic over time, causing brittleness and potential chemical leaching. Regular inspection is also a shield against unseen damage: examine for cracks, clouding, warping, or a chalky texture that signals the beginnings of material breakdown. When such signs appear, even if the container seems clean, replacement is a prudent choice to maintain both safety and taste integrity.
Understanding materials is a linchpin of safe and effective care. The most universal guideline across these specialized issues is to know the container’s material and its heat tolerance. Recycling codes on the bottom often indicate what kind of polymer you’re dealing with and whether it can be safely exposed to heat, soaking, or certain solvents. PP (polypropylene) is commonly favored for its heat resistance and dishwasher compatibility, but always check the label before applying hot water or high-temperature cycles. If in doubt, opt for hand washing with mild soap and warm water to minimize stress on the container. A prudent practice is to pair this material awareness with a regular, targeted cleaning routine that addresses mold, odors, and stains in a cohesive, non-disruptive sequence. Integrating these steps into a single care ritual—washing, inspecting, drying, and storing—creates a resilient system that extends the container’s life and preserves the flavor and safety of stored foods.
The broader health context adds another layer of relevance. While routine cleaning reduces the likelihood of microbial growth and odor carryover, a growing body of research highlights the broader conversation surrounding microplastics and chemical leaching in everyday plastic use. Clean containers contribute to safer food handling, but they are not a panacea for all risk factors associated with plastic consumption. A careful, incremental approach—favoring materials with proven safety profiles for the intended use, practicing gentle cleaning methods, and replacing aged or damaged pieces—remains the most reliable path. The conversation is evolving, and staying informed about material science and consumer safety recommendations helps ensure that daily routines keep pace with new insights.
In practice, a balanced routine for specialized stains and issues in plastic containers blends patience with small, repeatable actions. Start with a quick inspection after each use: look for residual grease in the corners, a faint odor, or any color that seems off. If you detect trouble, move through a short sequence: a mild wash with warm water and detergent, a targeted treatment for odors or stains, a thorough rinse, a controlled drying period, and a careful storage setup that minimizes moisture and heat exposure. If mold reappears despite these steps, consider whether the container’s integrity has been compromised and whether replacement is warranted. Throughout, prioritize safety: avoid high-heat exposure to plastics not labeled microwave-safe, minimize aggressive chemical cleaners, and respect the container’s material limits. This integrated approach—paired with occasional deep cleaning—helps maintain hygiene, reduces the risk of lingering odors, and preserves the utility of plastic containers for daily meals and snacks.
For readers seeking a deeper dive into related health considerations, refer to the broader literature on microplastics and consumer safety. An external resource provides peer-reviewed perspectives on how microplastics may interact with food and the factors that influence exposure risks. This resource offers broader context beyond routine care and can inform choices about container materials and storage practices as part of a comprehensive kitchen safety plan: https://www.ncbi.nlm.nih.gov/pmc/articles/PMC9871432/
Final thoughts
Effective cleaning of plastic food containers is paramount in the food service industry. By employing daily cleaning methods, tackling stubborn odors, conducting deep cleans, and addressing specialized stains, businesses can ensure their containers maintain high hygiene standards. Not only does this promote food safety, but it also enhances the customer experience, leading to improved satisfaction and loyalty. Adopting these strategies will position your business as a leader in cleanliness and customer care.