
For food service professionals, dealing with lingering odors in plastic food containers can be a challenging task. Whether you’re a bubble tea shop, a bustling restaurant, or a catering service, maintaining freshness in your containers is essential for a pleasant customer experience. With various ingredients soaking or storing inside, plastic food containers can easily absorb unwanted aromas, from pungent spices to sweet syrups. Fortunately, several natural methods are available to tackle these smells effectively, ensuring your containers are clean and odor-free. This article will explore four reliable techniques for odor removal: using baking soda for deep cleansing, vinegar for its acidic properties, harnessing sunlight’s UV rays for effective odor breakdown, and the natural absorption capabilities of used tea and coffee grounds. Through these methods, beverage chains and food service operations can restore their containers, enhance product quality, and keep customers satisfied.
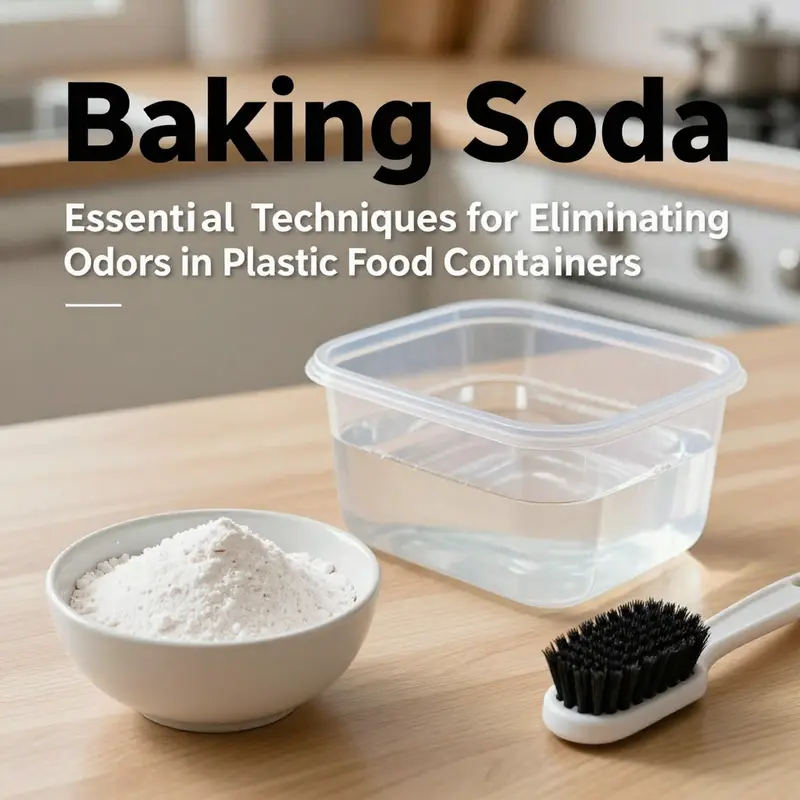
Baking Soda and the Science of Freshness: Eradicating Odors from Plastic Food Containers
Odors cling to plastic in a way that often feels stubborn, almost invincible. They seep into microscopic grooves and microabrasions that ordinary washing cannot fully scrub away. This is not merely a matter of stubborn smells; it is a chemical puzzle. Odor molecules come from fats, oils, proteins, and volatile compounds that can anchor themselves in polymer lattices. The challenge is not just to mask these scents with scents of their own; it is to neutralize the very molecules that cause the perception of smell to linger. In recent practical science-led guidance from Sustainable Kitchen Labs, researchers highlight a common thread: even high-quality plastics contain microscopic imperfections where food residues can embed and resist routine cleaning. That insight matters because it reframes deodorizing as a deep-clean process that addresses those hidden pockets, not just the visible surfaces. Among the simplest, safest, and most effective tools for this deeper clean is a familiar kitchen compound: baking soda. Its mild alkalinity makes it a natural ally for neutralizing acids and bases that odors rely on, and its gentle chemistry works without compromising the integrity of most food-grade plastics. The following approach centers on baking soda as the key agent while respecting the container’s material limits and the hygiene needs of everyday food storage. It blends practical steps with a touch of the science that explains why these steps work, so that readers can apply the method with confidence rather than just hope for a fresher container.
Baking soda’s appeal rests on more than habit. Sodium bicarbonate is mildly alkaline, which enables it to neutralize acids and basic odorants that contaminate plastics after repeated use. When odor molecules are acidic, baking soda can shift the pH balance in small, localized regions inside the container, weakening the bonds that keep those molecules attached to the plastic’s surface and within its microscopic crevices. This is more than a cosmetic effect; it is a chemical adjustment that reduces the affinity between odor molecules and the container’s interior. Dr. Lena Torres, a materials scientist who studies how plastics wear over time, has framed the issue in practical terms: microscopic imperfections in plastic can trap residues that washing cannot reach. Baking soda addresses that reality by interacting with lingering residues and easing their removal in subsequent rinses. It is not a brute-force solvent, but a gentle, targeted agent that can render those stubborn pockets less hospitable to odor molecules.
Two practical baking soda strategies emerge from the literature and tested home practice. The first uses a simple soak, and the second builds on that with a more active surface treatment. Both are designed to be safe for most food-grade plastics, while recognizing that older or heavily stained containers may require alternatives or replacement. The core technique begins with a straightforward soak: dissolve 1 to 2 generous tablespoons of baking soda in warm water, pour the solution into the container, and let it sit for at least four hours, ideally overnight. The alkaline environment helps neutralize acidic odor compounds and begins to break down grease that traps odors in corners and seals. After soaking, a gentle scrub with a soft brush—paying special attention to seals, corners, and ridges—helps lift residues that the solution loosened but did not entirely remove. A thorough rinse follows to remove any baking soda residue, which itself could impart a faint chalky taste if left behind. This soak is a practical first line of defense, a kind of spa treatment for the container that preps the surface for deeper deodorizing.
But a soak is not always enough on its own, particularly for stubborn smells such as fish or curry or for interiors that show multiple layers of use over time. For those situations, a second method, built on the same baking soda foundation, offers a more active, fizzing interaction that can dislodge embedded particles and lift odors more effectively. Here the baking soda is sprinkled inside the container, and a small amount of white vinegar is added. The reaction between baking soda and vinegar creates gentle effervescence, which can disrupt the interlocking residues that cling to the walls. This fizzing action helps to lift trapped food particles from micro-imperfections that are otherwise difficult to reach with brushing alone. The recommended duration for this step is shorter—about 15 to 30 minutes—to prevent excessive foaming that could spill into seals or crevices where it might cause build-up. After the fizzing interval, rinse thoroughly to remove vinegar residues and any loosened particles.
The science behind this vinegar-baking-soda pairing is simple, yet effective. The combination introduces a brief, localized alkalinity shift as the reaction proceeds, helping to loosen oil films and residue previously stabilized by the plastic’s microtexture. It is a controlled, safe process that avoids harsh chemicals while leveraging a natural chemistry that has stood the test of time in domestic cleaning. Importantly, the vinegar must be white and diluted for the soak to minimize any risk of staining or scent transfer. Undiluted vinegar can be used on stubborn areas with care, but a cotton swab soaked in undiluted vinegar is recommended only for targeted problem spots and not for large areas, to prevent overexposure of seals or labels to acidity.
In practice, these methods can be used in combination or separately, depending on the container’s history and the strength of the odor. For new containers or those with mild industrial solvent smells—a common issue when plastics are newly manufactured—the sunlight exposure step can be very effective, as ultraviolet light helps break down certain volatile organic compounds (VOCs) and reduces microbial presence in crevices. But sunlight is not a universal remedy; excessive heat can warp or degrade certain plastics, so this method should be used judiciously and only for the kind of containers known to tolerate brief sunlight exposure. The baking soda approaches, especially the soak and paste applications described below, provide a robust, scalable solution that can be repeated as needed without risking material damage.
A third practical option, which complements the baking soda approach rather than replaces it, is the concept of a paste made from baking soda and water. This paste is applied to the interior surfaces of the container, particularly the most odorous areas, and left to dry for several hours or overnight. The paste acts as a scavenger for smells, drawing odor molecules away from micro-imperfections. When rinsed away, the paste leaves the interior cleaner and less odorous than before. The application of a baking soda paste is straightforward: mix baking soda with water to form a thick paste, generously coat the interior, and allow it to sit. The longer the paste remains in contact with the odors, the more opportunity there is for neutralization and physical removal of residues. After the soaking period, rinse thoroughly and wash with soap and water to remove any paste residue and prevent future buildup that might resemble whitening of the container’s interior. A final rinse ensures all residues are fully removed and helps restore the container’s clarity and freshness.
The dosing and timing guidelines for these approaches are deliberately simple, aiming to empower home cooks and families to maintain a hygienic set of containers without resorting to harsh cleaners. They respect the material realities of plastic—its susceptibility to warping, staining, and residual chemical uptake—while acknowledging that a used container’s odor profile is often more stubborn than its appearance suggests. The baking soda soak steps and the baking soda-plus-vinegar steps are designed to be safe for most food-grade plastics, reducing risk while increasing the odds of odor elimination. For containers that are creased, deeply stained, or particularly old, the combined lesson is clear: if the odor persists despite repeated thorough cleaning, it may be time to consider glass or stainless steel alternatives. These materials do not absorb odors in the same way and can offer longer-term durability for food storage without the odor transfer risk that plastic sometimes presents.
Beyond technique and material science, this approach to deodorizing plastic containers reflects a broader habit of mindful cleaning. The goal is not merely to remove visible residue but to disrupt the internal environment that supports odor retention. A practical routine can be established: (1) rinse with warm, soapy water to remove gross residue; (2) perform a baking soda soak for several hours or overnight; (3) scrub the interior gently, paying careful attention to seals and corners; (4) if necessary, do a baking soda and vinegar rinse to address stubborn areas; (5) perform a final thorough rinse and air-dry completely before returning the lid and placing the container in storage. When done consistently, this routine reduces the likelihood that odors will become ingrained, keeping containers fresh for repeated cycles of use.
As readers apply these strategies, a practical reminder resonates: the goal is hygiene and safety alongside odor control. Baking soda is a safe, widely available agent that aligns with a low-toxicity cleaning ethos, an important consideration when handling containers used for meals and snacks. It avoids the harshness some industrial cleaners bring to plastics, preserving the container’s integrity and prolonging its usable life. Yet the science also teaches a boundary: odor is not only a surface problem but a microenvironment issue. If a container’s interior texture has been compromised by years of use, or if a seal has deteriorated to the point where odors commingle with stored foods, replacement becomes a rational choice. In such cases, transitioning to glass or stainless steel storage can be a worthwhile investment in long-term food safety and odor control. The overarching message is practical: use baking soda as a reliable first-line deodorizer, employ the vinegar fizz when needed, and know when the container’s life has run its course.
To bring a fuller perspective to readers who want to explore related practices, consider this related avenue: disposable kraft paper bowl with lid. While it concerns a different material than plastic, the same principles apply to seasonal cleanliness, storage hygiene, and the idea that materials designed for food contact deserve careful handling from rinse to storage. The broader lesson is that thoughtful packaging choices and mindful cleaning work hand in hand to preserve freshness and minimize odors across the kitchen. And for those who crave a deeper, science-grounded exploration of deodorizing reusable containers, a helpful external resource provides a thorough, evidence-based discussion of the topic: How To Remove Odors From Reusable Food Containers. This external reference offers additional protocols and clarifications that complement the practical steps outlined here, and it can help readers deepen their understanding of odor chemistry and material interactions. https://www.sustainablekitchenlabs.com/removing-odors-from-reusable-food-containers
In sum, the baking soda approach to deodorizing plastic food containers is more than a quick fix; it is a reliable, science-informed practice that respects the material realities of plastics while promoting safer, greener cleaning habits. By combining a soak, a paste, and a targeted fizz, and by recognizing when a container has outlived its usefulness, readers can maintain a kitchen where storage containers contribute to food safety rather than impede it. The method’s elegance lies in its simplicity and safety, grounded in chemistry that’s accessible to any home cook and scalable for families who store meals, leftovers, and lunches. With this approach, the stubborn smells that once seemed to cling forever to plastic can be tamed, and the everyday act of storing and reheating food becomes a little more predictable, a little less surprising, and a little more aligned with the goal of keeping flavors pure and the kitchen experience pleasant.
Vinegar as Odor Reset: Reclaiming Freshness in Plastic Food Containers
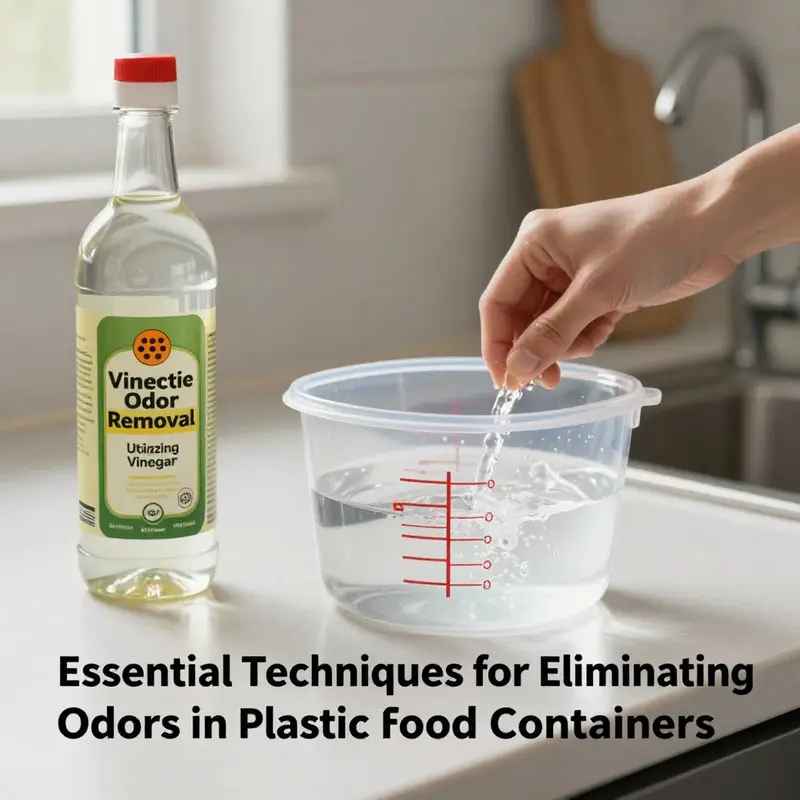
A stubborn odor lingering in a plastic food container can feel more like a memory than a meal, a reminder that today’s leftovers sometimes carry yesterday’s scents with them. When a curry’s spice trace or a fishy note refuses to fade, many home kitchens reach for a simple, natural ally: vinegar. Its active ingredient, acetic acid, is not a fancy chemical from a lab but a pantry staple whose everyday chemistry can tackle the stubborn, lipid-based odor molecules that cling to plastic surfaces. This chapter explores how vinegar works, why it is a reliable method within a broader odor-removal routine, and how to apply it with care so your containers return to their original neutrality rather than bearing a lasting tang. The approach is practical, affordable, and accessible to most households, and it fits into a larger strategy that often includes complementary methods for particularly obstinate odors. As with any cleaning practice that engages with food-contact surfaces, thoughtful steps ensure safety, efficacy, and the longevity of your containers.
Odor molecules that cling to plastic are not simply loose particles floating in air. Many are hydrophobic lipids and other residues from cooking oils, sauces, and fresh foods. These molecules have a tendency to seep into the microtextures and crevices of plastic, especially in containers with slightly textured interiors or worn seals. Vinegar, being acidic, interacts with these residues in a way that helps to break their grip on the plastic matrix. The acid can alter the chemical environment around the odor molecules, reducing their volatility and lowering their perceived strength. In effect, vinegar helps to neutralize odors rather than masking them with a stronger scent. While it is not a miracle cure for every plastic odor, it is highly effective for a wide range of common culprits—greasy residues, fishy notes, garlic, onion, curry, and other strong kitchen odors that tend to linger after meal prep or storage.
The recommended vinegar method is simple, repeatable, and minimal in risk when used correctly. Start by preparing a solution of white vinegar and water in a 1:3 ratio. That is, one part white vinegar to three parts water. This dilution provides enough acidity to act on odor molecules and break down oil films, while remaining gentle on most plastic surfaces. The exact amounts you use can be scaled to the size of the container, but the ratio remains the same. For a standard rectangular or round plastic container, a thorough soak often requires enough liquid to submerge the interior, including the lid if it is a sealable model. If a container is particularly small or shallow, a generous swish of the solution and ensuring the interior is wetted can suffice, but submersion is ideal when possible.
As you prepare to soak, consider the state of the container. If it has visible food residue or grease, begin with a basic wash in warm, soapy water to remove loose particles. This step is important because oils and particulates trapped on the surface can shield odor molecules from contact with the vinegar solution. A soft brush, sponge, or cloth is often enough to dislodge residue from corners, seams, and the gasket area around the lid. Rinsing thoroughly after washing ensures there is no soap film left that could interfere with the vinegar’s action. Once the container is clean and damp, place it in a basin or sink with the vinegar solution, fully submerging the interior and lid when appropriate. If the lid is tight or has a gasket, immersing the lid as well can help ensure a uniform treatment of surfaces that frequently trap odors.
The soak duration is flexible but purposeful. For mild odors, 30 minutes to an hour may be sufficient to refresh the interior. For more persistent smells—from fried fish to strong curry residues or fermented leftovers—the soak can extend to several hours or even overnight. The longer soak allows the acetic acid to work deeper into microtextures and to reach crevices that a quick rinse might miss. After the soak, rinse the container thoroughly with clean water. It is tempting to rely on the vinegar scent as a sign that the odor is gone, but a good rinse helps remove residual acetic acid that could itself be unpleasant or leave a faint tang in some cases. Patience with a thorough rinse is as important as patience with the soak itself. Finally, allow the container to air dry in a well-ventilated area. Drying is not merely about removing water; it also helps dissipate any lingering vinegar notes while ensuring the interior is completely dry to deter mold or bacterial growth in damp corners.
A few practical cautions can help you avoid diminishing returns. First, avoid using strong vinegar solutions on colored plastic containers. The acidity can, over time, contribute to fading or dulling of color on certain plastics. If your container is brightly tinted or dyed, use a milder approach or test on a small, inconspicuous area before committing to a full soak. Second, do not use black vinegar or other vinegars with high additive content for odor removal on plastics. The unique composition of some vinegars, especially those enriched with colorants or caramel colors, can leave residues or alter the appearance of the plastic. The general white vinegar and water mixture tends to be the safest, most versatile choice for most plastic surfaces. Third, consider the container’s age and material. If a container is heavily scratched or has compromised seals, odors can seep deeper than a surface treatment may reach. In such cases, replacement with a glass or stainless steel option becomes a practical alternative that does not absorb odors and remains durable for repeated washings. The idea is not to force plastic to withstand repeated odor battles beyond its design but to choose the best material for the task when repeated odor challenges are likely.
In practice, vinegar’s role in odor management does not stand alone. A typical kitchen odor-removal routine might begin with a quick wash to clear visible residue, followed by a vinegar soak to tackle deeper oils, and then a final rinse and air dry. If the odor remains stubborn after the vinegar treatment, a repeat cycle with a longer soak may help, or a short post-soak rinse with a little baking soda can be used to neutralize any remaining acidity and to deodorize further. The synergy between vinegar and other natural methods can be powerful, but the focus here is on harnessing vinegar’s specific strengths: neutralizing both acidic and greasy odors, affecting lipid residues that cling to plastic surfaces, and doing so in a manner that is safe for everyday home use.
An important nuance is that odors sometimes arise not merely from food remnants but from the pores or micro-scratches in older plastics where odors have been absorbed over time. In such cases, vinegar can still be effective, but it may take longer or require a combination approach. After the vinegar soak, a light rinse and air dry, followed by a brief exposure to fresh air or even a short moment in direct sunlight can further reduce residual odors by aiding the evaporation of volatile compounds. The sunlight step, when used judiciously, can complement the vinegar soak by providing a natural, low-heat mechanism to disrupt microbially produced odors and VOCs. However, this is a supportive step and should be used with caution for plastics that can warp or become brittle under heat. If your container is entirely new and has a solvent-like odor from manufacturing, vinegar soaking can help, but you should monitor color stability and structural integrity as you apply the method, adjusting soak durations accordingly.
A practical note on the broader choices readers often weigh: if a container is deeply stained or consistently returns with an odor despite multiple vinegar cycles, it may be time to consider switching to a material that does not retain odors as readily. Glass and stainless steel are common alternatives for this reason. They do not absorb odors, and they are generally easier to maintain with simple soap and water or mild detergents. For many households, a mixed approach works best: prefer plastics for light, everyday use or for meals on the go, but reserve glass or stainless steel for containers that routinely hold fish, curry, or strongly aromatic foods. This approach aligns with a broader strategy of reducing odor transfer while maintaining practicality and cost efficiency in food storage.
If you are exploring a broader packaging transition, you might be curious about alternatives to plastic containers that still fit a busy lifestyle. One practical option to consider is sturdy, take-away-ready kraft paper bowls with lids for certain applications. These containers minimize the odor-absorption risk and can be a viable substitute for some meals and storage needs. For readers who are curious about such alternatives, a commonly used option in the packaging landscape is the disposable kraft paper bowl for food package with lid. This option represents a different approach to keeping meals fresh and reducing odor retention, particularly when disposables are suitable for the context. You can explore this category here: disposable kraft paper bowl for food package with lid. The link offers a practical sense of how packaging choices influence odor dynamics and how consumer habits shape the materials they select for everyday use.
The vinegar method also leaves room for mindful, small-scale experimentation. If you taste-test a dish after washing, you may notice that a faint vinegar aroma lingers briefly. This is typically temporary and will dissipate as the interior dries and air circulates. If the plan is to reuse the container for highly flavored foods soon after, you might prefer a thorough rinse and a gentle air-dry, followed by a short wipe with a lemon-scented cloth to provide a fresh, citrusy finish without introducing new odors that could complicate future cleanings. Lemon juice, like vinegar, can help dissolve grease films and contribute a natural scent that masks residual odors. However, it is important to rinse after lemon treatment as well, especially when the container will be used for dairy or other odor-sensitive foods.
The vinegar approach fits into a larger story about safe, natural cleaning practices for plastic containers. It emphasizes accessibility, which is a meaningful consideration for households that prefer to avoid harsh chemicals or specialized products. Vinegar is inexpensive, widely available, and generally gentle on most plastic materials when used with appropriate dilution and duration. It also carries the practical advantage of being an all-purpose cleaner in many households, which means you may already have what you need on hand to address odor challenges without a separate shopping trip. Yet it is worth remembering that no single method solves every odor issue for every container. The age and condition of the plastic, the severity of the odor, and the nature of the remaining residues all influence outcomes. When odors persist despite thoughtful application of vinegar, you can rely on a combination of strategies or move toward long-term material changes that align with odor resilience and consumer preferences.
In closing, vinegar stands out as a straightforward, science-grounded approach to odor removal in plastic food containers. It leverages a simple chemical principle: acidity can disrupt the lipid-based molecules that cling to plastic, reducing their volatility and the strength of odors they emit. Used thoughtfully, this method can restore freshness to containers that have served their purpose in busy kitchens and can help extend the life of those containers when you choose to keep using them. The process is flexible, allowing for shorter or longer soaks based on odor intensity, and it respects both safety and practicality with clear cautions about color and age-related limitations. It also invites consideration of alternatives for those who consistently face persistent odors, presenting a broader spectrum of packaging options that balance convenience, sustainability, and odor control. With vinegar as a steady ally, you can approach odor challenges with a calm, methodical routine rather than a sense of defeat, knowing that a pantry staple can play a pivotal role in preserving the usability and longevity of the containers that hold our meals.
External resource for broader context: https://www.healthline.com/health/food-nutrition/how-to-remove-plastic-container-odors#vinegar-method
Sunlight as a Gentle Deodorizer: Renewing Plastic Food Containers with Natural Light
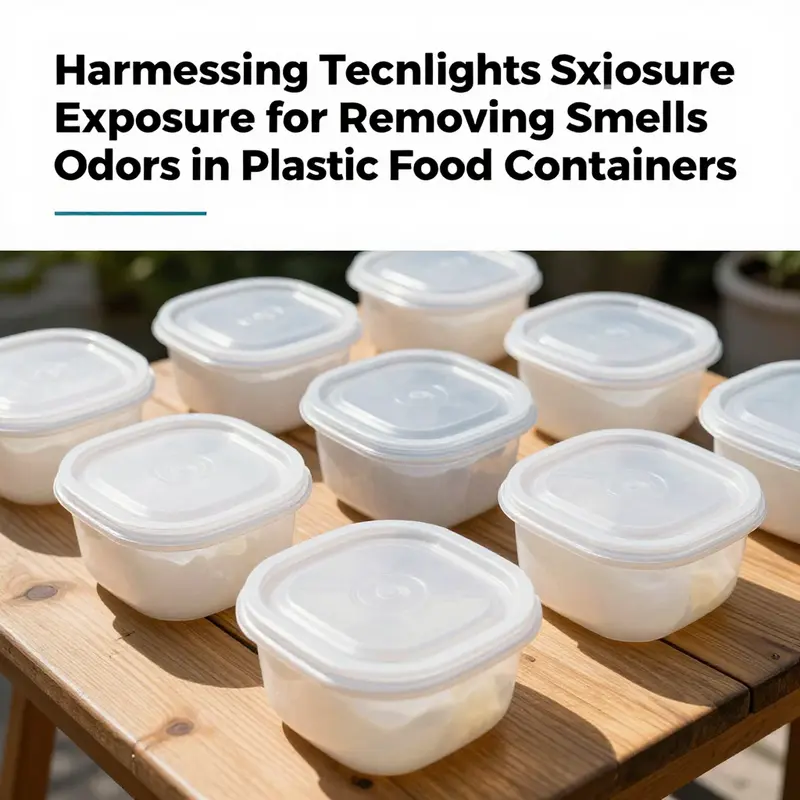
When a lunch box or snack tub carries strong odors, residual scents cling stubbornly. Many quick fixes rely on chemicals or repeated washing. A timeless approach exists: sunlight. Not just warmth, but direct sunlight, especially UV, can help restore a container’s neutral odor. The principle is simple: expose the interior to light and air, and give odor molecules a chance to break apart, evaporate, or migrate away from crevices where they hide. Used judiciously, sun exposure is a practical, low-cost ally in maintaining clean-smelling plastic containers without resorting to aggressive cleaners.
The practical steps: rinse and wash with warm soapy water to remove visible residue. Dry completely. Place the container upside down in a sunny, well-ventilated spot with the lid off to allow air flow. Typical duration is 2-3 hours; if stubborn odors persist, a brief additional exposure in the late afternoon can be considered if the plastic tolerates heat.
The type of plastic matters. Polypropylene (PP) containers are generally more heat-tolerant; PET can warp if exposed too long. Avoid prolonged midday sun that could raise interior temperatures toward 50C.
Sunlight works best when paired with a clean slate. If residues remain, a well-washed interior remains essential. The routine should start with cleaning, drying, then sun exposure. If odors persist after a sun session, you can complement with baking-soda or white-vinegar methods described elsewhere in natural odor-removal guides.
A practical routine: empty and clean before sun exposure; place in a location with gentle air movement; avoid direct gusts; after exposure, allow to cool completely before use. The goal is steady, moderate exposure, not a long bake.
Real-world routine: wash container, place upside down by a sunny window; UV energy helps at the molecular level; heat accelerates drying; after the session, wipe with a dry cloth or air-dry. The cycle is a simple, eco-friendly habit that fits mindful kitchen care.
Boundaries: sunlight is not a universal solvent. Very old containers or those with severe staining may require replacement with safer materials like glass or stainless steel. When used as part of a broader natural approach, sunlight can be a gentle, cost-free deodorizer.
To close: if a container has a stubborn odor, begin with a clean wash and a 2-3 hour sun exposure window. If odors persist, repeat the cycle only if the container tolerates warmth. Monitor for warping or color changes.
Health and safety note: for more information, consult reliable sources and materials guidelines; consider Healthline’s overview on plastic container safety and UV exposure.
Breathing New Life into Plastic: Natural Odor Absorption with Tea Leaves and Coffee Grounds
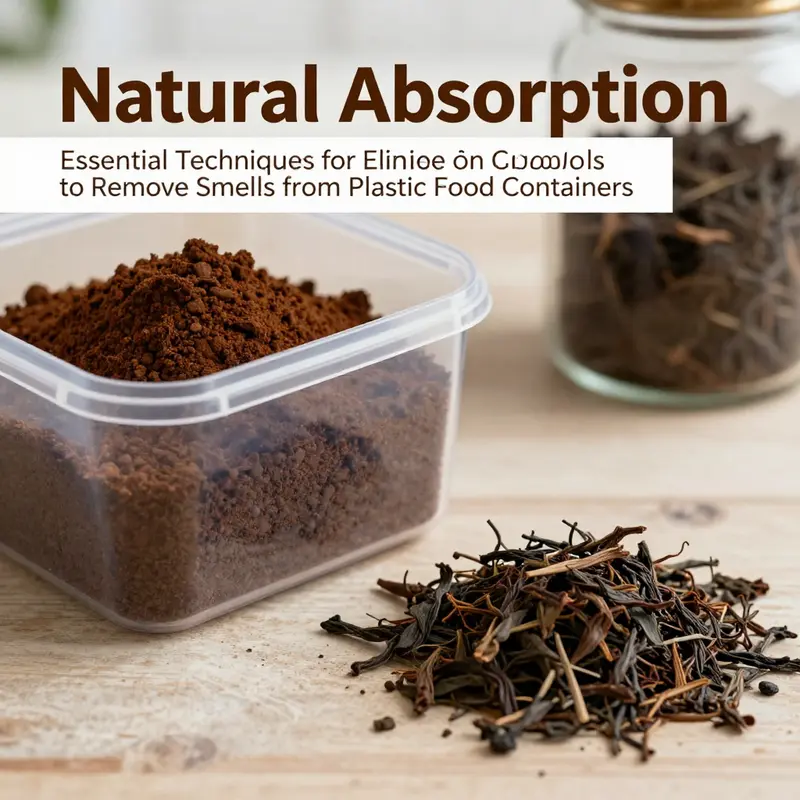
Odors trapped in plastic food containers can feel stubborn, especially when a new batch of containers carries factory or solvent-like scents, or when lingering kitchen aromas cling to the sides after a week of pasta and sauces. In the search for safe, chemical-free ways to restore freshness, many households have turned to natural absorption methods that leverage everyday pantry leftovers. Among these, used tea leaves and coffee grounds stand out for their porous structure and their own aromatic chemistry. The idea is simple: as the container is sealed with the absorbent material inside, the tiny pores and the volatile compounds in tea or coffee compete with the unwanted odor molecules for space and, in the process, draw the unpleasant smells away from the plastic interior. The approach is not a sweeping cure-all, but when used thoughtfully it can soften or erase odors without introducing harsh cleaners or synthetic fragrances. It rests on a straightforward premise and a careful sequence of steps that can be woven into ordinary cleaning routines, making it a practical option for families, students, or anyone who values simple, low-impact solutions.
The materials required are minimal. A clean, dry plastic container is essential, as residual moisture can promote mold rather than adsorption. The absorbent agent is equally uncomplicated: dried, used tea leaves or coffee grounds. The tea or coffee should come from a recent brew and be allowed to cool to a safe temperature before use, with any excess moisture pressed out so that the material sits relatively dry inside the container. Lightly used tea leaves or coffee grounds are preferable to fresh, wet grounds because dryness helps maintain a porous matrix that can attract odor molecules more effectively. It is not necessary to use a large quantity; a small handful usually suffices, provided the container isn’t overflowing and the absorbent material can be sealed inside with the lid closed securely. The lid itself is an important part of the process. A tight seal helps keep the volatile compounds contained, maximizing contact time between the odor molecules and the deodorizing material while preventing the release of any die-hard aromas back into the room.
The procedure unfolds in a natural, almost ritual-like rhythm. Begin by ensuring the container is clean and free of visible food residue. A quick wash with warm, soapy water followed by a thorough rinse sets the stage, removing oils or particles that could compete with the tea or coffee for adsorption sites. Once the container is dry, place a modest amount of the dried tea leaves or coffee grounds inside. The goal is to fill enough space for the absorbent to make contact with the walls where the odor tends to cling, but not so much that there is no airspace left for the adsorption process to occur. Seal the lid tightly and set the container aside in a quiet corner of the kitchen, pantry, or cupboard. The duration of the treatment depends on the magnitude of the odor and the strength of the container’s initial smell. For mild notes or a fresh factory scent, a few hours can be enough, but for stubborn odors, an overnight resting period is more likely to tip the balance in favor of cleanliness. During this time, the tea or coffee’s aromatic compounds work their way into the lining, while also serving as a gentle, natural fragrance that does not overwhelm or mask with synthetic notes.
When the waiting period ends, the next step is straightforward: discard the used absorbent material and rinse the container to remove any residual particles. A final air-dry helps ensure there is no trapped moisture left behind. The result is often a noticeable improvement. The interior no longer smells primarily of plastic or solvent but carries a softened, more neutral scent, sometimes with a faint caramel or roasted note that comes from the absorbent itself. This is a sign that the odor molecules have been captured and displaced, and that the container is ready for a fresh round of storage use.
Why does this work so well in practice? Tea leaves and coffee grounds, while common as beverages, are porous, fibrous matrices that can trap and hold a range of volatile compounds. They bring with them a spectrum of organic compounds—tannins, polyphenols, and various aromatic oils—that readily interact with odor molecules. When placed inside a sealed plastic container, these compounds create a microenvironment where odor particles are more likely to collide with the tea or coffee than to remain adhered to the plastic surface. The result is a reduction in the concentrations of troublesome odors inside the container. Importantly, the process is driven by physical adsorption rather than chemical reaction, meaning it is inherently gentle on plastics and avoids risk of altering the container’s material properties. While the exact mechanism of adsorption is complex and influenced by factors such as porosity, surface energy, and the specific odor profile, the practical outcome is clear: the container becomes less odorous and more inviting for everyday use.
Practically speaking, freshness is a key lever in this method. Freshly brewed tea or coffee carries a dynamic mix of volatiles that may enhance adsorption during the initial pass, but it is the dryness of the material that matters most for lasting results. Fresh, damp grounds can introduce their own moisture and even residual odors if not dried properly, which could undermine the process. Conversely, dried, cooled tea leaves or coffee grounds present a stable, inert matrix that does not contribute new smells while still offering robust adsorption capacity. In this way, a well-timed repurpose of household leftovers can become a cost-effective, eco-friendly deodorizing tool that aligns with broader habits of waste minimization and mindful cleaning.
It is worth noting the places where this method shines most. New plastic containers with manufacturing odors often respond well to a tea- or coffee-based treatment because the interior lining is still relatively pristine and the odors are volatile but not yet deeply entrenched. In contrast, older containers with long-standing, permeating scents may respond more slowly. In such cases, this approach can be paired with other gentle methods mentioned in the broader guide—such as a baking-soda soak or a citrus-based wipe—to maximize results. The overarching message is that natural deodorization, when applied with care and patience, can restore freshness without introducing harsh chemicals or leaving behind heavy fragrance residues. This aligns with a growing preference for simple, safe cleaning strategies that respect both health and the planet.
As with any cleaning routine, there are practical cautions to keep in mind. Odors trapped in plastic are not magically erased with one application; they are reduced. If a container has persistently strong or sour odors, or if it shows signs of mold, cracking, or warping, it may be time to retire that container or switch to a different material, such as glass or stainless steel, which are less likely to absorb smells and are easier to keep pristine over the long term. When using the tea- or coffee-based method, dryness is essential. Do not leave damp absorbent material inside the container for extended periods, as moisture can foster mold rather than adsorption. After the treatment, rinse thoroughly to remove any residual particles, and allow the container to dry completely before storing or using it again. If possible, a brief sun-drying or air-drying phase can help ensure all moisture is gone, further reducing the risk of microbial growth.
The beauty of integrating tea or coffee grounds into a broader odor-control routine lies in its compatibility with a range of containers and kitchen settings. It requires no special equipment, no synthetic additives, and no heavy fragrances that might clash with your food or preferred scents. It is an approach that honors a slower, more deliberate pace of cleaning—one that acknowledges the chemistry of odors while keeping everyday practicality at the forefront. For households that are navigating the tension between convenience and healthy living, this method offers a quiet, low-cost option that complements a wider spectrum of natural cleaning strategies. It also invites a mindset of experimentation: if one round yields modest improvement, a second round with slightly different absorbent material (for example, swapping from tea to coffee grounds, or adjusting the amount used) can yield further gains without ever venturing into aggressive chemical territory.
In the larger arc of keeping plastic containers fresh, the tea- and coffee-based absorption method sits alongside other evidence-based approaches that have stood up to practical testing: thorough soap-and-water cleaning, occasional vinegar rinses, and targeted sunlight exposure for disinfection and deodorization in certain contexts. Taken together, these steps form a balanced clean that respects the plastic’s integrity while preserving the flavors and aromas that come from using your containers for their intended purpose. When combined with mindful storage practices—avoiding prolonged exposure to heat, not overfilling containers, and using containers that suit the contents—this approach helps households maintain a kitchen environment where smells are controlled, not masked. It is a simple reminder that everyday ingredients can play a surprising role in a household’s chemistry of freshness.
For readers who want to deepen their understanding or see how this method fits into a broader odor-removal toolkit, an accessible external resource offers broader context on the science of removing odors from plastic containers. While it delves into a range of techniques, the core idea remains consistent: odor molecules are volatile and can be addressed with safe, natural strategies that align with everyday cleaning routines. By combining the tea- or coffee-based approach with other gentle methods, you can craft a personalized, reliable plan for keeping plastic food containers fresh, functional, and free from lingering smells.
External resource: https://www.moldex3d.com/blog/how-to-remove-odors-from-plastic-containers/
Final thoughts
In the world of food service, maintaining the integrity and freshness of your supplies is vital for customer satisfaction. As we’ve explored, employing natural methods such as baking soda soak, vinegar rinses, sunlight exposure, and tea or coffee grounds offers effective solutions to neutralize odors in plastic food containers. These approaches not only preserve the quality of your food and drinks but also contribute to a more environmentally-friendly cleaning regimen. By integrating these techniques into your standard operating procedures, you can ensure that your containers remain in excellent condition, enhancing your service’s overall quality and your customers’ experience. Keep these methods handy for a fresh start every time!